DIY Textured Art

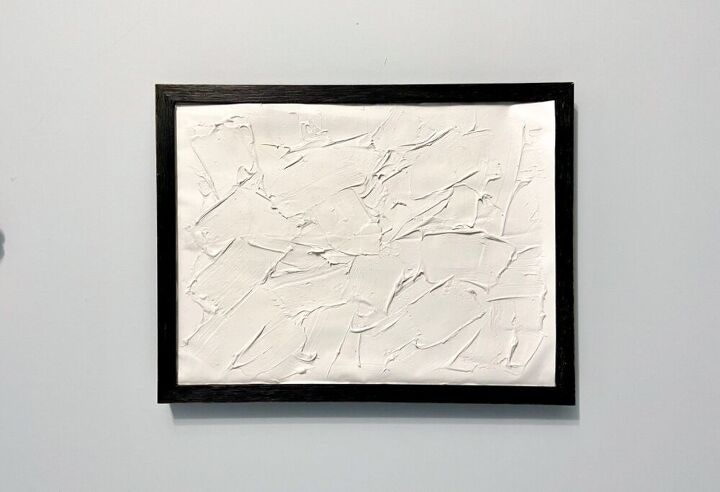
Wall art can be expensive so I've been looking for cheap ways to spice up my walls. I came across this idea to use joint compound to create a textured piece, but all I had on hand was caulk. I figured I'd give it a shot! Behold another $0 wall art piece (my kind of DIY!). Even if you had to buy the material, caulk is very inexpensive and (depending on the size of your art), the project doesn't take very much!
What you'll need:
Canvas (I used an old sign and contact paper)
Caulk or joint compound
Plastic putty knife
Spray paint
Step 1: Prepare your canvas
If you buy a canvas you can skip this step, but since I was using this old sign, first I covered it with contact paper. You can also use an old picture frame, and printer paper, wrapping paper, or whatever else you have on hand.
I wound up with this giant crease down the middle but I didn't mind it because the whole point was for it to be textured!
Step 2: Apply caulk
As I mentioned, I saw this done with joint compound originally, but we didn't have any of that laying around, so I used white caulk and it turned out great!
Step 3: Create texture
Use your putty knife (or plastic knife/spoon/whatever you have), to move around the caulk until it's in a pattern you like.
Repeat steps 2 and 3 until you're happy. I wound up layering the caulk on a few times until the whole canvas was covered.
Step 4: Spray paint
My "white" caulk was a little dingy, so once it was dry, I sprayed it over with white spray paint. I've also seen people use multiple colors to add a little dimension.
Enjoyed the project?
Comments
Join the conversation
-
-
-
 Carmen Maritza DeJesus
on Feb 13, 2023
Inspirational. I will be heading that direction with my wall decors.
-











Frequently asked questions
Have a question about this project?