


Photo Memory Crocheted Afghan

by
Susie Lee
1 Material
I was looking for a special gift to make for my only living Aunt's 89th birthday. In 2015, we lost my Mom, her sister and BFF. They were only a year and a half apart in age. Growing up on a farm with 8 children during the depression, these two were inseparable. In searching, I found a few things to make for her, but the cream of the crop was this memory afghan I found on Pinterest. Unfortunately, it was in another language...(Dutch???) 😏
So...I set out to figure it out myself.
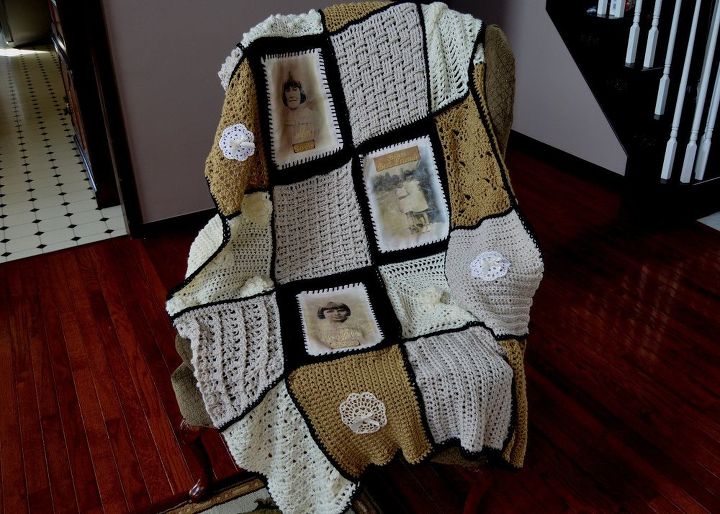
First I had to decide how big I wanted it. I only had about a month before I was to take it to her in Ohio. (I'm in Michigan) and surprise her with it. I decided to pick 17 different squares from an old granny square crochet pattern book I purchased years ago and use three photo images. I love to crochet, but don't do it often, so I had to pick some that I thought was within my range of capability. Truly any stitch would be fine, but I wanted them each unique and textured. I bought 3 skeins of yarn each in ivory, taupe and a golden tan color, and one skein of black for the trim. I paced myself doing 1-2 squares a day.
Next, I researched how to take photos and transfer them onto fabric because after all, without the photos, it's just an afghan, right? This was fairly simple. I watched a couple videos on YouTube and found ModPodge for photo transferring to be the easiest route to go. It only took a portion of a jar of ModPodge, some small pieces of denim fabric (about a quarter yard) and the printed (mirror image) photo on regular copy paper. (Directions for this can be found on the bottle of ModPodge. Takes about 24 hours for the process.)
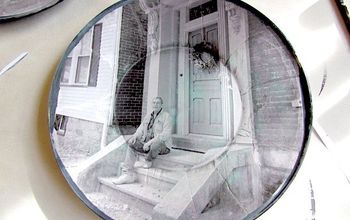
Below is a photo I found from google images. It was what inspired me to check out on You Tube exactly how this process was done. Just Google, How to transfer photos with Mod Podge. It is a fairly simple process. Simply apply a thick, even coat of the modpodge to a "mirror image" (in case there is writing, you don't want it to transfer backwards) laser printed photo. This is simply a regular piece of copy paper. Not an actual photo. Then turn it over onto your selected fabric. (It is recommend to use a light color and not too textured fabric for this process to be successful). I used a light color cotton denim. Using a credit card, gently smooth the photo onto the fabric and let it set for 24 hours. Do not cheat on this step!!! In 24 hours, you may wet a sponge or wash cloth and place it over the paper to begin gently rubbing the paper off. The photo will be adhered to the fabric. It will be messy and take several times to completely get the paper off the fabric. For me it took about 6 times to have no residue left.
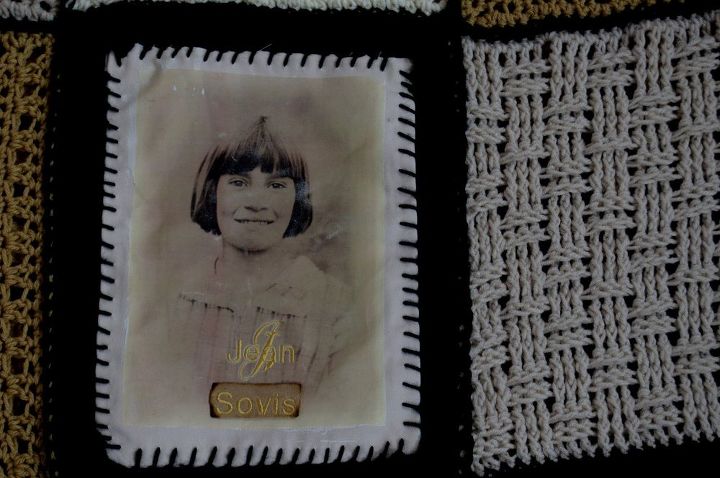
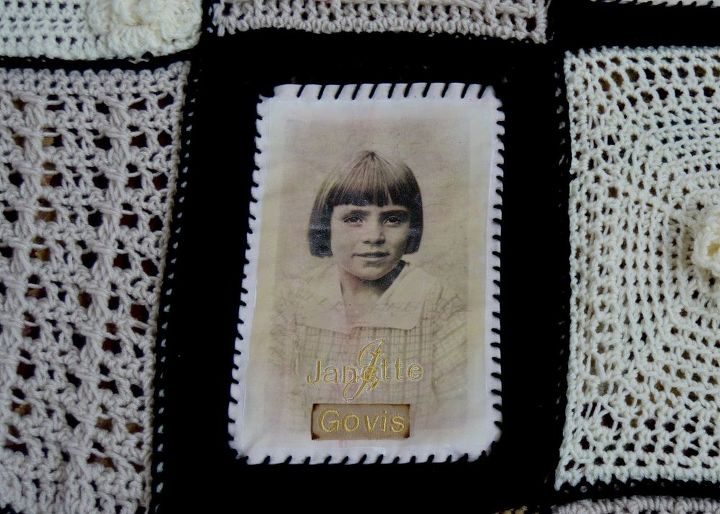
Once that step was done, I decided to personalize the photos by embroidering their names and nicknames with my Brother embroidery machine. I love layering textures and mixed media type projects.
Some background on the people in the photos (my sweet Mom and Aunt):
Their nicknames were names they gave each other when they played house up on the pasture field hill in Cumberland, KY. My Aunt was Govis. My Mom was Sovis and (not seen for obvious reasons) their imaginary maid, Grongis.
So...I set out to figure it out myself.
First I had to decide how big I wanted it. I only had about a month before I was to take it to her in Ohio. (I'm in Michigan) and surprise her with it. I decided to pick 17 different squares from an old granny square crochet pattern book I purchased years ago and use three photo images. I love to crochet, but don't do it often, so I had to pick some that I thought was within my range of capability. Truly any stitch would be fine, but I wanted them each unique and textured. I bought 3 skeins of yarn each in ivory, taupe and a golden tan color, and one skein of black for the trim. I paced myself doing 1-2 squares a day.
Next, I researched how to take photos and transfer them onto fabric because after all, without the photos, it's just an afghan, right? This was fairly simple. I watched a couple videos on YouTube and found ModPodge for photo transferring to be the easiest route to go. It only took a portion of a jar of ModPodge, some small pieces of denim fabric (about a quarter yard) and the printed (mirror image) photo on regular copy paper. (Directions for this can be found on the bottle of ModPodge. Takes about 24 hours for the process.)
Below is a photo I found from google images. It was what inspired me to check out on You Tube exactly how this process was done. Just Google, How to transfer photos with Mod Podge. It is a fairly simple process. Simply apply a thick, even coat of the modpodge to a "mirror image" (in case there is writing, you don't want it to transfer backwards) laser printed photo. This is simply a regular piece of copy paper. Not an actual photo. Then turn it over onto your selected fabric. (It is recommend to use a light color and not too textured fabric for this process to be successful). I used a light color cotton denim. Using a credit card, gently smooth the photo onto the fabric and let it set for 24 hours. Do not cheat on this step!!! In 24 hours, you may wet a sponge or wash cloth and place it over the paper to begin gently rubbing the paper off. The photo will be adhered to the fabric. It will be messy and take several times to completely get the paper off the fabric. For me it took about 6 times to have no residue left.
Once that step was done, I decided to personalize the photos by embroidering their names and nicknames with my Brother embroidery machine. I love layering textures and mixed media type projects.
Some background on the people in the photos (my sweet Mom and Aunt):
Their nicknames were names they gave each other when they played house up on the pasture field hill in Cumberland, KY. My Aunt was Govis. My Mom was Sovis and (not seen for obvious reasons) their imaginary maid, Grongis.

To achieve a uniform look in the photos, I scanned them and changed them all to the sepia color you see in my photos. I also made sure each was approximately the same size before printing.
The fabric was smaller than the actual granny squares ended up being. I ended up crocheting a black boarder around them so I could attach them to the other pieces. The brand of yarn I used was "I Love This Yarn" purchased at Hobby Lobby for $3.99/each. It's soft and easy to work with.
When all the squares were complete and ready to be assembled, I layed them out in front of me on the floor the way I wanted them and began connecting them row by row with a single crochet stitch. Once each row was attached, I crocheted a black single crochet boarder around the entire piece, twice.

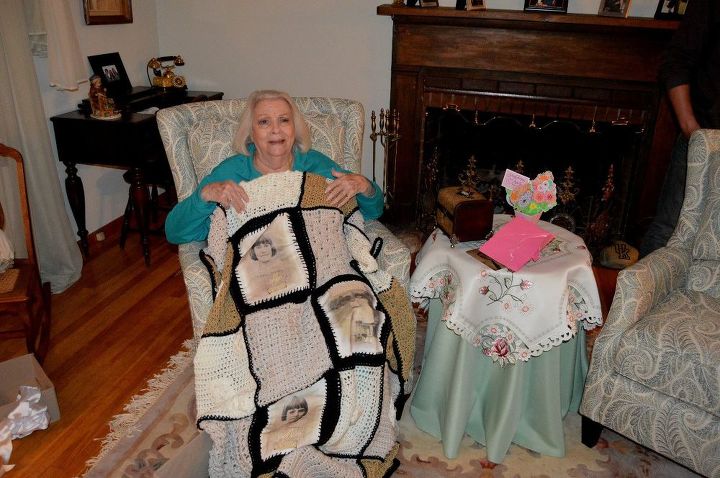
Yes, she cried.

Isn't she precious?
Comments
Join the conversation
2 of 20 comments
-
What a great idea! I like it! I actually made a similar memory afghan using prints I ordered from prestige portraits. Their color accuracy and sizing options made it easy to pick shots that worked well as squares. I printed them, transferred them to fabric-transfer paper, and crocheted a neutral border around each to help the images pop. A couple of tips: choose high‑contrast photos with simple backgrounds, plan your square dimensions up front so nothing gets stretched, and use a washable, soft yarn for the join so the blanket holds up. This would make a beautiful, heartfelt gift. Hopefully, my experience will be useful for someone else.
-
Looks do lovely! Great personalized gift!


Frequently asked questions
Have a question about this project?