Make a Serving Tray From a Photo Frame

Julien K., Hometalk Team
by Julien K., Hometalk Team
7 Materials
$10
45 Minutes
Easy
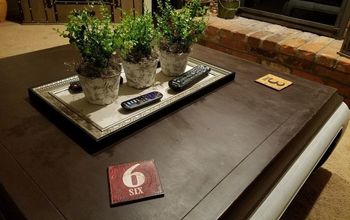
Repurposing items is one of my favorite things to do, along with entertaining. I'm always looking for serving trays that are nice enough to stay out on my coffee table even after all of the guests have left. With this project, you can customize it exactly how you want and save money at the same time, by using an inexpensive photo frame for the base.


SUPPLIES:


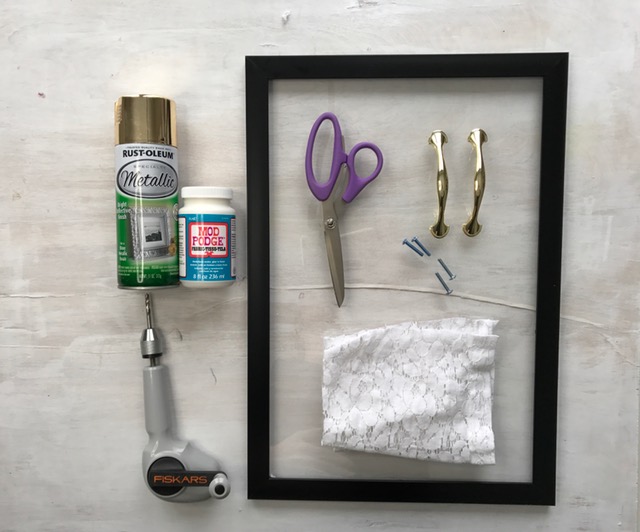
- Photo Frame 12" x 18" (Mine is Plastic, including the insert)


- Rust-Oleum Spray Paint 'Metallic Gold'


- Lace (I used an old lace shirt)


- Cabinet Handles x 2


- Fabric Mod Podge


- Drill


- Scissors


I used a large frame so that I would have plenty of space for carrying snacks an d coffee!


Step 1: Spray Paint your photo frame.


If your glass or plastic insert is not removable (like mine), be sure to cover this area with a piece of cardboard or painters tape. In a well-ventilated area, spray paint the front and back of your photo frame.


Step 2: Cover the Plastic or Glass insert with Mod Podge Fabric paste.


Step 3: Cut your fabric to the size of the photo frame insert.


If you are using an old shirt like me, Be sure to remove any hems, trims, buttons or pocket areas.


Step 4: Carefully place your fabric on top of the mod podge covered insert. Be sure to smooth out any wrinkles or bubbles in the fabric.


If you are using strips of fabric like I did, be sure to line up the edges as closely as possible (without overlapping), to ensure you can't tell two separate pieces were used.


Step 5: Remove any excess lace from the edges of the photo frame.


Step 6: Apply your Fabric Mod Podge paste to overtop of the lace fabric to seal it onto the photo frame insert. Follow product instructions and let dry until clear (approximately 2 hours).


Step 7: Measure & mark the area where you'd like to install your handles on the photo frame.


Step 8: Drill two holes where you placed your markings, for the handles to be installed.


Step 9: Fasten your cabinet handles to either side of the photo frame.


Admire your custom serving tray and fill it with yummy goodies for yourself or guests to enjoy!


Resources for this project:
See all materials
Any price and availability information displayed on [relevant Amazon Site(s), as applicable] at the time of purchase will apply to the purchase of this product.
Hometalk may collect a small share of sales from the links on this page.More info
Frequently asked questions
Have a question about this project?
3 of 10 questions
  • Gail Bucci Gail Bucci on Oct 23, 2017

    Once the lace is mod lodged and dry, you put the glass over it before inserting into the frame, correct??

  • Angel Moore Angel Moore on Dec 28, 2018

    When do you put the glass back into the frame ? how does the glass stay in the frame ?

  • Wif34464182 Wif34464182 on Jan 10, 2019

    Maybe it's it would just be a cosmetic 💄💅or like a Nail polish tray??

Comments
Join the conversation
2 of 69 comments
  • Wendy D'Agostino Wendy D'Agostino on Feb 05, 2019

    Many years ago (approx. 40 years) I saw something like this in a magazine using a picture frame. We made it for my parents who have since passed away and still use it in our home. It was a little different. First you picked the type of frame and size, cut a piece of plywood to fit the entire underside of the frame. It also used 4 wood door knobs for feet. First we painted all the pieces a warm bright red, several coats. Then we glued different wine labels that were interesting looking to surface and then covered with a number of coats of polyurethane (you could also decoupage it). We also put a coat over all the pieces for extra protection (40 years later it was definitely worth it only thing i would do differently is put something on the bottom that did not stain). After it was completely dry we used plain old black electrical tape around the edge of the frame so it created a black border around the edge that was visible after the frame was attached. Next we attached the picture frame with glue and tiny tacks to the top and then glued the painted wooden knobs to the bottom 4 corners. You could use decorative knobs as long as the tops are flat (the top will become the bottom when attached). My parents used it as part of their bar as it was both decorative and functional. I have it on my glass coffee table as a decorative/display/usable tray. I will attach a picture, it still looks good even after 40 years plus it holds memories of my parents.
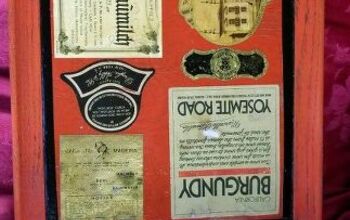
    comment photo
    comment photo
  • Beryl Beryl on Aug 07, 2021

    I'm going to make some I like it I was looking for something like this to have it will be great to have. Thank you for the project I like it

Next