


Porch Bunny DIY: Adorable Easter Bunnies From Fence Boards

A step-by-step guide to making your own festive bunny decor for Easter!
When you think of Easter, bunnies are one of the first things that come to mind!
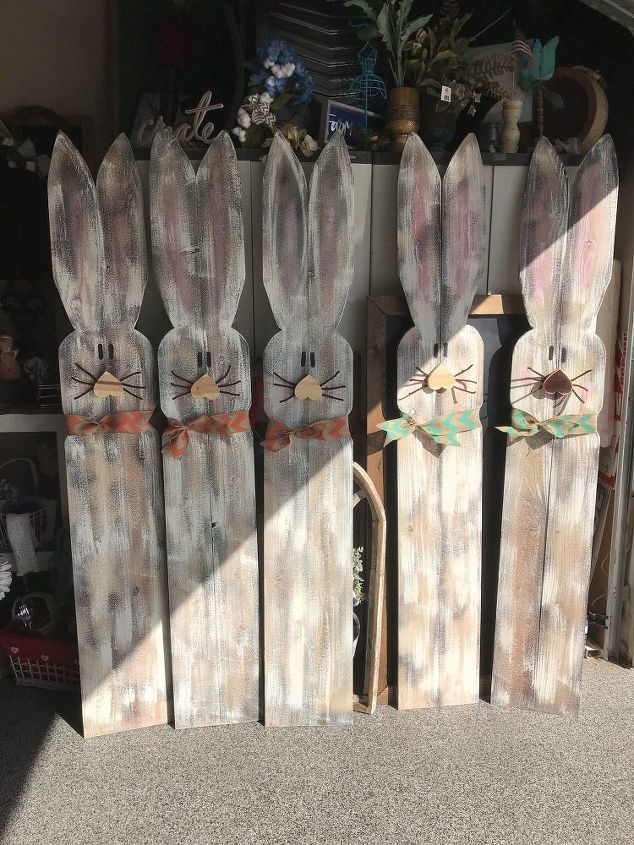
If you’re looking for a fun and easy DIY project to add some festive charm to your front porch, look no further. I made these Porch Bunny's from wood fence boards and they add the perfect touch to your outdoor holiday decor.
Not only is this project budget-friendly—costing around $10—but it’s also simple enough to complete in just a couple of hours.
Ready to get started? Let’s hop to it!
Tools and Materials:
- 2 fence boards
- A round bucket (for shaping the face)
- A jigsaw
- Sandpaper
- A nail gun
- Paint (brown, white, pink)
- Ribbon (for the neck)
- Pipe cleaners (for whiskers)
- Clamps
- Cross bars (for the back)
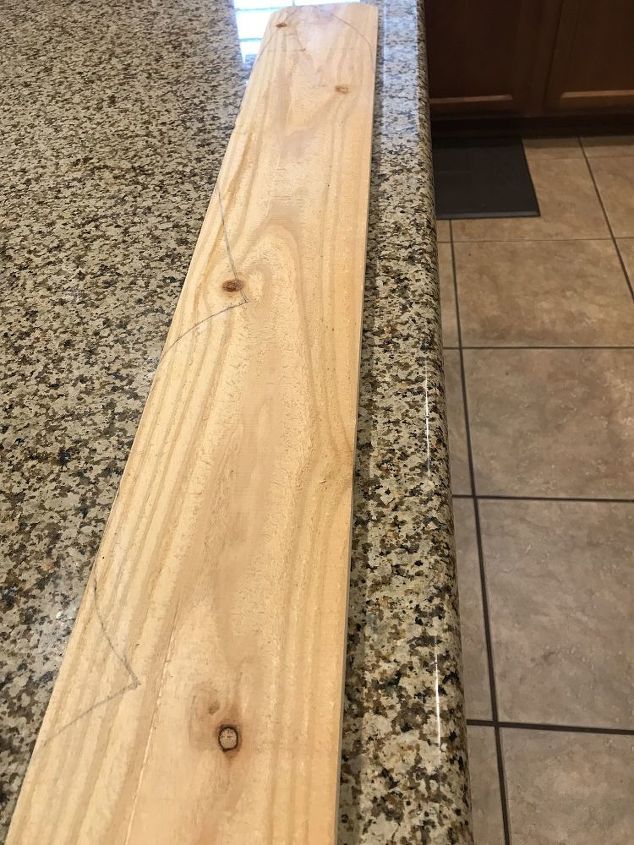
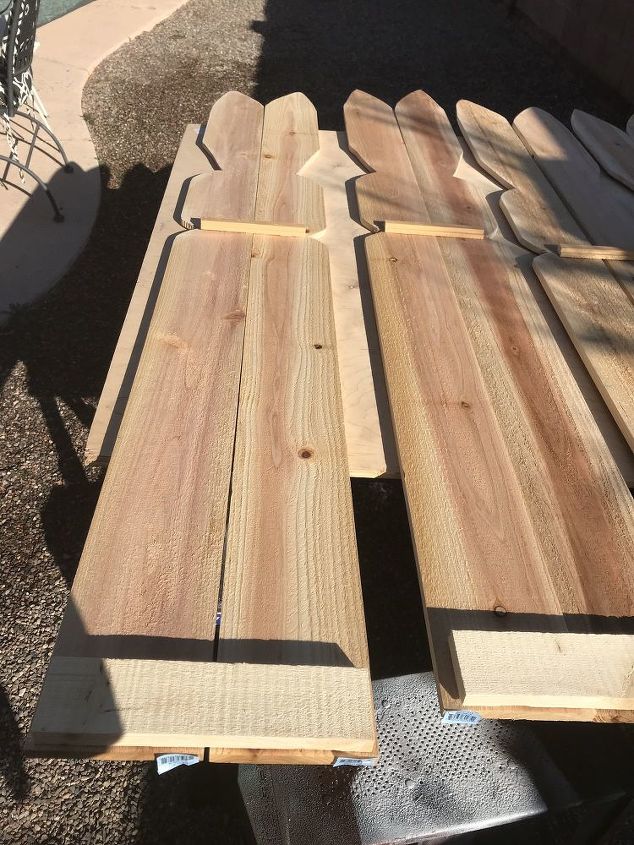
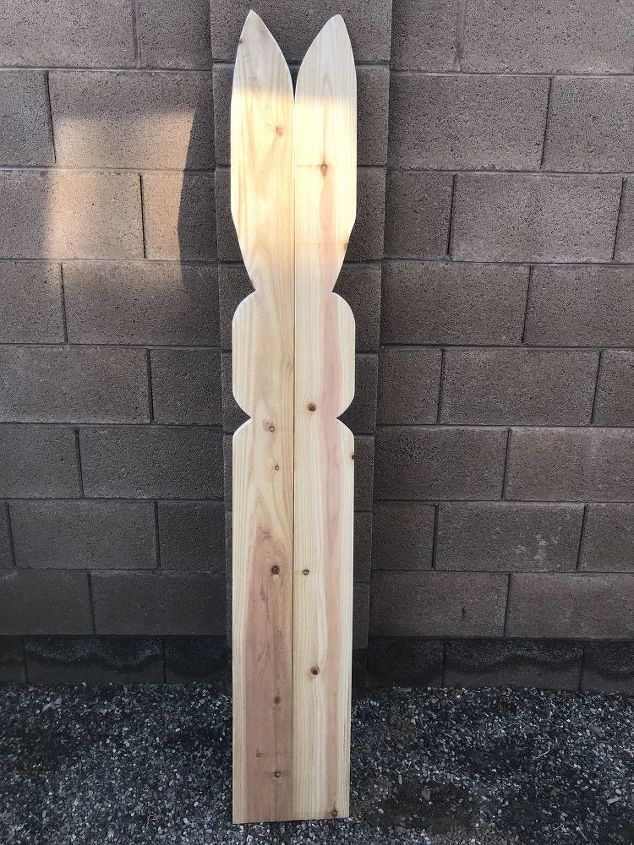
1. Draw the Bunny Shape
Start by drawing half of the bunny shape on one of your fence boards.
Use a round bucket to create a perfect semi-circle for the face.
Draw the ears at the top of the board.

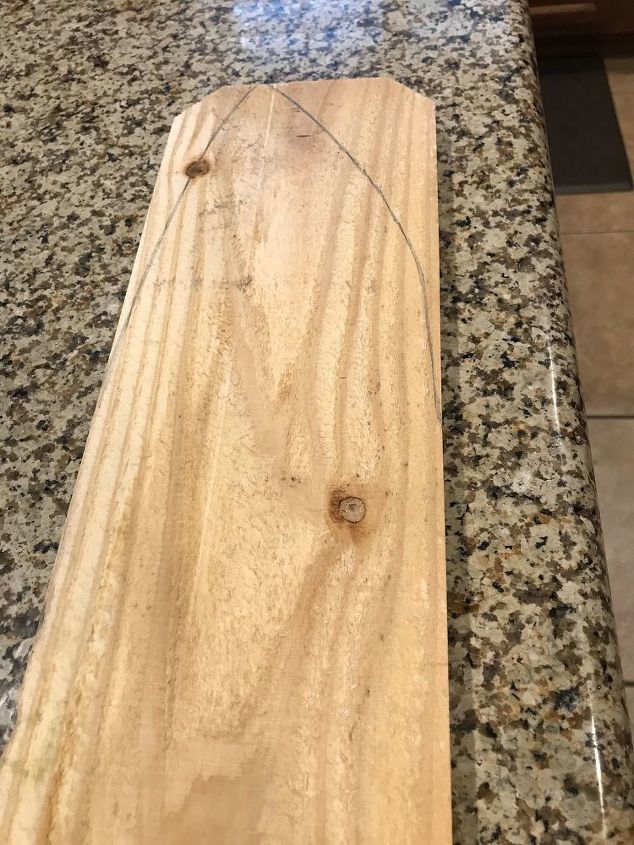
2. Trace and Cut Out the Shape
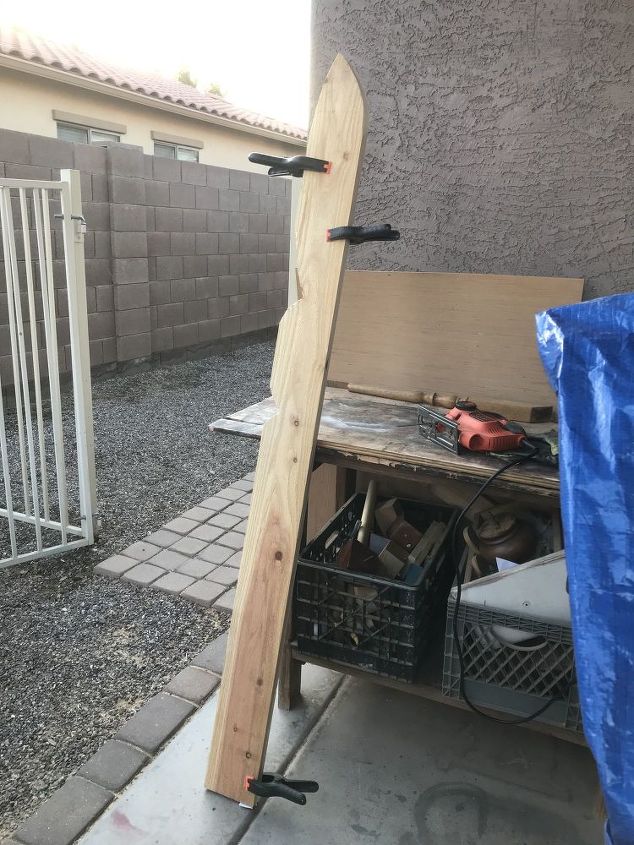
Once you’ve drawn your bunny shape, lay the board with the design over a second fence board and clamp them together.
Using a jigsaw, cut along the lines you drew. Cutting both boards at once will save time!
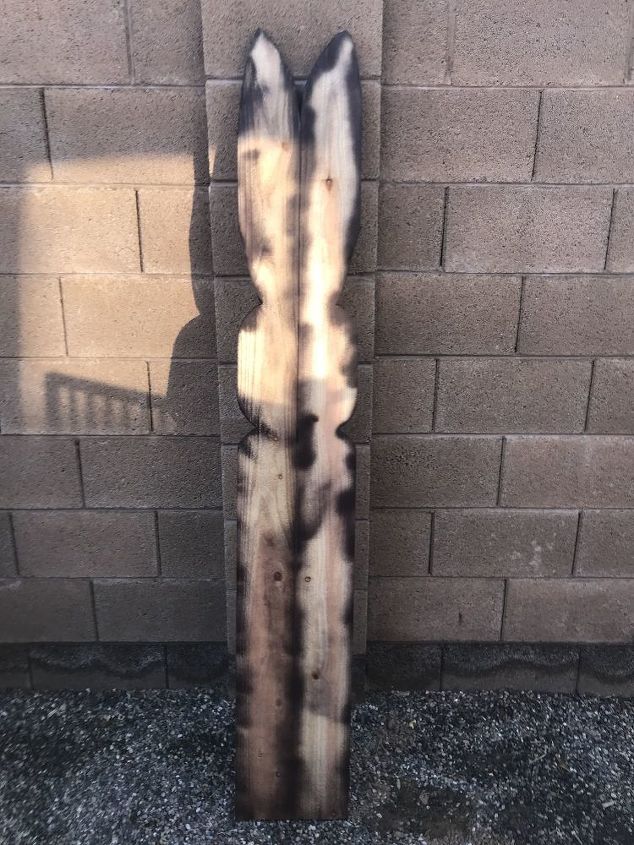
3. Sand the Edges
After cutting out the bunny shapes, leave the boards clamped together and sand the edges.
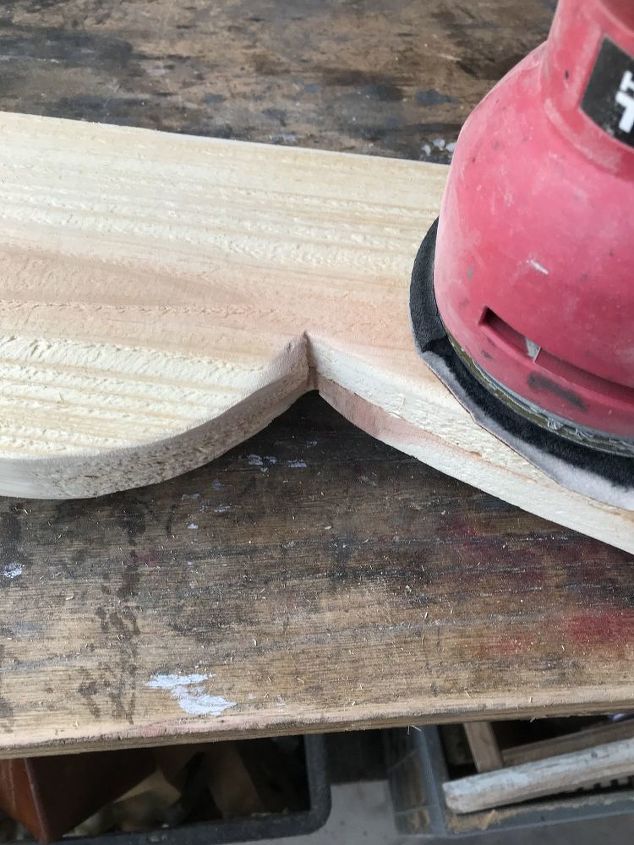
Smooth out the lines and remove any rough spots.

Once that’s done, carefully take them apart and sand the edges of both sides.
An when laid next to each other, you have a bunny!
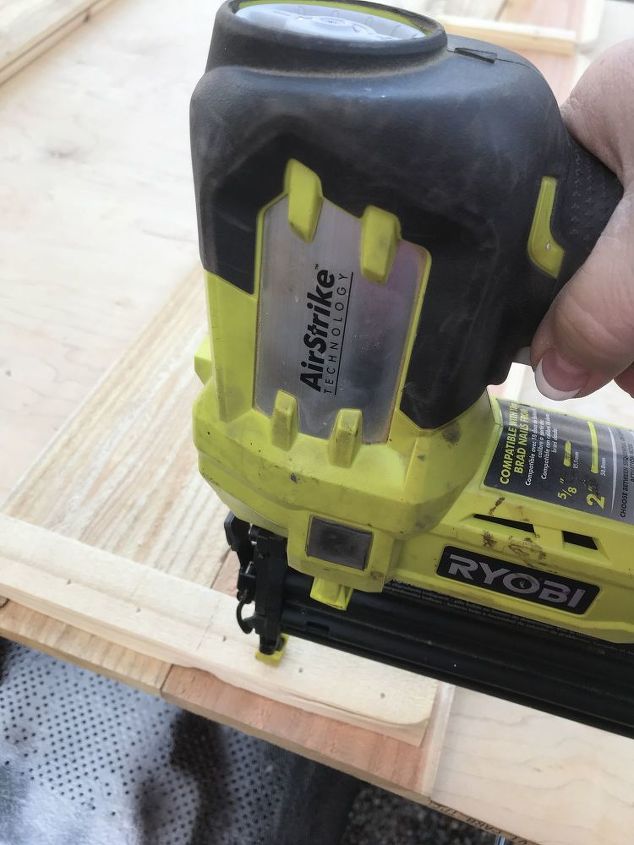
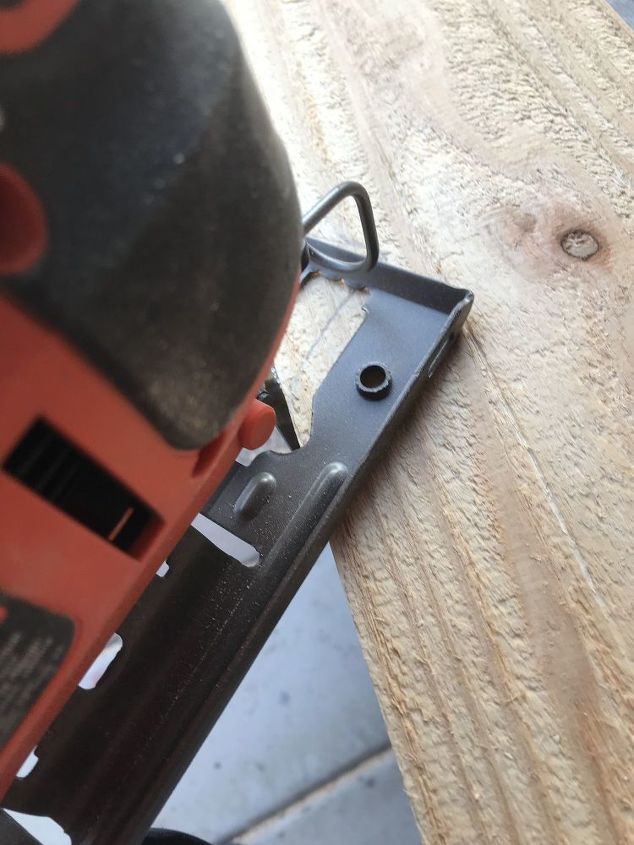
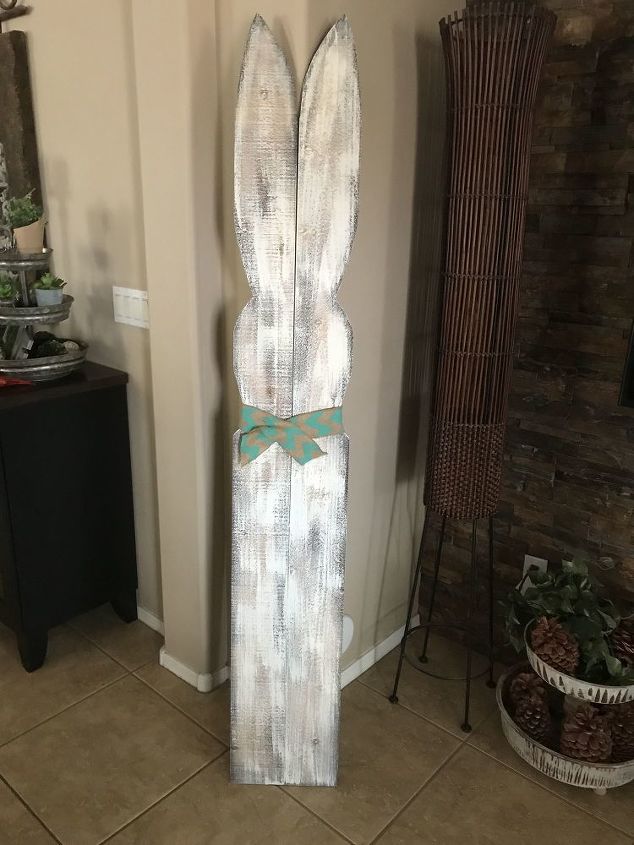
4. Assemble the Bunny
Now that your bunny shapes are cut and smoothed, it’s time to assemble the pieces.
Attach three cross bars to the back of the bunnies using a nail gun: one at the bottom, one at the neck, and one near the ears.
5. Paint the Bunny
Begin painting your bunny by randomly applying a dark brown paint to give it a worn, rustic look.
Once that’s dry, use a dry brushing technique to apply a white coat over the entire surface for a weathered effect.
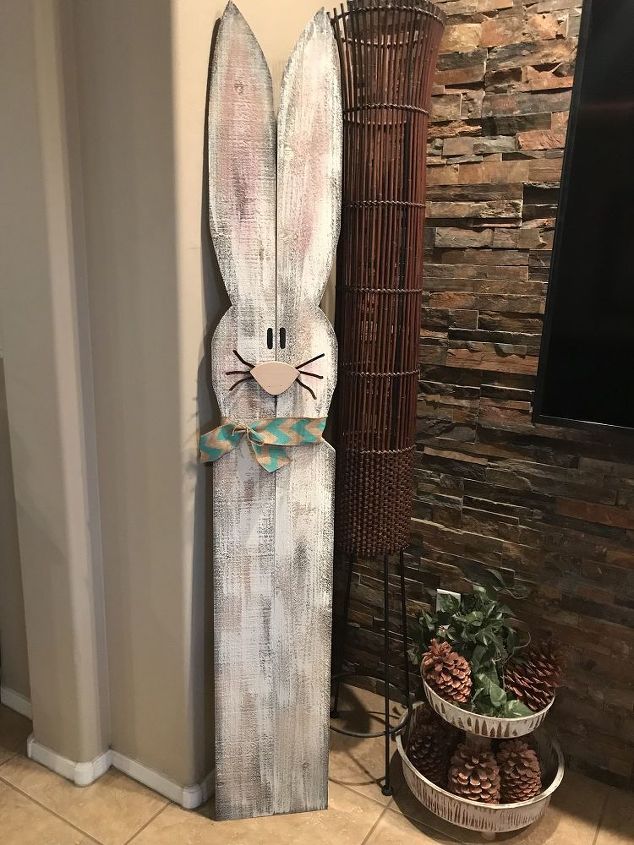
6. Add Details
Now, it’s time to add personality to your Porch Bunny!
Use pink paint to add color to the ears and cheeks, and paint eyes and a nose.
For a fun touch, staple pipe cleaners to the back of the nose to create whiskers.
Finish with a ribbon tied around the neck for extra charm.
More Outdoor Easter Decor
How to Make a Porch Bunny from Wooden Fence Boards
With just a few materials and simple steps, you’ve crafted an adorable bunny that will be the highlight of your spring and Easter decor.
This easy-to-make craft is the perfect addition to your outdoor decor, bringing both character and a touch of rustic elegance to your porch.
Don’t forget to check out my No Sew Stuffed Bunny project for another cute, no-fuss craft idea for Easter!
Happy crafting, and may your Easter be filled with joy and creativity!
Resources for this project:
See all materials


Comments
Join the conversation
-
I need to find some fence boards! Cute!
-
I made one but I used one fence picket which made it a short bunny I am also going to make a tall one too. It is so cute!


Frequently asked questions
Have a question about this project?
I have never heard of “dry brushing”
How do u do that? Darling idea and so easy. Thanks, Doris Turner
How did you make the nose and what material did you use for it??
What type of paint did you utilize on this project? Was it paint say house paint or paint from a craft store?