DIY Self- Watering Planter

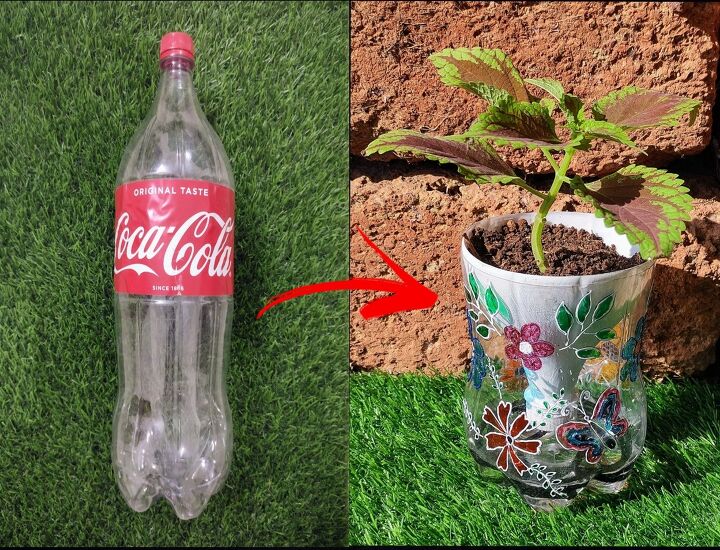
Upcycling plastic reduces the amount of waste that gets to the landfills. Using this waste plastic into something creative, not only helps the environment to reduce it's waste, but also helps us to be a little more creative in using our ideas to beautify our garden.The self-watering planters allow you to deep water the container without any issues of root rot. Water flows to the bottom reservoir which stimulates roots to grow deep to find the moisture supply.
Step 1: Rinse and clean the bottle, and let it dry.
Step 2: Remove the label and cut the bottle into 3 sections.
Cut the bottle as shown.
We will require the top and bottom part of the bottle. Using sharp object make a hole on the bottle cap.
Step 3: Paint the top part of the bottle using Matt Chalk Paint. And on the bottom part of the bottle make design using marker.
Step 4: Once the design is done do the outline and fill in the glass paints.
It will look something like this once it's done.
Step 5: Rope is to be passed through the bottle cap hole which was made, Make sure that the rope is a good absorbent.
Pass the rope as shown.
And make sure to tie a knot.
Once done place a plant in the top part of the bottle and add water in the bottom part of the bottle. And Self-Watering Planter is ready.










Frequently asked questions
Have a question about this project?
is that a 1-liter bottle?
Is it a 1-liter bottle or not?! Please
I'm thinking the water wicks up the cord to the soil and plant above it. I hope this is correct. How do you prevent the soil from falling out the bottom hole where the bottle cap had been? Do you lift the top plant part out to refill the bottom reservoir each time it goes dry?