How to Get Perfect Crisp Lines With Painter's Tape: 5 Top Tips
If you've ever struggled with getting those clean and crisp lines when taping walls for painting projects, I've got you covered. In this tutorial, I'll walk you through my process of creating flawless tape lines every time. Let's dive in with these great paint tape tips.
And my first tip: stay patient and keep your pets away from the project during this process!
Tools and materials
- Painter's tape or masking tape
- Base color paint
- Second color paint
- Paint brushes or rollers
How to get perfect crisp lines with painter's tape
1. Prep with tape
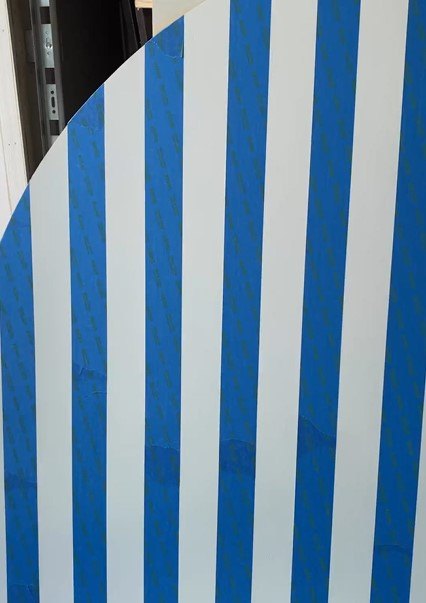
To start, I'm going to grab my trusty painter's tape and carefully tape off the area where I want those clean lines. Make sure the tape is firmly pressed down along the edges to prevent any paint bleed.
2. Apply the base color
Next, I'll take the same color that I used as the base coat and apply it over the tape. This might sound counterintuitive, but it's a crucial step for achieving sharp lines. I'll focus on the edges of the tape, ensuring they're nicely covered with the base color. This creates a barrier that helps seal the tape and prevents the next color from seeping underneath.
3. Add the second color
Once the base color is dry on the tape, I'll move on to my second color. This is where the magic happens! I'll apply the second color over the base color, making sure to cover the entire area within the taped-off section.
4. Dry thoroughly
Here's a critical tip: make sure that the second color is completely dry before moving on. You don't want the colors to mix or smudge when you remove the tape.
5. Remove the tape
Once the second color is dry (trust me, patience is key here), it's time to reveal those crisp lines. Slowly and gently peel off the tape at a slight angle. Taking your time during this step ensures that you won't accidentally disturb the paint and ruin your hard work.
Paint tape tips
Achieving flawless tape lines is all about patience and the right process. By taping, layering, and letting each color dry before removing the tape, you can consistently create stunning results.
Remember, practice makes perfect, so keep experimenting and refining your technique when you are learning how to tape for painting. Were you able to remove the painter's tape without removing the paint? Let me know how you did in the comments!
Follow @flippedbyfaith_ on Instagram for more DIY ideas.














Frequently asked questions
Have a question about this project?