DIY Faux Brick

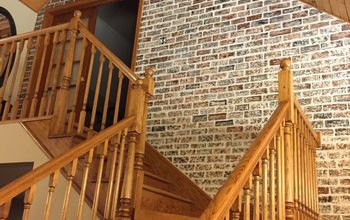
I have always loved the look of exposed brick in homes! Our home, unfortunately, didn’t have any, so I decided to find a way to add it myself. I am in love with the character that it has added to our home. Check out my tutorial so that you can do it yourself!
Tools and Materials
- painter's tape
- joint compound
- gloves
- paint
- Minwax polycrylic
You’ll want to start off by taping off where you’d like your brick to end. (I planned to add white shiplap to both sides of the brick, so I chose to have mine 11”) side note, if you’re doing a whole wall or somewhere that already has clean edges you won’t need this step
For your next step you’ll want to tape off your brick ‘mortar’ lines using your 1/2” masking tape. My bricks measure 7”x3”.
Smear joint compound over the wall and tape. Keep in mind that the more texture you leave on the joint compound the more realistic your brick will look.
THIS STEP IS MESSY! So get those gloves on! You will now pull all of your tape from the wall while the joint compound is still wet. You can see the result in the photo above, though it is a tad hard to see because of colors.
Let that dry OVER NIGHT.
Next you’ll paint each brick individually. I used burnt umber, driftwood, and oyster beige. I used a mixture of the three on each brick to give them a more realistic look.
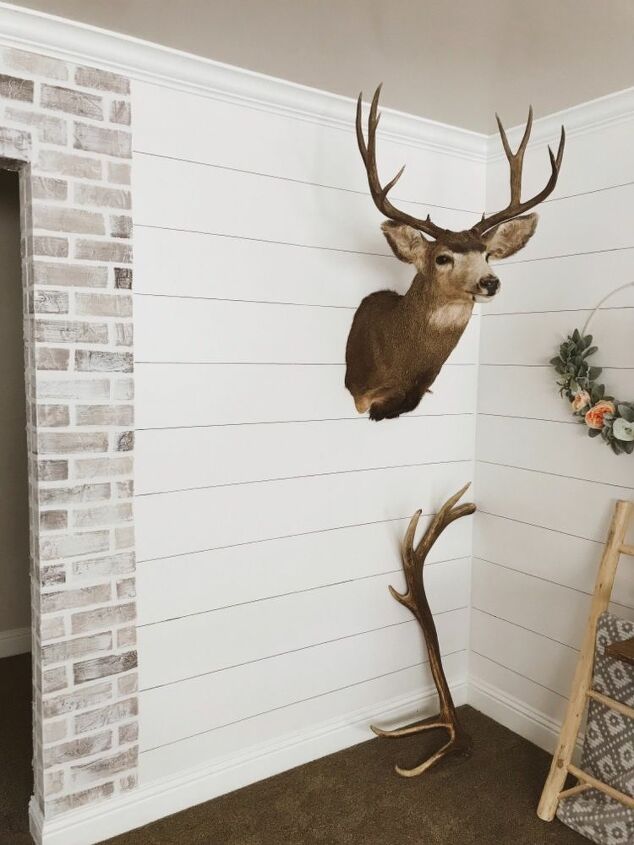
Here is a photo of the painted brick. Notice how each brick has color depth from using all three colors.
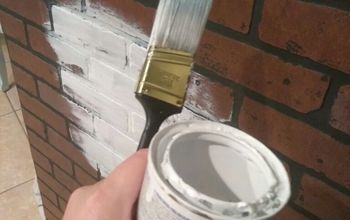
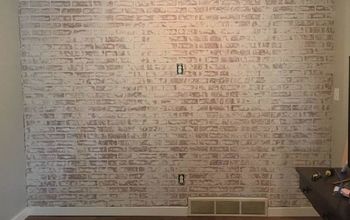
Your final step is to paint your mortar lines and white wash your brick. Using Rustoleum chalked paint in ‘linen white’, I first start by painting the mortar and when there is minimal paint left on the brush, I use what is left to lightly brush it over the brick to create the white wash look. Repeat this step until you’ve finished all bricks.
This step is optional, but I like to seal my brick with Minwax polycrylic in matte finish to ensure durability.
My 2 year old loves the brick.. so it needs a little extra help to stay pretty 😉










Frequently asked questions
Have a question about this project?
Looks amazing!!
I was wondering if you could use a roller to apply paint to the "bricks" when covering a larger area by taking three colors of acrylic paint but barely swirling or pouring them together into a paint pan? If trying this I would use a roller with very thin napp or a sponge roller to keep the colors from getting on the "mortar" and applying with very little pressure on the roller.
Next, paint over the "mortar" just like you did. With a new roller, then apply the whitewash and then the matte finish to the "brick." What does everyone think about this method for a larger area? TIA for any input!
I was thinking, paint wall with morter color, tint joint compound with lightest paint color, and then tape ..... Then all you would have to do is add your accent colors, and seal.
Love the colors, shiplap and decorations, beautiful job!
Any thoughts?
Looks beautiful ,maybe I’m missing something but how did you draw the bricks on the wall to start ? I’d love to try this .