BBQ Deck : Privacy & Heat Proof
![[re]FɄB19](https://cdn-fastly.hometalk.com/media/profile/2019/05/21/40771987_6.jpg?size=91x91)
Hi there!
For Mother's Day, I bought myself a new BBQ. Compare to the one we had before, it is huge! I was already planning some changes for my patio, and this new baby pushed me to start right away!
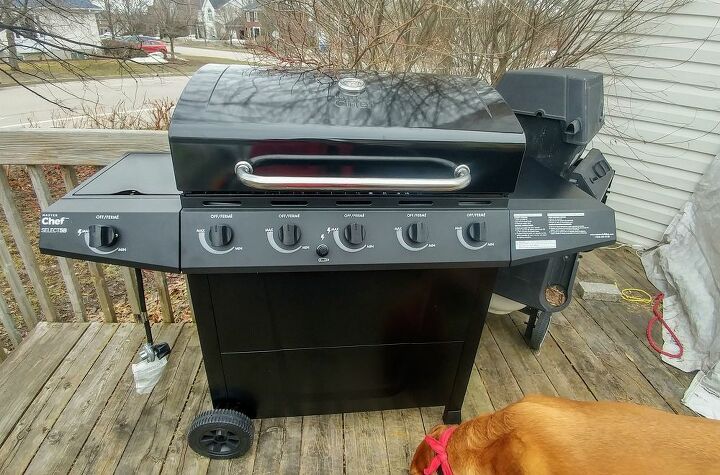
As you can see on this picture, my deck really needs love! I didn't take a "before picture" but I took this one to show our new BBQ to hubby. You can see the railing behind. Our house was built in 1991 so our deck is almost 30 years!
I plan to paint the floor this summer but it is still too cold now.
I started by building the wall structure.
As you can see in this picture, I have several shrubs that are growing nearby and, when we BBQ, the leaves and branches burn. This is something that bothers me and that I wanted to fix with this new construction with galvanized steel.
On the horizontal 2x3, I screwed 1x6 boards on the lower part of the wall : 3 feet tall. To make a nicer finish, I added a 1x6 board that I screwed on the 2x3, giving a shelving effect. I did the same on the the top.
This was the tricky part of the job but I am so happy with the result, I even texted my husband to tell him : your wife is freaking hot!!
I needed a way to hold the steel sheet inside the 2x3. But the thing is : the sheet had some texture. Every 12 inches there was a bump of about 7/8" wide. I marked the ultimate center on each vertical pieces and, using a 1" wide bit, I drilled a hole that would contain the bump. Then, with my table saw, I made a groove, just the width of the blade, at the center of all pieces : horizontal & vertical.
Once the steel was framed, I installed it in the wall. And here it is : the final result. I love it!!
Outside view. Yeah, I know, I'll be working on the lower section ASAP!!
Time for a good BBQ!
I am really pleased with the look. My shrubs won't burn, my neighbors can not see me, and I can not see them anymore, but what's more, I love this urban, industrial, yet rustic look. This is what I call a win-win-win !!
To see how I made the cute leather stool, see link below.
Enjoyed the project?
Resources for this project:
See all materialsComments
Join the conversation
-
 Kimberley's Joy
on Jul 25, 2020
You're a bad azz! I hope to be proficient with power tools some day.
-
-
 Linda Wells
on Sep 08, 2021
Love your fence and sense of humor.
-













Frequently asked questions
Have a question about this project?
Looks fabulous! Did you screw the fence into the house? The reason I ask, is I have a similar fence (not nearly as nice as yours!) running behind my BBQ that had been screwed to the house. And it was pulling the vinyl siding right off the house! I spent a big chunk of yesterday detaching the fence from the house to fix the siding. So now that 8 foot fence is basically free-standing there, only attached to a shorter fence on the other side. I'm wondering how to secure it to the deck - not the house! It looks like you have those post-support feet/bracket thing-ys on the bottom of yours? The base of the posts are not even visible on mine as they've done the standard two layer fence boards on it. Thinking I should just rip it down and do something like you did!
I love it. I just built a small deck for my husband two Valentines ago. I wanted to build something like this but was running out of time before he returned from his deployment. I considered doing something like this using those big concrete blocks for the posts but am worried even if attached to the other corners or sides if it would tip over. I am sorry I may have missed if you put more details in construction. How tall did you build yours? I could anchor to deck just like you but my deck is only sitting on top of concrete stones and not secured to the ground. I was wondering if you or anyone else may help with my dilemna. I am reaching out because it takes me months to years to do somethings because of overthinking, replanning, or scared to waste materials. Luckily so far I only have a large collection of screws and anchors. Thank you