How to Make a Hanging Chicken Wire Fruit Basket

I have had my produce in a bowl on my counter for ages, but I could really use the counter space for other things.
That's why I decided to make a hanging chicken wire fruit basket!
This is a cheap and easy fix considering it's made from chicken wire!
All you have to do is cut and bend the wire in the shape of your choice, and hang it where you please!
Hometalk Recommends!
Tools and Materials:
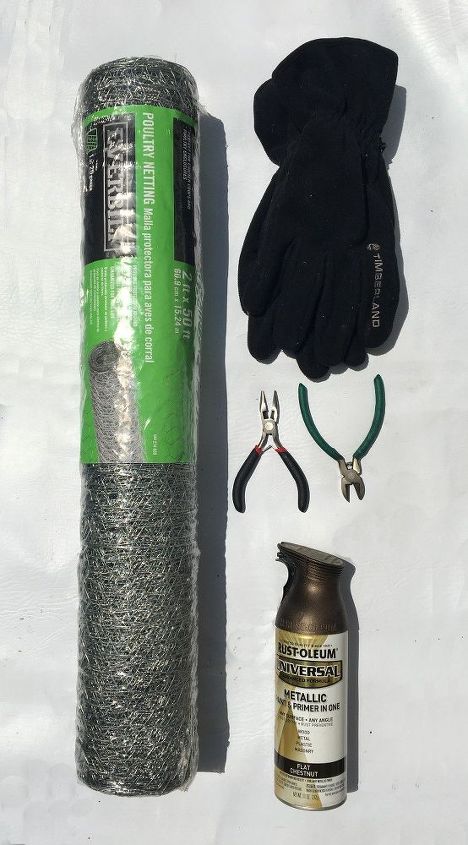
- Chicken Wire (I used 20 gauge)
- Wire Snips
- Pliers
- Gloves (I know I'm not wearing them in the pics, but it is smart to do so)
- Spray Paint in the color of your choice (optional)
Hometalk may receive a small affiliate commission from purchases made via Amazon links in this article but at no cost to you.
1. Shaping Your Wire Cylinder
Unravel your chicken wire and lay it flat to get started.
Roll it into a cylinder, making sure it’s the size you want for your produce sphere’s circumference. I went with about 20 inches, but feel free to adjust based on your project.
Don’t forget to add an extra inch or two to give yourself some wiggle room.
Once you’ve got your desired size, grab your wire cutters and trim the wire at the point where your cylinder ends.
2. Rolling and Twisting Your Wire Cylinder
Now it’s time to roll your wire back into a cylinder shape, making sure to overlap the edges by about an inch.
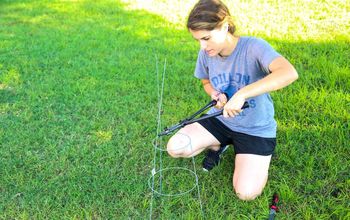
Grab your pliers and start twisting the free wire ends around each other where the overlap occurs, beginning in the middle.
Leave about 6 inches of untwisted wire on both ends—trust me, this will make things much easier later!
3. Closing Up One End of Your Cylinder
Stand your cylinder upright on one end and focus on the open top.
Start folding the wire inward, almost like wrapping a present, to close it off.
As you fold, shape the wire into a rounded form, making sure to twist any free wires around others to secure everything in place.
Keep bending and adjusting the wire until you’ve got a nice, round shape that holds steady!
4. Trim the Excess Wire
After finishing the closed, circular end on one side of the cylinder, I realized it was a bit too long. No worries—just trim off the extra length from the open end.
If it’s still too long after your first cut, go ahead and trim it a second time until you get the perfect size.
Once you’ve got the length just right, repeat step 3 to finish shaping the other end of the cylinder.
5. Cut a Hole in the Ball
By now, your ball should be fully closed (feel free to reshape it if needed).
It’s time to create an opening so you can easily place and remove produce.
Grab your wire cutters and carefully cut a hole large enough for different-sized produce.
Make sure to bend back any loose or sharp wires around the hole so it’s neat and safe.
If you want to make a smaller hanging basket, just repeat the whole process with a smaller cylinder.
6. Spray Paint Your Baskets
Ready to give your wire baskets a fresh look? Grab some spray paint in your favorite color and give them a coat.
I know some folks worry about spray paint touching their produce, but I always give my produce a good wash, and most of it is in peel that gets discarded anyway.
For this project, I used a metallic paint I had lying around. Feel free to get creative with your color choices!
7. Attach the Baskets With Twine
Take a piece of twine and thread it through the bottom of the large basket and the top of the smaller one.
This will keep them securely attached and ready for use!
8. Secure with a Knot
Tie the twine into a knot to keep everything firmly in place.
This simple step ensures your baskets stay together and ready for action!
9. Create a Hanging Loop
Grab another piece of twine and thread it through the top basket.
Make a loop knot by folding the twine in half, threading the two loose ends through the loop, and pulling it tight.
This will give you a sturdy loop to hang your basket from.
10. Hang It Up
Now, just find the perfect spot to hang your basket and fill it with fruits and veggies!
Enjoy your stylish and functional new addition to your space.
How to Make a Hanging Chicken Wire Fruit Basket
I can't wait to keep filling this up with fresh and colorful treats!
I decided to make two in different sizes for varying produce. (I might even add a third later on.)
Note: While the project cost is listed as $9, I have a ton of chicken wire left for future projects.
Enjoyed the project?
Resources for this project:
See all materialsComments
Join the conversation
-
 Dl.5660408
on Jul 25, 2022
I don’t think the baskets look like “barnyard garbage”. They’re rustic and very creatively made.
-
-












Frequently asked questions
Have a question about this project?
How do you get fruit/veg in or out? It is closed at top and bottom.
That was my first thought. How do you get the fruit or veg's out?
Maybe this was just for display, but in general, doesn't storing onions and potatoes side by side cause them to get softer faster?
I do like your work here - it's something I might try, as I have lots of wire around.