Refinishing TV Trays

I had bought these old TV trays at a garage sale with the intent of refinishing them using chalk paint but after seeing all the posts on faux marble finish, I decided to try this instead. This was a great project to try this on. Now perhaps I'll try this on my laminate kitchen counters...
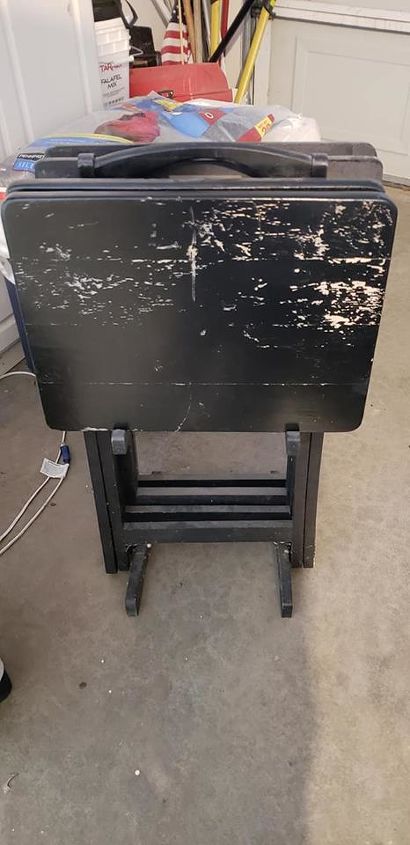
These things have been setting my garage for some time now waiting on me to get inspired on what to do with them. These are black in color and you can see the paint has chipped or flaked off on them. I have been wanting to paint my laminate kitchen counters like a faux marble but wanted to try a smaller project first to see if I liked it. So these TV trays were the perfect experiment!
The first thing I did was to wipe all the dust and cobwebs off of them and set them up for sanding. Because they had this black surface, I wanted to make sure the future paint would adhere well so I sanded the tops with an orbital sander. I believe I used a 180 grit sand paper (it was the only one I had on hand) and seemed to work fine. Next I wiped the tables with a clean wet cloth to make sure to get all the grime off before paint.
Once dry, I painted the tops of each of the tables with a Kilz primer (2 coats) letting dry between each coat. After that I painted the tops with a simple white interior paint that I had left over from painting my bathroom. (Sorry, no pics of that)
Now the fun begins...
Sorry, I don't have a pic of everything I used. But here's the list:
- Kilz primer
- Interior wall paint I had left over (timeless white)
- Craft paint - black, granite grey, lighter gray, white
- sea sponge, small foam paint brush, small bristle brush, very small artist brush, thin cardboard cut to a point (or you can use a large feather - I didn't have one)
- Poly-acrylic - clear gloss
This is my first attempt at paint faux marble. I watched many youtube videos on how to do it and learned just go for it. There is no wrong way.
After painting all the tops of the TV stands (each one turned out a little different) I applied two coats of the Poly-acrylic coating to the top to protect it from general use. To finish "dressing them up a bit" I touched up the base with black paint and also put a coat of Poly-acrylic on them. The main holder of the trays seemed wobbly, so I tightened all the screws and touched it up with the black paint as well.
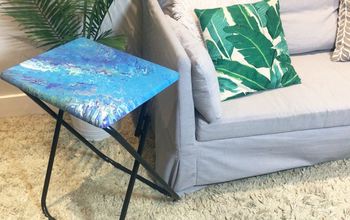
This is the finished project. I really like how they look. They have a little bit of a texture but look so expensive! At a glance you would think they were marble or granite. This was really a pretty easy project that took maybe 6 hrs. because of the drying time in between the base coats. My cost was around $20. The Poly-Acrylic was the most expensive thing running around $13 but I have plenty left for other projects now. I already had the paint brushes and artist brushes.
Enjoyed the project?
Resources for this project:
See all materialsComments
Join the conversation
-
 Syb15884097
on Jan 12, 2025
They look Great nice job.
-
-













Frequently asked questions
Have a question about this project?
I have these same type of TV trays and I want to refinish them as well, but they are very wobbly. Do you know of anyway to fix them so they don't wobble?
Did I miss the part of how to do it? Need to show more steps other than before and after.
Those look really cool. Would be nice to know how you did it?