Rustic Curtain Rod & Corbels With Sheet Curtains

by
Rob & Coco, Hometalk Team
(IC: paid contributor)
16 Materials
$51
1 Hour
Easy
Slowly but surely I'm trying to make a change with my home decor, and that change includes my window treatments. Rob and I purchased our house four years ago and I've had the same treatments up ever since--I don't know what I was thinking when I chose the curtains and rods that I did--but nevertheless, I chose what I did and now I'm changing everything up. I love the rustic farmhouse feel but I don't want to do what EVERYBODY is doing and have my entire house white and grey; I'm a color girl so I've got to have a bright pop here and there. For now though, I'm starting with neutral window treatments in the living room, then will tackle the couch/throw pillow situation, and so on. Here's a great curtain rod, corbel and curtain project for the rustic-lovers like myself.
We want to help you DIY, so some of the materials in this post are linked to sellers. Just so you know, Hometalk may collect a small share of sales from the links on this page.
Buy the materials here:
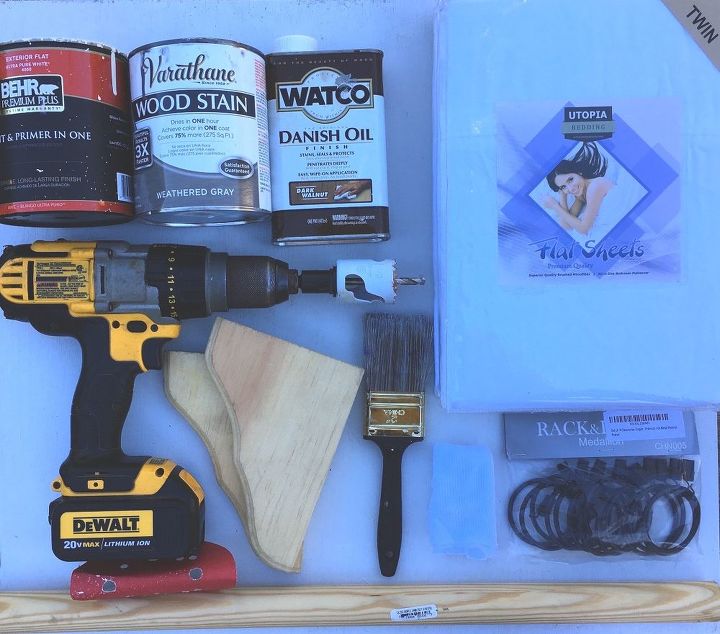
- 6"x8" corbels (You'll want as many as you need for the width of your window/window casing...I just needed 2.)
- 7’ wooden dowel (1-1/4” dia.)
- 2" curtain rings (14 in a pack)
- Twin size flat sheets (Again, you'll want to estimate the number of sheets you need based on the width of your window/window casing...I ordered 2.)
- Behr Cozy Cottage paint
- Weathered Grey wood stain
- Drill
- 1-1/2" hole saw
- Paint brush
- Rag
- Rough grit sandpaper
Not pictured (optional):
*Note: I ended up not using the danish oil on this project.
STEP 1: Drill divot in corbels *The first two photos of this step are optional but recommended.* In order to drill the divots for the curtain rod to rest in, I wanted to make sure that my corbels would have something to rest against so they didn't move around when I was drilling. To secure the corbels, I nailed a piece of scrap wood onto my work table for the corbel to lay flush against...
...then I used a clamp to hold the corbels in place on my work table.
After my corbels were in place, I drilled a 1/2" divot using a 1-1/2" hole saw. Hindsight, for this size dowel, I would have made a divot the same size as the diameter of the dowel which was 1-1/4".
STEP 2: Paint corbels Next, I used a vintage white color by Behr called "Cozy Cottage" to quickly paint the corbels and dowel.
*Note: When painting the dowel, try to use the longest strokes you can so that you can't see where you stop and start with the brush.
STEP 3: Sand corbels and rod After my paint was dry, I took a piece of rough grit sandpaper to create a worn look for both my corbels and dowel as well as to even out any rough/frayed edges from where I drilled my divot.
I found that holding my piece of sandpaper like this made it easier to slide up and down the dowel--I moved the dowel using one hand while holding the sandpaper in the other.
STEP 4: Apply stain Once my corbels and dowel were roughed up, I used a rag to apply my grey stain. I barely dipped my rag into my stain and used that to rub it in evenly. The darker you want your curtain rod/corbels, the more layers of stain you should add after each layer dries.
[Pay no attention to my gross stained nails--I was too impatient to put on gloves.] A word of advice for applying stain to the dowel: try your hardest to use long strokes like how you did for the paint--you don't want to see where you start and stop with the stain.
STEP 5: Iron sheets (optional) While you're waiting for your stain to dry, you may want to run an iron over your sheets. Mine were super wrinkled since they were wrapped up in packaging so I took the time to steam/iron them. After your wood pieces are dry and your sheets are nice and crisp, you can now install your corbels, slide your curtain rings on the dowel, clip your sheets on the curtain rings, stand back and marvel at your hard work!
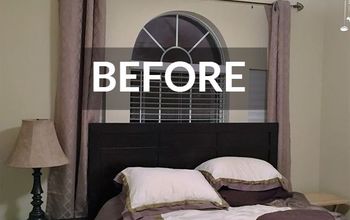
Here's my curtains/rod before--very traditional, and to me, BLAH--but they did go better with my couch/pillows.
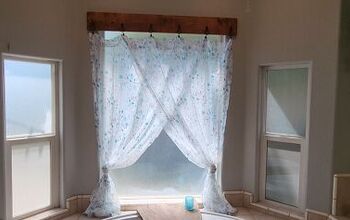
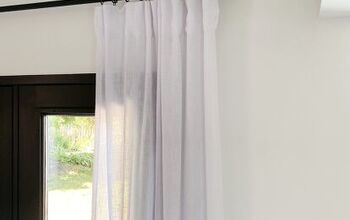
Here is the final look of the rustic corbels/rod and sheet curtains! I know they don't go with my couch right now but once I nail down what accent colors I want to go with, I'm thinking I'll make some DIY pillow covers since these throw pillows are our couch cushions. I'm open to suggestions and photos for inspiration! Farmstyle+Boho Chic ;)
Finally, here is a close up (yes, I know I scratched the wall--I've got some holes to fill too from the former curtain rod).
Update photo: WE GOT A NEW COUCH!! :) I love the curtains with this couch so much better. We're still changing up our decor so we have some things that need to be hung but all-in-all I'm loving our new airy space.
Enjoyed the project?
Suggested materials:
- Corbels (6"x8") (Amazon)
- 7’ wooden dowel (1-1/4” dia.) (Amazon)
- 2" curtain rings (Amazon)
- Behr Cozy Cottage paint (Amazon)
- Weathered Grey wood stain (Amazon)
- Drill (Amazon)
- 1-1/2" hole saw (Amazon)
- Paint brush (Amazon)
- Rag (Amazon)
- Rough grit sandpaper (Amazon)
- Scrap wood (Amazon)
- Hammer (Amazon)
- Nails (Amazon)
- Clamp (Amazon)
- Iron (Amazon)
- 2 twin size flat sheets (Amazon)
Published October 18th, 2016 6:43 PM
Comments
Join the conversation
2 of 106 comments
-
 Gig69451122
on Aug 12, 2024
This idea super cute ❤️ Another 💡But, Coastal/Boho? Using a thicker piece of bamboo. No painting, or tips needed. Either rings slide over the pole. Or, built in ringed drapes too. If not making corbels? Inexpensive wood brackets, make it easy peasey‼️ It looks very designer!
-
-
 Sun115594039
on Aug 12, 2024
Hang the curtains higher and wider. Esthetically pleasing in the eye and window.
-










Frequently asked questions
Have a question about this project?
how did you anchor it to the wall?
what keeps the rod in place? looks like it would slide off when you open and close the curtains.
Why don't you use heavier fabric...the twin sheets just don't hang well.