


How to Banish Kitchen Gloom: Genius Under Cabinet Lighting!

If you're like me and always on the lookout for simple and creative ways to enhance your living space, I've got a fantastic solution for you.
Today, I want to share an exciting project that will bring a whole new level of brightness and charm to your kitchen (or any other room!). It's all about adding DIY under cabinet kitchen lighting and trust me, the results are absolutely stunning!
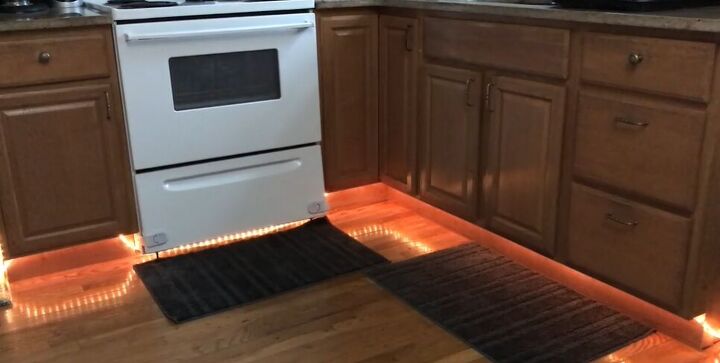
Goodbye, kitchen gloom! Just look at that glow in the video—now it’s so bright and festive
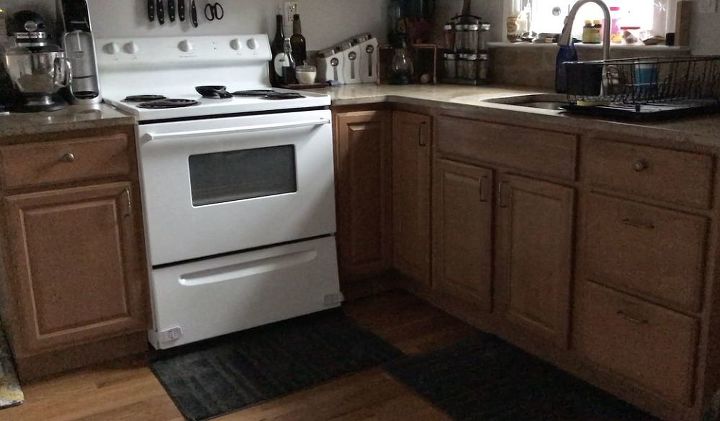
BEFORE: On this gloomy, rainy day, my house feels just as dim and dark even with all the windows. Whether it's days like today or the evenings, I've come to realize that I need some extra light to brighten up my kitchen. Let me show you how easily I achieve that below!
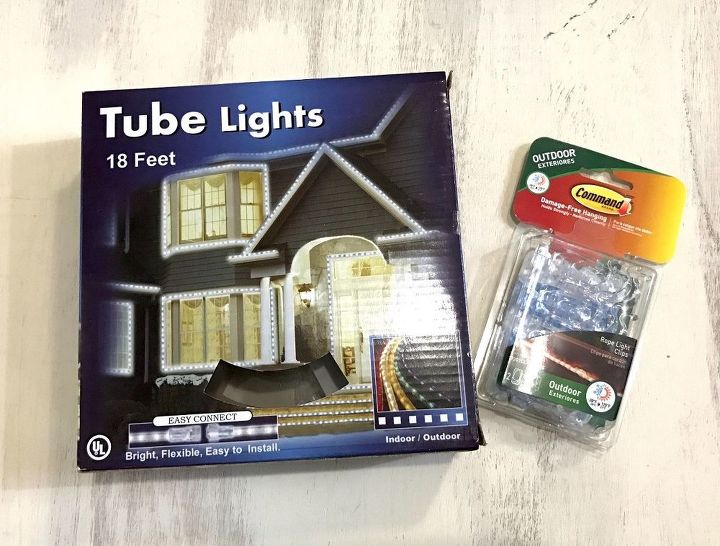
Tools and Materials for DIY Cabinet Lights :
- Rope/tube lights (I purchased 18' but 10' is sufficient)
- Command rope lighting hooks
Note: The rope lighting came with clips and screws for installation, but I found them impossible to work with. The screws were as tiny as the ones holding the ears of your sunglasses together, making the whole process horrible. So, I opted to give the Command brand clips a try instead. Not only were they much easier to use, but they also won't create any permanent holes under my cabinets, providing a convenient and reversible solution.
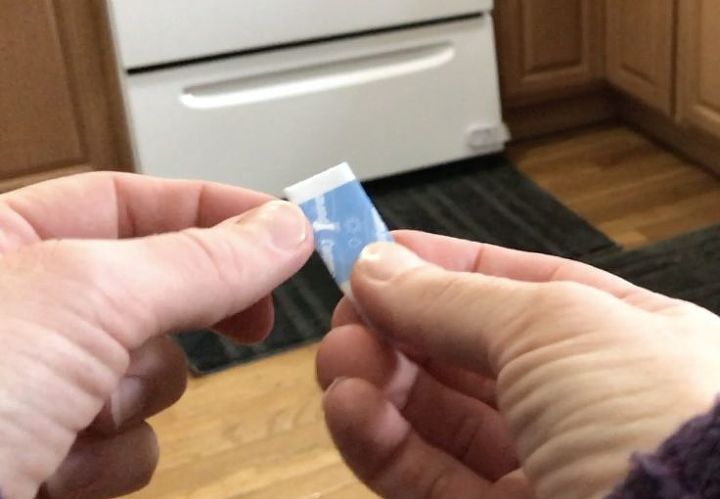
1. Applying the Command Clips
To begin, I followed the instructions on the packaging and removed the blue paper to adhere the tape tabs to the Command clips.
Then, I stuck the tape tab to the back of the Command clip and applied pressure.

Next, I took the paper off of the other side of the tape tab.
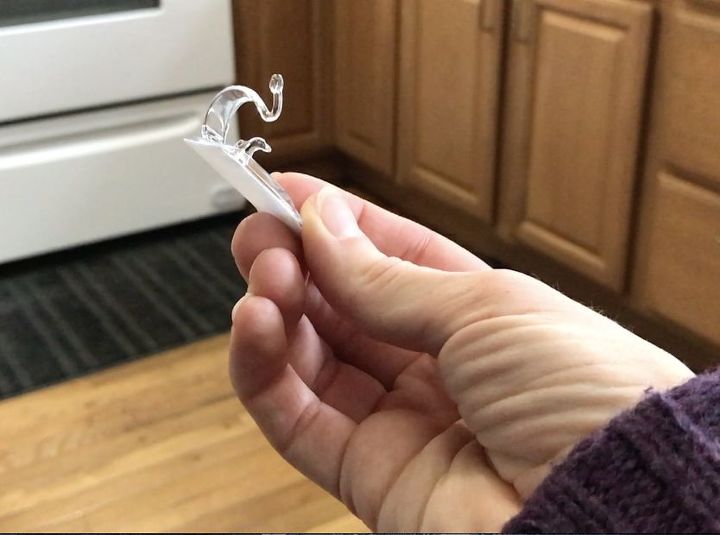
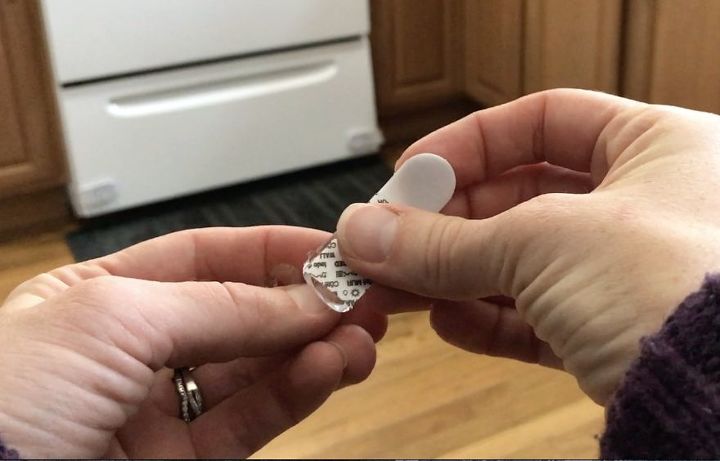
Here is what the clip should look like once the tape tab is correctly applied.
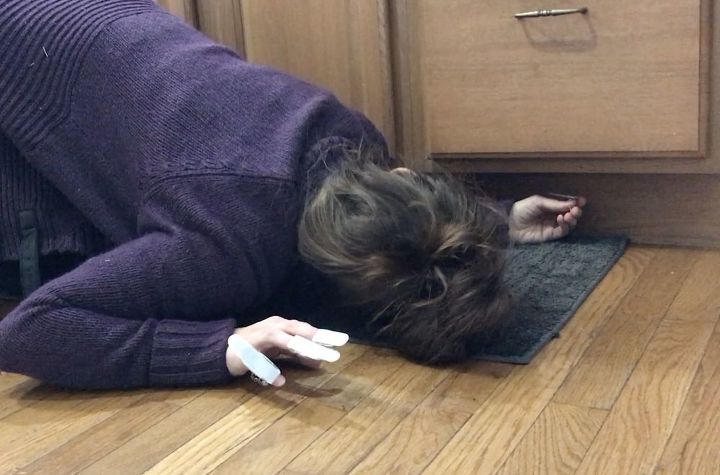
2. Attach Command Clips to the Cabinet
Moving on, I took all of my Command clips and firmly attached them to the underside of my cabinets. It's essential to ensure that the wood surface is clean, free from cobwebs, and any other debris for a secure grip.
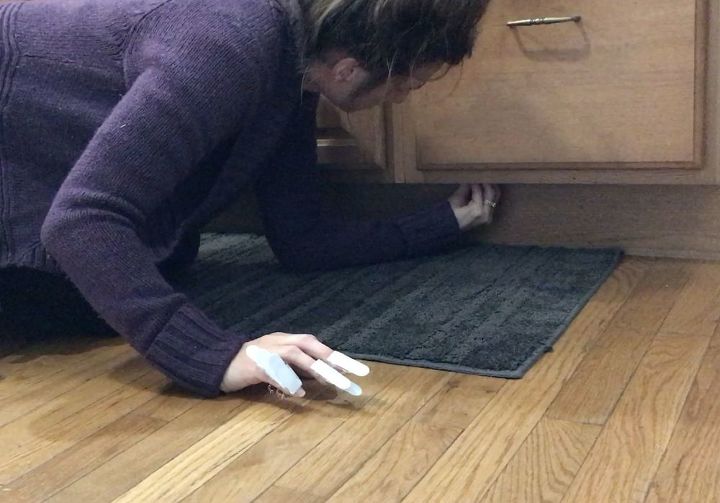
Apply pressure when sticking the clips to the wood. I used all of my Command clips, spacing them out every 4 inches.
Note: If you're able to install the clips with the tiny screws that came with the rope lights, STEPS 1 and 2 would basically just be you installing the clips with a drill.
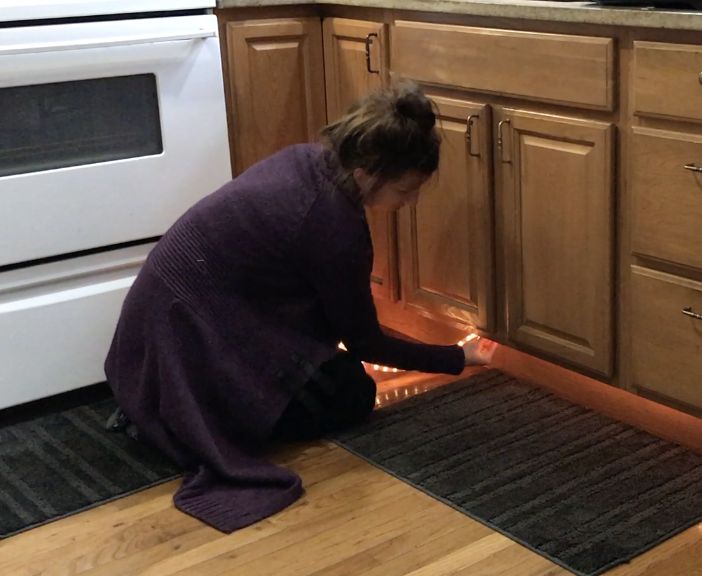
3. Clip in Lights
Finally, just snap in the rope lights into the clips. I tried to keep mine as tight as I could so that there was no slack. It sounds a little tricky, but once you see how it’s done in the video, it’s actually pretty simple.
DIY Kitchen Cabinet Lighting Tutorial
By installing command hooks under your kitchen cabinets and attaching rope/tube lights, you'll achieve genius lighting that not only brightens up your kitchen but also adds a festive touch. And here's the best part – this entire project is budget-friendly, costing just $26!


Comments
Join the conversation
-
did this years ago, but under the counter top, so when I open a draw or cupboard it lights the inside. But I might put another set by the plinths like you to light my new floor. Great job BTW. Bet it looks so nice in the evening.
-
This is a great idea! Especially if you have a baby (midnight feeding), elderly relatives that have had to move in with you or just guests staying over. This eliminates falls and fumbling for light switches. True, it may not be everyone's taste but rude comments are not necessary.


Frequently asked questions
Have a question about this project?
Where do you plug the rope light into?
I used cup hooks to hang rope lights around the top of my screened porch. They might work here too. Love the idea. Thanks for sharing
What kind of command did u used? I’m going to order them today along with lights