Tomato Cage Cloche

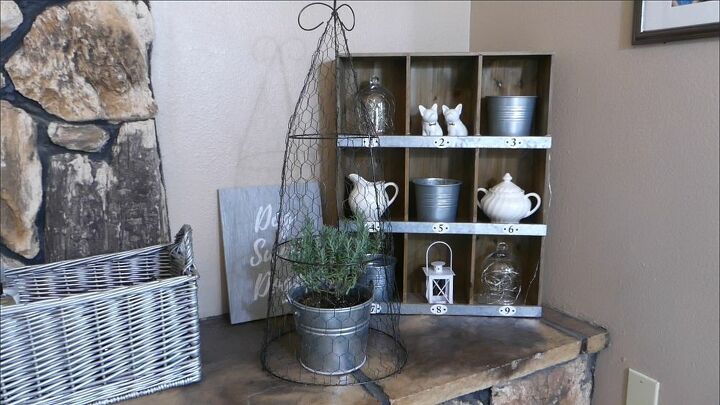
The cloche adds a bit of whimsy to your display pieces. Whether fairy lights or plants, they beg you to take a closer look and see what’s inside. They also protect delicate treasures from well-meaning but overly curious noses (watch the video at the bottom of this project to see why...). Make a farmhouse style version with a tomato cage and chicken wire.
Best tomato cage!
Materials
You’ll need: (affiliate links on my blog earn proceeds, which are donated to no-kill animal shelters and rescue organizations):
* Wire tomato cage
* Chicken wire
* Additional wire for wrapping
* Wire snips
* Needle nose pliers
* Work gloves, if you don’t want to get small scrapes from the chicken wire
* If you want your finished cloche to be something other than galvanized metal, add spray paint and a drop cloth. I’m using Rust-Oleum’s metallic Oil Rubbed Bronze.
Process
First, set the tomato cage upside down and bend the anchoring legs together so they create a dome. Secure in place with wire.
Use the plyers to bend the ends into curls.
Lay out the chicken wire. It’s easier to work with if it’s not rolling back up on itself.
Set the tomato cage on the chicken wire and begin working with one section at a time. I found this to be the easiest way to not only keep the wire taut but to keep the pattern of the chicken wire straight. Bend the bottom edge of the chicken wire under and around the bottom tier of the tomato cage.
Using the wire snips, cut the chicken wire so it’s slightly wider than the two vertical edges of the section. Bend the cut ends around the edges to secure as you go.
You’ll find that as you work your way up the tomato cage, the sections get smaller and you’ll need to start angling your cuts. This is why I recommend only working with one section at a time. If you simply wrap the chicken wire around the entire cage, you’ll end up with a slanting pattern, overlapping wire, or bulges…or all three of these issues. I tried this route as I tested the best way to assemble and it was more of a pain. I was having to go back and cut in between sections, stretching chicken wire here and there or cutting out sections altogether. Working one section at a time might feel like it’ll take longer, but the end result will look more professionally put together.
Once you have one section completed, move to the next section until the entire tomato cage is covered.
Spray paint the finished piece over a drop cloth and allow to dry.
Use inside to complement your farmhouse style décor or use outside as a practical way to keep the cute but destructive squirrels and bunnies out of your plants.
Watch the step-by-step video tutorial here:
Enjoyed the project?
Resources for this project:
See all materialsComments
Join the conversation
-
-
 Garage Media
on Aug 27, 2025
This DIY cloche works, tried it, but don’t rush it.
-













Frequently asked questions
Have a question about this project?
how do you pick the tomatoes that mature inside the cage?
Can I make a table using old cowboy boots
Tried to paint it other color?