Wood Wall Art

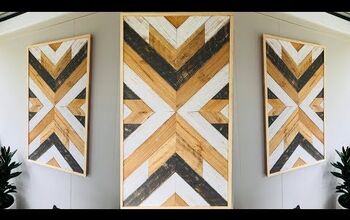
For years I have loved reclaimed wood wall art. We’ve always wanted a piece for our home, but the cost has always kept us from one. After starting to work more and more with wood, we decided to make one ourselves.
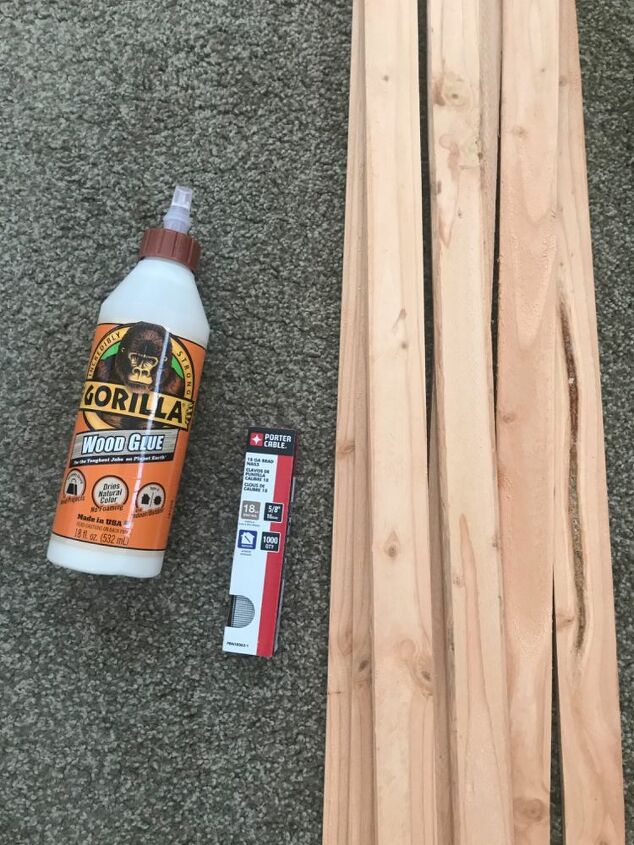
For this project we used Gorilla wood glue, 5/8” brad nails, and wood lath.Not pictured : white paint, black paint, wood stain, 3/4”x1/2” pine wood molding for the frame.Tools: table saw, skil saw, porter cable finish gun.
My wood lath ended up being a lot more red/orange than I expected. So, to get the white washed oak look that I wanted I had to white wash my boards-this made them look slightly pink. Next I added some yellow acrylic paint to my white wash and used that to help counter the pink tones and make the wood look like a more natural white wash. I did this to 16 boards.
I painted 4- 1/2” square wood dowels in Caviar by sherwin Williams in eggshell finish. And 8- 3/8” square wood dowels with the same paint.
I painted 30 pieces of wood lath Bistro White by Valspar in an eggshell finish. I then stained 16 pieces using Provincial by Minwax. I used a cloth to rub the stain onto the wood. I didn’t want it to be really saturated, so I just used a small amount on the rag and left some small areas not stained to help the wood look more weathered.Then I added a little bit of white paint to the edges using the end of a stirring stick and just sliding it lightly acrossed the surface.
After I finished my lath wood, I started playing around with the design. Once we actually put it together, the wood will be cut to 45 degree angles and put together.
We got our plywood from Home Depot and had them rip it down to 5’x3’. They have a machine that they use that keeps the cuts straight which is super important for this project.Next you’ll draw a cross section in the center of your plywood that extends both horizontally and vertically through the middle of the plywood. This will act as your guide when placing your wood lath onto the plywood. Again, it’s very important that these lines are straight or the 45 degree cuts won’t fit together properly and your design won’t look right.
Nate then proceeded tocut the wood lath at 45 degrees. Because I had already painted/stained my wood, we had to alternate between the two different 45 degree cuts. Since I had already figured out the design, I was able to bring him two separate piles to be cut- one at 45 degrees angled to the left and one at 45 degrees angled to the right.
After he finished cutting them, I laid them out in the design. This step isn’t strictly needed, but I noticed my wood lath had started to warp since I had painted them, so I wanted to be sure they’d still lay together well.
Next, we started glueing and nailing down the design. Starting from the center point, we worked outward and in quadrants.
Its best to do this one board at a time. Gluing first and then nailing each board in the top middle and bottom. This is an example of one quadrant.
This is the design before we cut the excess lath wood from the edges. We ran out of white because there were four pieces that were too warped to be used, so that is why there are a few sections of unfinished lath at the edges of the design. Once we cut it down to size, I’ll paint them white.
Once we had finished the design and given the glue a few hours to dry, we took the piece outside and laid it face down on a small table. Using a skill saw Nate followed the line of the plywood to cut off all of the excess lath wood sticking over the edges.
Using 1/2”x3/4” Pieces of wood, we framed out the artwork.To start the frame, we nailed two pieces together in an L shape using 1” brad nails.this way, the wood will overlap slightly on top of the wood art. We then attached them to the plywood portion of the art using 1” brad nails.








Frequently asked questions
Have a question about this project?
Love it! Isn’t lathe fantastically cheap fun and easy to work with? Well done sister!
We are needing to cover a wall in our guest bathroom this looks pretty cool how did you figure out the amount of lath you would need?