Junk Pumpkins With Sugru - Cutest Jack O' Lanterns Ever!

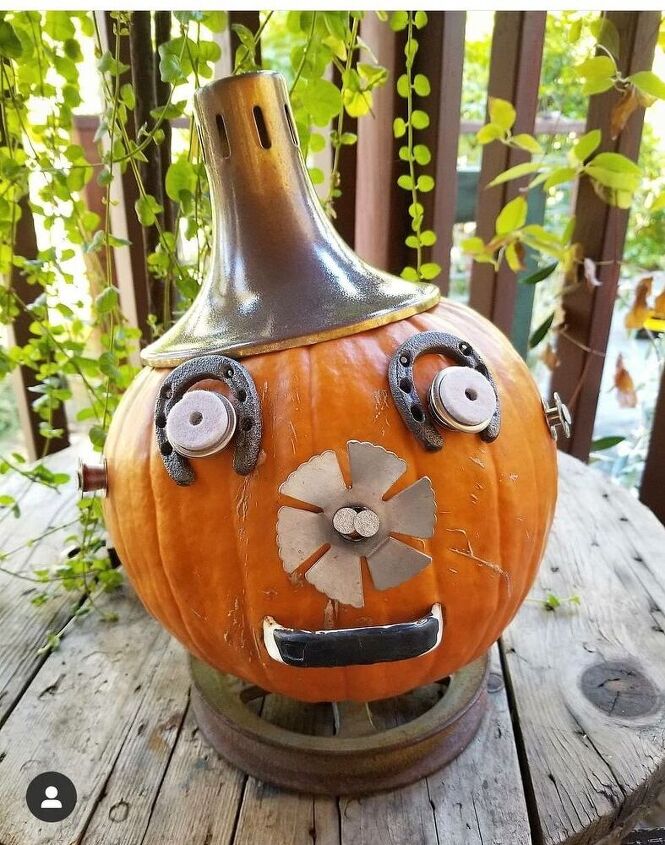
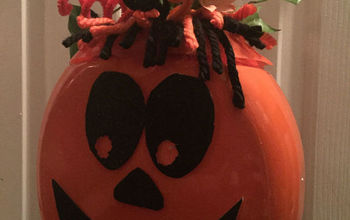
Well… it is the BEST month of the year, and I am so excited to share another fun Sugru project with you to help celebrate all things FALL! Last year, my mom created a “junk” Jack o’Lantern for me, using a real pumpkin. It was amazing, and I decided that I wanted to replicate it using one of my inexpensive faux pumpkins so that I could enjoy it year after year. Here's the one she made:
Isn't it so fun?! I love the horseshoe eyes and windmill nose!
Step 1: Prepare Your Paint (if you want to paint your pumpkins – totally optional!)
I don’t particularly like the look of most faux pumpkins, and I wanted to make mine look a little more rustic. So my first step was to paint my pumpkins with some craft paint that I already had on hand. For the orange pumpkin, I used a mixture of bright orange and brown paints. For the white pumpkins, I used white with a little bit of brown mixed in. I also did a small green one (pictures below).
I wanted to add a little texture to the paint, so I stirred some baking soda into each color.
I don’t have a particular measurement on the ratio of paint to baking soda; I just added it a little bit of the soda at a time until I had a consistency that I thought might work out. I left it kind of lumpy.
Step 2: Paint (or skip this step if you prefer)
I used a coarse bristle brush so that the brushstrokes would show. You can see the texture in the paint here - the baking soda technique is really awesome!
As the paint was drying, I brushed back through it from time to time, just to add even more texture.
I absolutely this paint technique! There is some white “shading” from the baking soda on the orange pumpkin - so cool! After they dried, I sprayed with a matte sealer (optional).
Step 3: Gather Your “Junk” Face and some Sugru
I gathered a combination of old drawer pulls, metal stars (salvaged from the ashes of our home that burned – they used to be shiny bright and hang on the Christmas tree), washers, an old key, and some screws (not everything is pictured here, but you will see them in the following photos). Get creative! You could use so many different things: nuts, bolts, bits of fabric, old jar lids, old hinges… the list goes on. I would have used some old wire around the stem, too, but I don't have any at the moment -- something to add later!
Step 4: Attach Your Junk
This is the part that is SO easy because Sugru is such an amazing, moldable glue. And it is super strong! As you may have seen in my previous post where I made the Garden Caddy out of an old cake pa & shovel handle, SUGRU starts out feeling like a flexible putty, and is easily molded into any shape. I attached bits of Sugru to the junk pieces, and then pressed them into the pumpkins. It works great because it molds to the shape of the pumpkin's uneven surface.
I love that Sugru comes in 10 different colors. For this project, I used green, brown, and black! I especially love the green because it looks great on the eyes.
Speaking of the eyes, it was fun to embellish them a bit by adding a bit of detail with the tip of a screw.
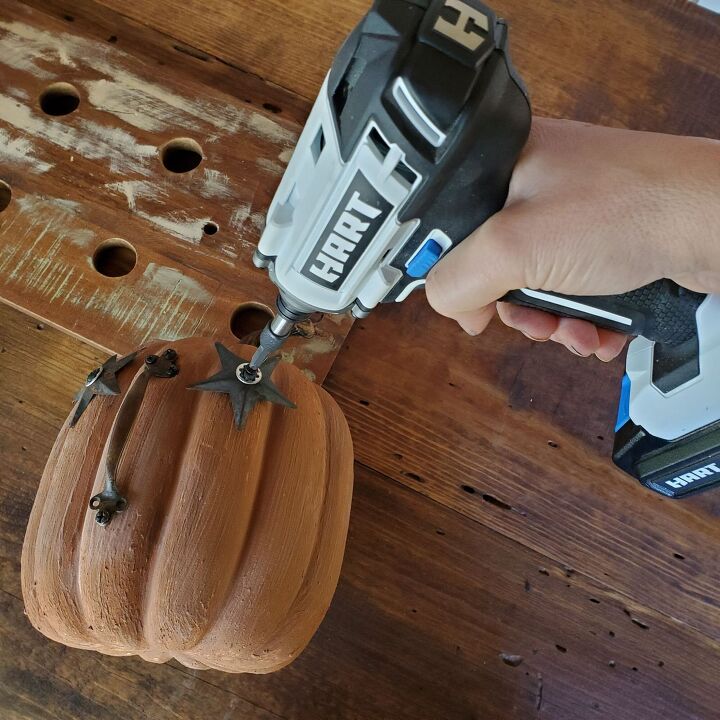
For my large pumpkin, I thought it would be fun to go ahead and add a few screws in the holes of the handles, etc. This was totally optional and done for looks only. The Sugru is plenty strong on its own.
I used my rechargeable Hart Tools drill because the pumpkin was too hard to just press the screws in by hand. I love this drill because it is so convenient. It is lightweight and cordless, and I have used it on everything from small projects like this pumpkin to building large barn doors (post coming soon for the how-to on that!).
Here is a close up of the big pumpkin. I love his starry eyes!
Step 5: Take it a step further, if you want!
I decided that the orange one was large enough to turn into a scarecrow, and using my Sugru once again, I attached an old yardstick to a lamp base (this lamp base used to be a fern stand at one time – stay tuned and I will post that project, too!).
I dressed it up with an old peanut sack, Spanish moss, and old keys.
You could build your own scarecrow with any old lamp base or similar item(s). Come to think of it, a table lamp, old jars/pots, or candlesticks would make a cute tabletop version of this scarecrow! You could also make a ghost with a junk pumpkin head… oh, there are SO MANY fun thinks you can do with this idea! And using Sugru makes it so quick and easy.
Step 6: Decorate
Display on your porch or in your house for all to see! I can guarantee that you will have the most unique and fun Jacks on the block! My husband says they look kind of creepy. I don't do "gross" Halloween decor, but I do love unique & fun pieces, with a little bit of "creep" in there for good measure -- lol!
If you make some, please share. I would absolutely love to see what you come up with! Don't forget that you can get the Sugru in different colors -- (enjoy 10% off your first order if you sign up for their newsletter here).
Also, be sure to follow me on Instagram and Facebook for lots of fun Halloween ideas. It’s my fave time of the year!
Happy Creating!
Xo,
Jamey
DIY Halloween decorations
Enjoyed the project?
Resources for this project:
See all materialsComments
Join the conversation
-
 Judy
on Oct 19, 2020
I LOVE Robots, I love steam punk, I love slightly creepy.. Therefore I absolute love your mechanical looking Jacko lanterns. My heart goes out to you & family about your home, our home had a major fire 29 years ago. The little stars are very sweet, has is your new home💗
-
 @JagCagDesign
on Oct 19, 2020
Thank you, Judy! You know how hard it is to look through the ruins of your home. The hardest things to lose were the handmade holiday pieces and my kids' artwork - as they are full grown men now. I love being able to use bits and pieces in new ways.

-
-
-












Frequently asked questions
Have a question about this project?
Looks great and very imaginative. we don't do halloween much here in Queensland, fall for that matter either - it is just autumn. But i was wondering, what do you use the pumpkins for come winter, stock feed?