


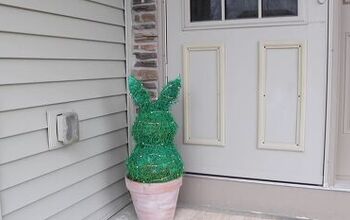
DIY Easter Peeps Topiary: A Fun and Festive Craft for Spring

When Easter rolls around, it’s impossible not to get excited about the shelves filling up with those colorful, squishy, marshmallow PEEPS!
These sweet treats have become a holiday staple. So why not turn them into something festive for your home?
This Easter Peeps topiary is a fun and playful way to bring spring cheer to your decor.
It’s bright, whimsical, and the perfect conversation starter for your Easter celebrations!
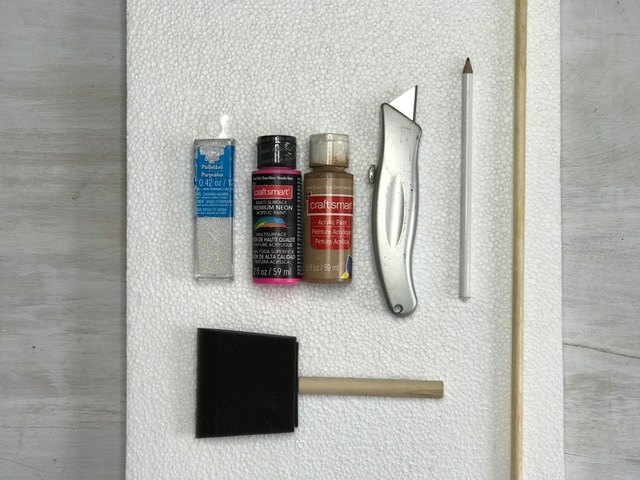
Tools and Materials:
- Piece of 1" (or thicker) styrofoam
- Xacto Knife
- Neon Paint (in PEEPS colors, of course)
- Foam Paint Brush
- Brown Paint
- Pencil
- 1/4" Round Dowels (x 2)
- Iridescent Glitter
- Faux Flowers/Greenery
- Garden Urn
- Styrofoam Circle 1" thick
- Ribbon (optional)
Hometalk may receive a small affiliate commission from purchases made via Amazon links in this article but at no cost to you.
I used a Stone Garden Urn for the base of this project, as I had it on hand. But you can also get inexpensive plastic versions as well!
Feel free to paint it in the color of your choice - just be sure it's exterior paint if it's living outdoors.
Get some non-candy Easter egg ideas for this year's egg hunt.
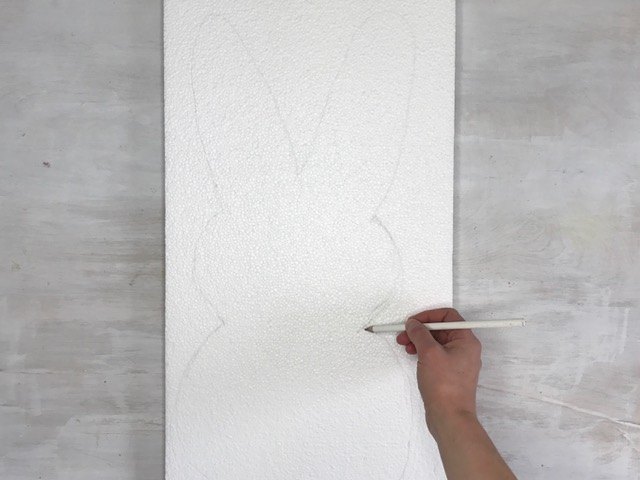
1. Draw Your PEEPS Bunny Shape
Draw out your PEEPS bunny shape on your styrofoam piece.
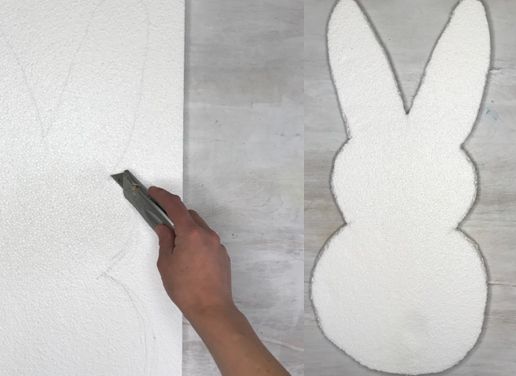
2. Cut Out the Bunny
Using a sharp knife, cut out your bunny outline.
Smooth out any rough edges with a nail file.
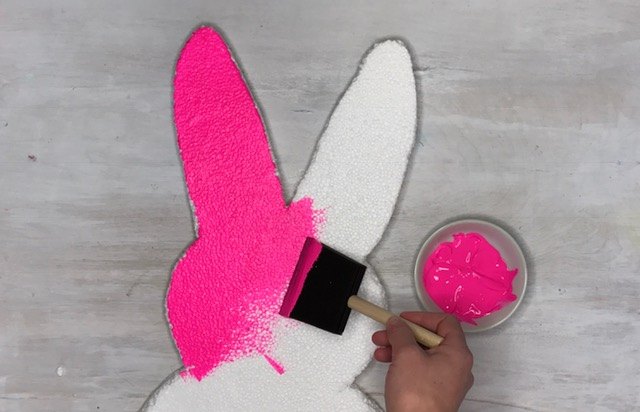
3. Paint Your Bunny
Paint your rabbit Easter decoration in a bright color like neon pink, purple, turquoise, or yellow.
Don't forget the edges and the backside!

4. Add Some Sparkle
Add a little sparkle to your bunny by dusting iridescent glitter all over the outline while the paint is still wet.

5. Give Your Bunny a Face
No PEEP is complete without a recognizable face!
Using your brown acrylic paint, give your bunny base two round eyes and one round nose.
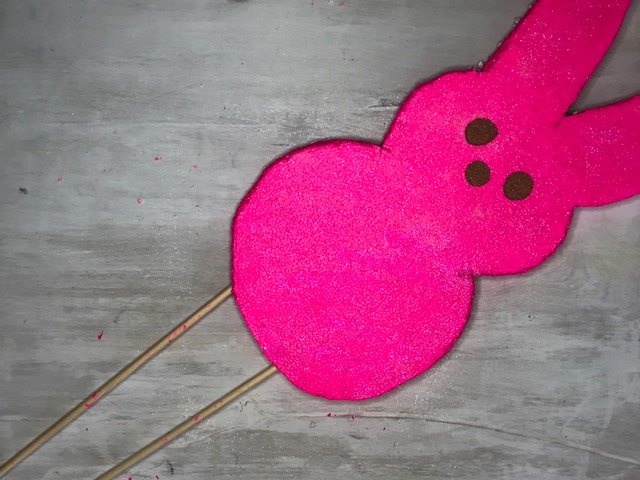
6. Attach the Dowels
Insert two round dowels into the bottom of your bunny.
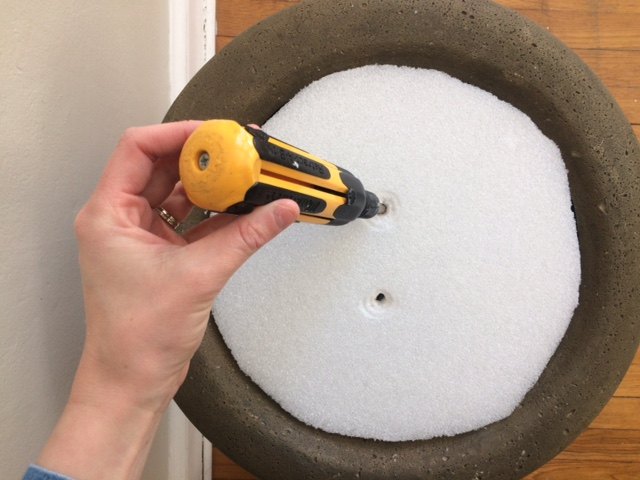
7. Prepare the Base
Place your styrofoam circle inside the top of your urn. Ensure it fits tightly into the top, just beneath the rim.
Poke two holes (side-by-side) into the center of the styrofoam.
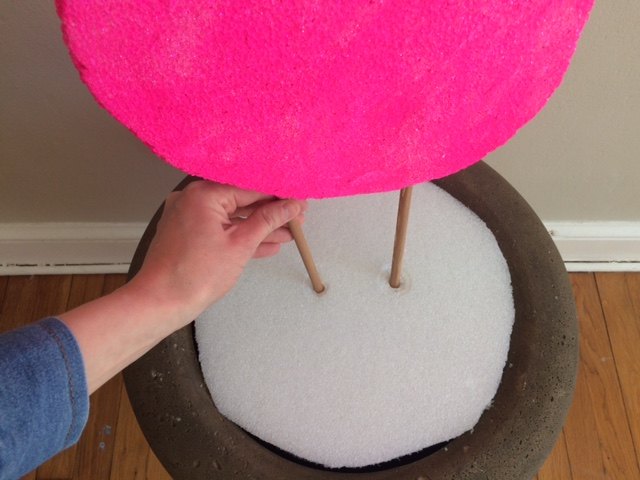
8. Assemble Your PEEPS Topiary
Insert the dowels from your PEEPS bunny into the holes in your circular piece.
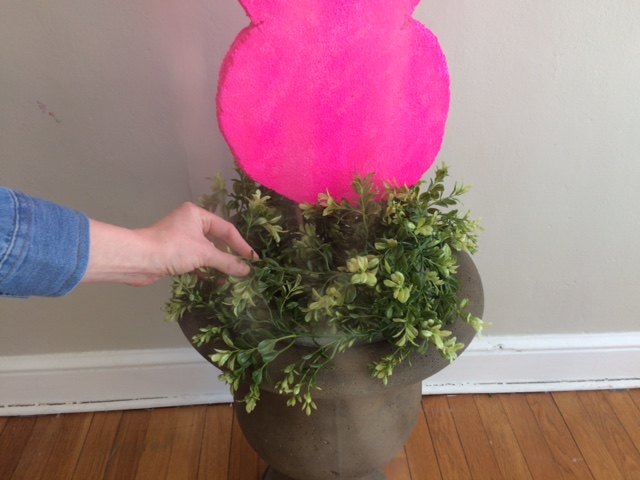
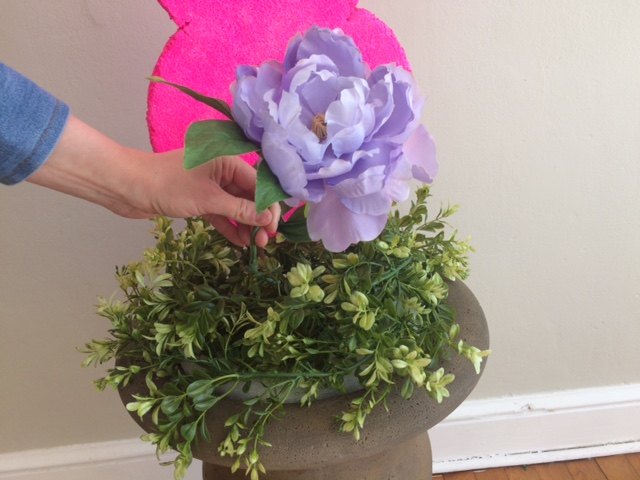
9. Add Greenery
Wrap a long piece of wired greenery around the top of the urn, covering the dowels and base as much as possible.
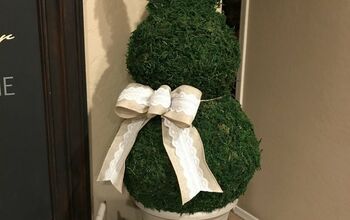
10. Decorate the Bunny
Add faux flowers throughout the greenery, continuing to cover up the styrofoam base.
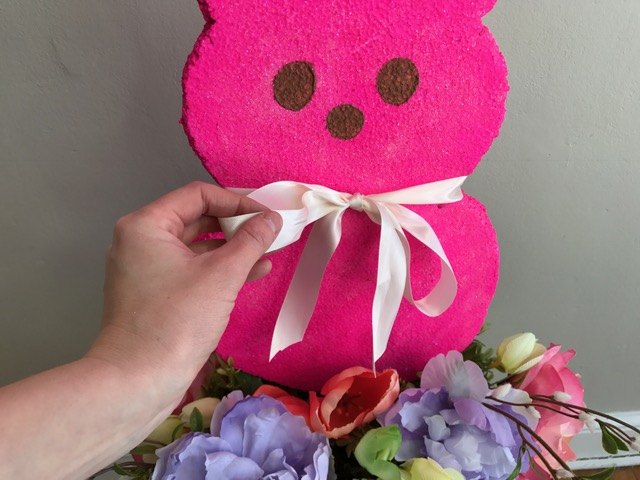
Tying a bow around the bunnies neck with ribbon, gives it a special touch!
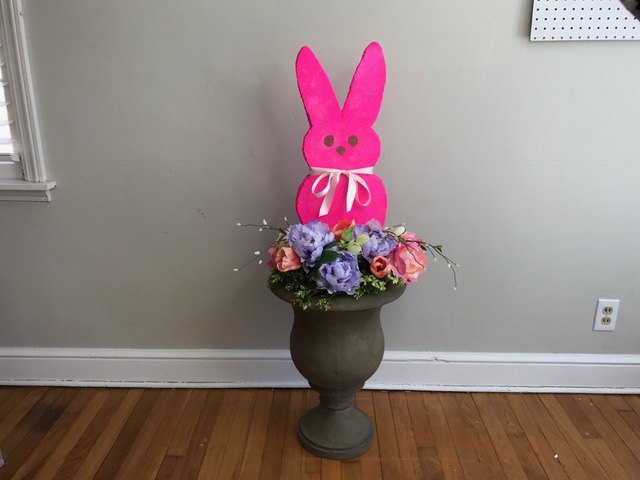
Now, doesn't that look like a pretty pop of fun?!
More Peeps Ideas

Easter Peeps Topiary: A Sweet and Whimsical DIY Decoration
And here it is, shining brightly in the Spring sunlight!
With its bright colors, glittery finish, and playful charm, this DIY project is sure to be a standout piece in your Easter decor.
So grab your supplies, get crafting, and don’t forget to share your finished Peeps topiary—I’d love to see how yours turns out!
Happy Easter and happy crafting!
Resources for this project:
See all materials


Comments
Join the conversation
-
Soooo.. cute! Thanks
-
I ABSOLUTELY LOVE THIS IT IS ADORABLE NICE JOB!!! THANK YOU FOR SHARING


Frequently asked questions
Have a question about this project?
What kind of paint did you use? I have used spray paint before on styrofoam and it kind of eats it up. I have lots of projects with styrofoam but am afraid to do any du to what happened before. Thanks for any information you can give me.
Did you seal it? What if it rains?
I love this its so darn cute! But I was wondering also about the paint and if its protected by some kind of aerosol sealant? I don't think I could cut out the styrofoam though it would give me goose pimples LOL