How to Build a Stylish Fluted Bucket Table on a Budget

You’ll never look at a plastic bucket the same way again after this DIY!
With a few simple materials, this ordinary bucket became a stylish fluted side table.
This project is budget-friendly, easy to follow, and a fun way to add custom furniture to your space.
Keep reading to see exactly how I did it!
This post was transcribed by a member of the Hometalk editorial team from the original HometalkTV episode.
Hometalk Recommends!
Tools and Materials:
- Bucket
- Orbital Sander
- Multi-tool
- Jigsaw
- Wood rasp
- Hammer
- Nail
- Pencil and string
- Sandpaper (220 grit)
- Foam roller
- 5-gallon bucket
- 5 1/8-inch wood half rounds
- Construction adhesive
- Paintable caulk
- MDF board
- Primer
- Paint
- Rubber bands
Hometalk may receive a small affiliate commission from purchases made via Amazon links in this article but at no cost to you.
1. Prepare the Bucket
Start by using a multi-tool to cut off the top edges of the bucket, creating a smooth and even surface.
This will serve as the base for your DIY side table.
2. Cut and Sand the Wood Half Rounds
Measure and cut the 5 1/8-inch wood half rounds to match the height of the bucket.
Use 220 grit sandpaper to smooth out the edges and surface of each piece.
3. Attach the Wood Half Rounds
Using construction adhesive, secure the first half round to the bucket, checking to make sure it is level. Since the bucket has a slight slope, the half rounds may touch at the top but leave small gaps at the bottom.
Continue attaching the pieces around the entire bucket, checking periodically to maintain alignment.
For the last half round, use a wood rasp to narrow it slightly so it fits snugly.
Once all the pieces are in place, wrap two rubber bands around the top and bottom to hold everything in place while the glue sets.
Allow it to dry for 12 hours.
4. Fill the Gaps with Caulk
Apply paintable caulk between each wood piece to create a seamless, smooth look.
Wet your finger slightly and run it along the caulk lines to smooth them out. Let the caulk dry completely.
5. Prime and Paint the Base
Once the caulk is dry, apply a coat of primer and let it dry.
Then, paint the base with two coats of green paint, using a foam roller for a smooth, even finish.
6. Create the Tabletop
For the tabletop, take a piece of MDF board and hammer a nail into the center on the back side.
Tie a string to the nail and use a pencil to trace a 20-inch diameter circle.
Use a jigsaw to cut out the circle, keeping the bottom side up for a cleaner edge.
Sand the edges and top surface, then prime and paint the tabletop to match the base.
7. Attach the Tabletop
Apply construction adhesive to the top of the bucket and carefully center the MDF tabletop on it. Let it dry completely before applying a third coat of paint to the tabletop for extra durability.
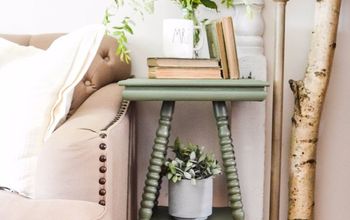
More DIY side tables you’ll love!
Build a Stylish Fluted Bucket Table on a Budget
Why spend a fortune on designer furniture when you can make it yourself?
This DIY end table is proof that stylish home decor doesn’t have to be expensive.
Now it’s your turn—grab a bucket and some wood, and give it a try! Let me know in the comments how yours turns out.
Enjoyed the project?

Comments
Join the conversation
-
-
 Shuganne
on Mar 02, 2025
That secret hiding place? My son would have had that filled with Legos and Matchbox cars. I hope you have kids to enjoy your lovely table!
-










Frequently asked questions
Have a question about this project?