DIY Memory Box to Organize Your Child's Papers

by
Pamela - DIY vibes
(IC: blogger)
3 Materials
$30
1 Hour
Easy
I love the calmness January brings after the chaos of December. On snowy, gray days, when I don't have to leave the house, I'm motivated to work on the projects I've been putting off, like organizing my pantry. (Check out my free printable pantry labels if you want to tackle YOUR pantry) This year I started with the piles of school papers the kid's had accumulated since fall. I felt like my previous system of separating them by child and throwing them in their respective plastic container was enough but THEN I found a big box of old papers in my craft room and I knew it was time to get a bigger, better system.
Here's what I used for my DIY memory box:
- File tote
- Hanging Folders (I used 19)
- Labels/Pens--I love this label maker
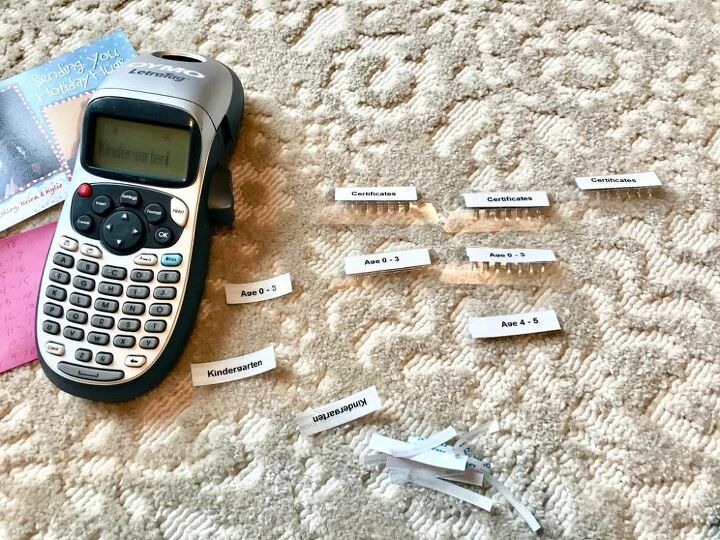
Start by labeling the hanging folders (ideas for categories are below) and putting them in each bin. I used a label machine because, well, that's how I roll!!! My handwriting would NOT be as neat once I got through ALL the labels. But handwriting them is totally acceptable!
These are the categories I used, but feel free to customize them:
- Age 0-3
- Age 4-5
- Kindergarten - Senior Year--one folder for each year
- Certificates
- Cards
- Talents (programs for chorus, band, orchestra, etc)
- Other
Here's my biggest tip to make things go faster. Have a key so you can separate your piles faster. Here's a pic of my "high tech" system (I'm sure your's will be much more legible) but I wrote down: 1) their age 2) their grade 3) the school year. So in the top line of the pic, my daughter was aged 11-12, in 6th grade, in the 2017-2018 school year. I wrote it like this because some papers said "age 7", others said "2nd grade" and others said "2013". This was a quick reference for me and saved a TON of time trying to calculate it in my head.
I also made a pile of "unknowns" and asked my kids to help me to identify the year some of their "masterpiece's" were created. Their memories are SO MUCH better than mine when it comes to things like that. Of course they'll feel the need to go through all their stuff once you're done. My girls loved seeing their work from when they were younger and I was told a few stories that I hadn't heard before. That was exactly why I wanted to do this project in the first place, to remember pieces from their younger years.
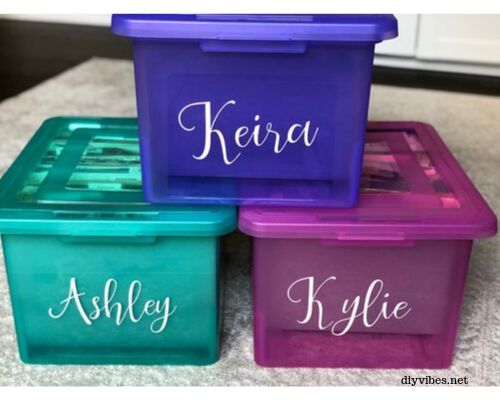
Once everything is in it's appropriate folder, you are done! Now create a label with their name on it. I used my Cricut for my labels but any label will do. A sticker type will last longer than a paper one taped on. You could even use paint markers and get creative. For more organizational ideas you can find them HERE.
Enjoyed the project?
Resources for this project:
Any price and availability information displayed on [relevant Amazon Site(s), as applicable] at the time of purchase will apply to the purchase of this product.
Hometalk may collect a small share of sales from the links on this page.More info

Want more details about this and other DIY projects? Check out my blog post!
Published January 5th, 2020 11:14 PM
Comments
Join the conversation
2 of 11 comments
-
-
 Mary Ellen
on Jan 15, 2021
A great system! This can be a major problem for parents...Thanks.
-








Frequently asked questions
Have a question about this project?
How tall did you make you name labels with the cricket? Thanks.
Where can I get the same color totes? I’m obsessed with the colors! I tried clicking where you said resources for this project but I still can not find it!