Antique Wash Stand Makeover

by
Misty Gaines-Johnson
(IC: homeowner)
6 Materials
$15
4 Days
Medium
Well another project is done. I ran across this antique wash stand for $10 and me being me could not pass it up. I showed the pics to my husband and he refused to go with me to get it stating “it is too damaged!” That just sounded like a challenge to me, so off I went to pick it up. When I picked it up I noticed warping in the doors and the top and one front leg and one back leg had pretty bad splits, but I was determined to prove my husband wrong. I headed home to really look at the damage more closely. It was a really fun project and I love how it turned out!
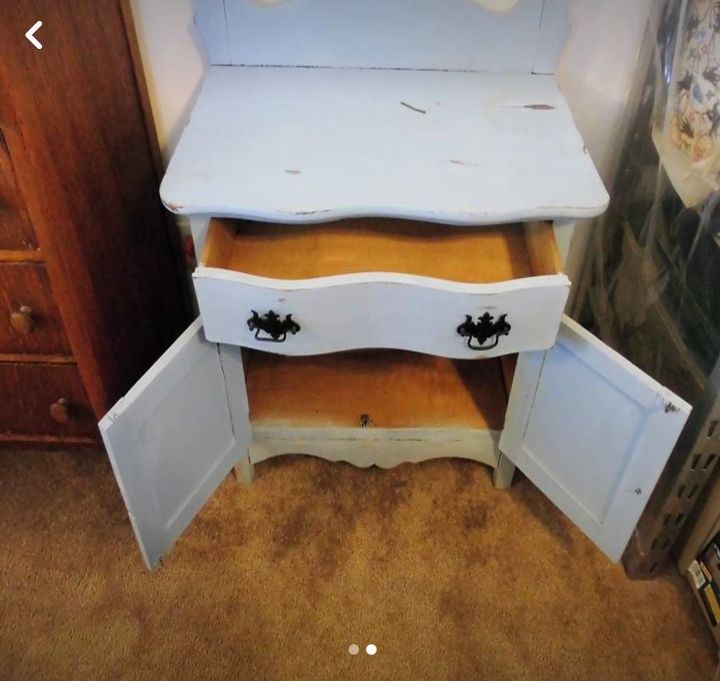
Here is what the ad looked like, totally normal, maybe needed some paint, I was in for a surprise.
The doors were so warped they could not be fixed.
I decided to do away with them altogether. The inside wood was in suprisingly great shape. The drawer front was is good shape but I had to rebuild the rest of the drawer. I used 1/8 inch plywood to make a new drawer bottom. I laid the drawers on it to get the pattern.
Before photo. I decided to paint a nice peach color and put a little stain shaded sunflower on it. I also decided to stain the bottom inside with the same stain as the top.
You can see the split in the front leg, the back leg was the same. For the front leg I noticed the bottom board was warped and causing the leg to be split. I tapped out the bottom board and replaced. I was then able to put some gorilla wood glue in the crack and put 2 inch nails to hold together, the back did not need the board replaced but I fixed the crack the same as I did the front.
In this pick you can see how that front leg was bent up badly but once the new board was in place it went together great. I was starting to get excited at this point knowing that I was able to fix the legs as they were the biggest issue.
Here is the outline of the sunflower that I put on the top. i thought the top was warped but the screws were just no good. I tighten the top down and filled a small crack with dap wood filler (love this stuff as it stains great) I sanded it all down.
I have the flower outlined with stain and started shading it.
Its coming together!
Shading all done.
All done! I love the peach chalk paint. I make my own paint using 1cup of flat latex paint 1/3 cup plaster o Paris and 1/8 cup of water blended in my old blender for a few minutes.
These beautiful rustic handles with the little flowers really looked great!
Top stained with Miniwax espresso stain.
Side view
All finished and sealed. I sealed the top with one coat poly and used wipe on poly to seal all the paint. My husband just shook his head in disbelief, and now owes me dinner cooked by him! I hope you enjoyed my little makeover, my face book page is www.facebook.com/memawslovelyglass
you can see a couple video tutorials on there regarding the stain shading process.
Enjoyed the project?
Resources for this project:
See all materials
Any price and availability information displayed on [relevant Amazon Site(s), as applicable] at the time of purchase will apply to the purchase of this product.
Hometalk may collect a small share of sales from the links on this page.More info
Published June 24th, 2018 8:10 PM








Frequently asked questions
Have a question about this project?
We want to strip the paint of a tv console stand we got from a thrift store. What & how do you suggest we do this?
Did you have any problem with drawer sliding; if so what was your cure
How did you put the flower on without getting stain on it