How to Build an Easy Clothing Rack

by
Rob & Coco, Hometalk Team
(IC: paid contributor)
7 Materials
$45-55
2 Hours
Medium
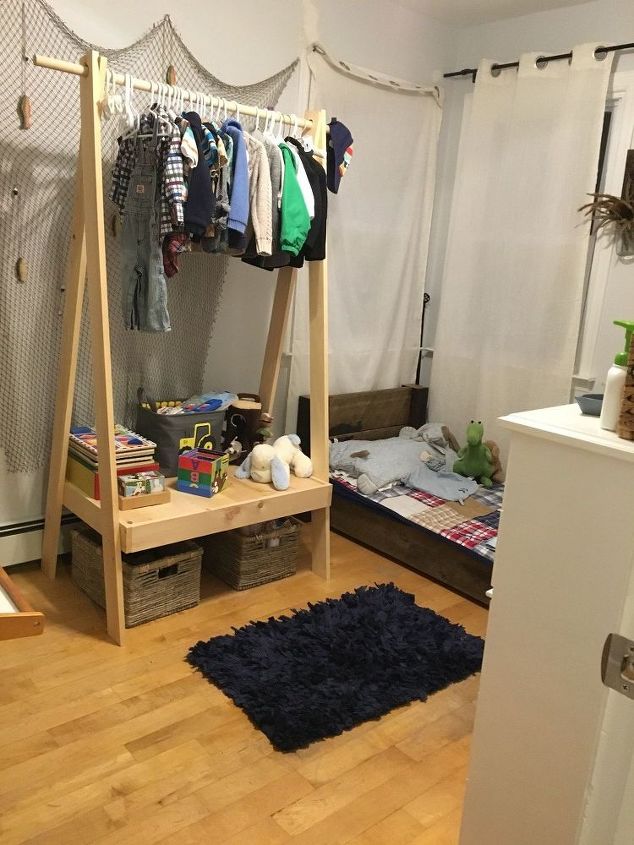
Since having our son, Bo, almost 2 years ago, I’ve been trying to get his room looking tip-top but that just hasn't happened. We live in a roughly 850 sq. ft. house with two rooms, so I’m constantly trying to think of ways to save space. Bo doesn’t have a closet, because I use the closet in his room for my clothes. I have a dresser in his room as well (Rob uses the dresser and closet in our room), so I’ve always used a little wicker basket cabinet/drawer thing for his folded clothes and a hand-me-down baker’s rack from my mom for his hanging clothes. It has worked for us for the past 2 years, but now he’s growing like a weed, which means his clothes are getting bigger and harder to stuff in the wicker drawers. Thus, this amazing clothing rack! Rob was the mastermind in coming up with the detailed plans and doing most of the carpentry work (because apparently I can’t cut the boards perfectly with the chop saw), so I helped as his assistant with this one.
Ok, I know, something is seriously wrong with me — I changed Bo's room around AGAIN. I think I'm done though; I love this new clothing rack and the fact that it can grow with him. This project was easier than I had expected, of course, with Rob's lead on this one, but I would love to do more of these when we have more room for them.
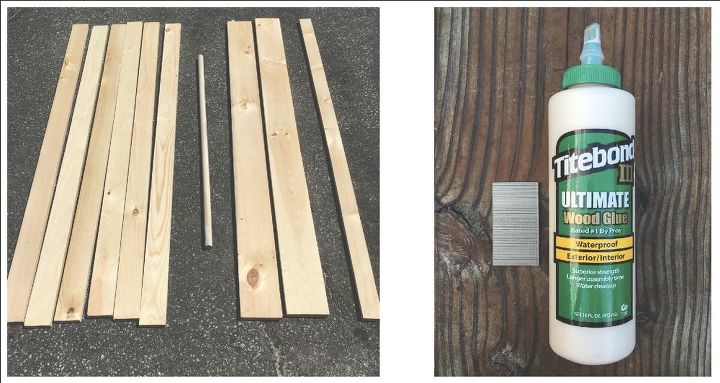
Supplies:
STEP 1: Cut base frame boards
STEP 2: Assemble base frame
STEP 3: Assemble slats in base
STEP 4: Make the legs
STEP 5: Assemble the legs
STEP 6: Attach base to legs
I’m so in love with this clothing rack!!! I wasn’t expecting the base to sit so far up but, as soon as Rob and I flipped the rack right-side-up, Bo brought his trucks over and started playing on it. I decided to put his baskets on the floor underneath and sit some of his toys and books on the base, so he has a little activity spot in his room. If you’re using this clothing rack in a child’s room, you could always add another dowel so you can hang his or her tops/coats on the top dowel and pants on the bottom. Eventually, this rack may be used in another room, so I’m just sticking with one dowel for now.
Enjoyed the project?
Suggested materials:
- Common board (Home Depot)
- Wooden dowel (Home Depot)
- Wood glue (Home Depot)
- Nails (Home Depot)
- Screws (Home Depot)
- Measuring tape
- Forstner bit
Published July 17th, 2016 8:56 PM
Comments
Join the conversation
3 of 22 comments
-
I also meant to say...you did a fabulous job, may try something like this in my bedroom but will have to put on wheels so we can move it out of the room when we need to access the basement (the opening is in the floor at the foot of our bed)
 Lisa House
on Oct 15, 2016
-
Oh love the idea of the wheels! Our basement opening is also in the floor but in our hallway--so annoying! lol!
 Rob & Coco, Hometalk Team
on Oct 16, 2016
-
-
-










Frequently asked questions
Have a question about this project?