How to

  • Silver
  • Gutters
  • Windows
  • Bathroom
  • House
  • Floors
  • Carpet
  • Cabinets
  • Furniture
  • Wood
  • Walls
  • Furniture
  • Electric
  • Drywall
  • Appliances
  • Air Conditioning
  • Plumbing
  • Windows
  • Easter Eggs
  • Rooms
  • Walls
  • Tablescapes
  • Mirror
  • Pillows & Throws
  • Decks
  • Doors & Windows
  • Fire Pits
  • Furniture
  • Planters
  • Raised Garden Beds
  • Sheds
  • Shelves
  • Walls
  • Candles
  • Centerpieces
  • Ornaments
  • Party Decor
  • Wreaths
  • Grow
  • Upcycle
  • Organize
  • Tile

In-depth Guides

Product Reviews

Rooms & Spaces

  • Curtains
  • Furniture
  • Lighting
  • Fireplaces & Mantels
  • Chairs
  • Garden
  • Kitchen
  • Walkways & Paths
  • Fireplace
  • Decor
  • Lights
  • Porches
  • Pools & Ponds
  • Patios
  • Bench
  • Closets
  • Dressers
  • Furniture
  • Organizing
  • Vanities
  • Kitchen & Dining
  • Bathroom
  • Craft Room
  • Laundry Room
  • Home Office
  • Entryway
  • Basement
  • Outdoor
  • Windows & Doors
  • Floors & Ceilings
  • Staircases
  • Home Tours
  • How to

    • Silver
    • Gutters
    • Windows
    • Bathroom
    • House
    • Floors
    • Carpet
    • Cabinets
    • Furniture
    • Wood
    • Walls
    • Furniture
    • Electric
    • Drywall
    • Appliances
    • Air Conditioning
    • Plumbing
    • Windows
    • Easter Eggs
    • Rooms
    • Walls
    • Tablescapes
    • Mirror
    • Pillows & Throws
    • Decks
    • Doors & Windows
    • Fire Pits
    • Furniture
    • Planters
    • Raised Garden Beds
    • Sheds
    • Shelves
    • Walls
    • Candles
    • Centerpieces
    • Ornaments
    • Party Decor
    • Wreaths
    • Grow
    • Upcycle
    • Organize
    • Tile

    In-depth Guides

    Product Reviews

    Rooms & Spaces

    • Curtains
    • Furniture
    • Lighting
    • Fireplaces & Mantels
    • Chairs
    • Garden
    • Kitchen
    • Walkways & Paths
    • Fireplace
    • Decor
    • Lights
    • Porches
    • Pools & Ponds
    • Patios
    • Bench
    • Closets
    • Dressers
    • Furniture
    • Organizing
    • Vanities
    • Kitchen & Dining
    • Bathroom
    • Craft Room
    • Laundry Room
    • Home Office
    • Entryway
    • Basement
    • Outdoor
    • Windows & Doors
    • Floors & Ceilings
    • Staircases
    • Home Tours
  • Ask DIY Question
  • + Post Project
  • Ask DIY Question
  • Join Now
    • My History
    • + Post a new Project
    • Saved Projects
    • Notifications
    • Account Settings
    • Log out
    • Support • Privacy
Preview Mode
Edit & Post

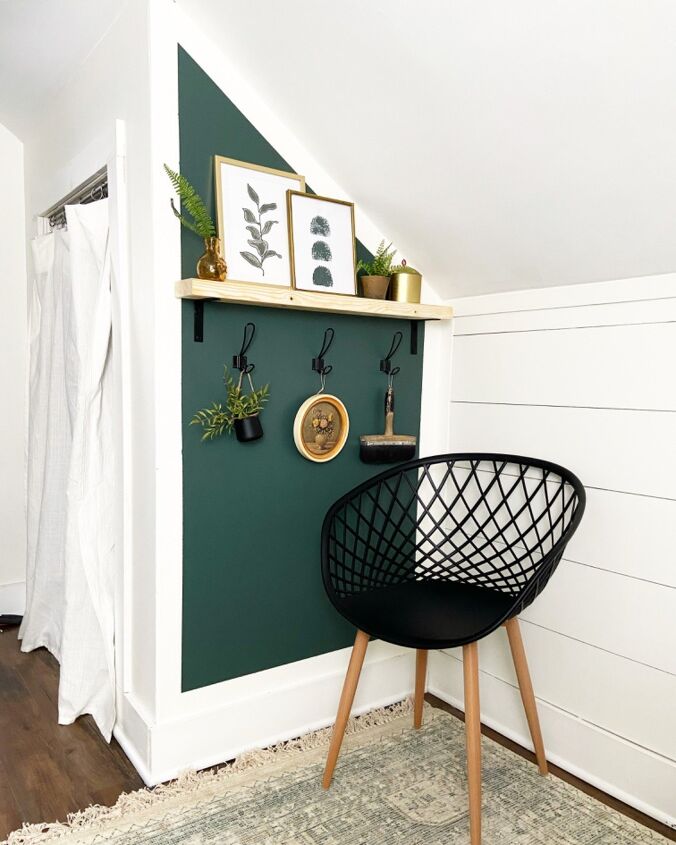
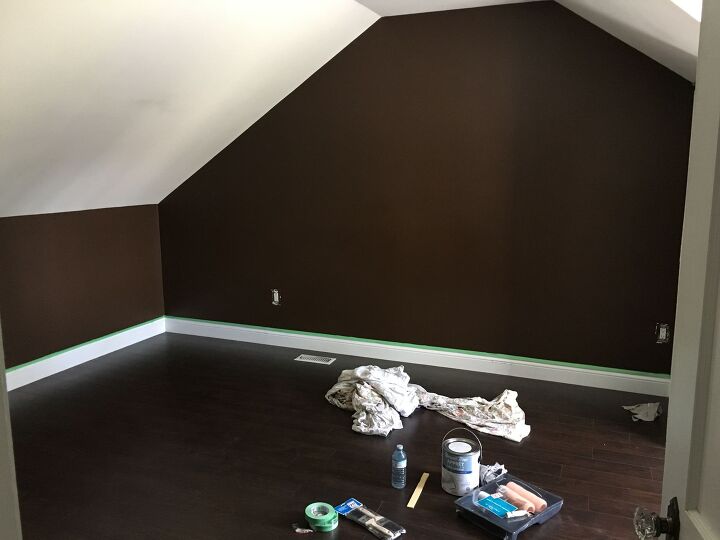
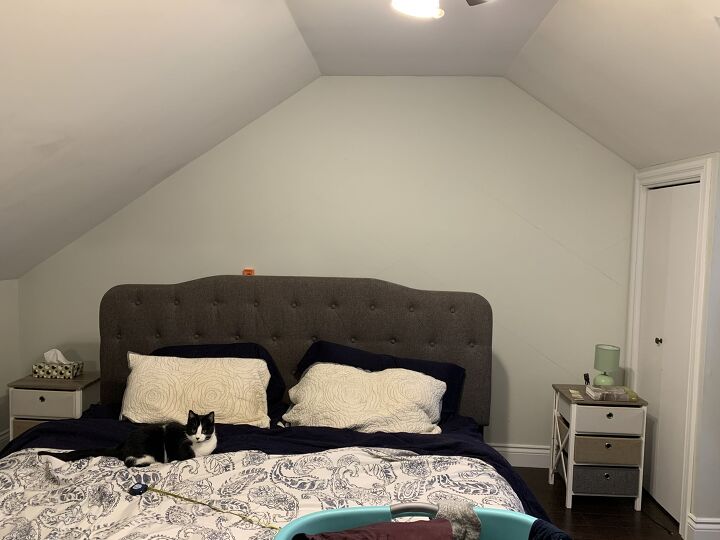
4 Beautiful Ways to Use an Awkward Sloped Ceiling to Your Advantage

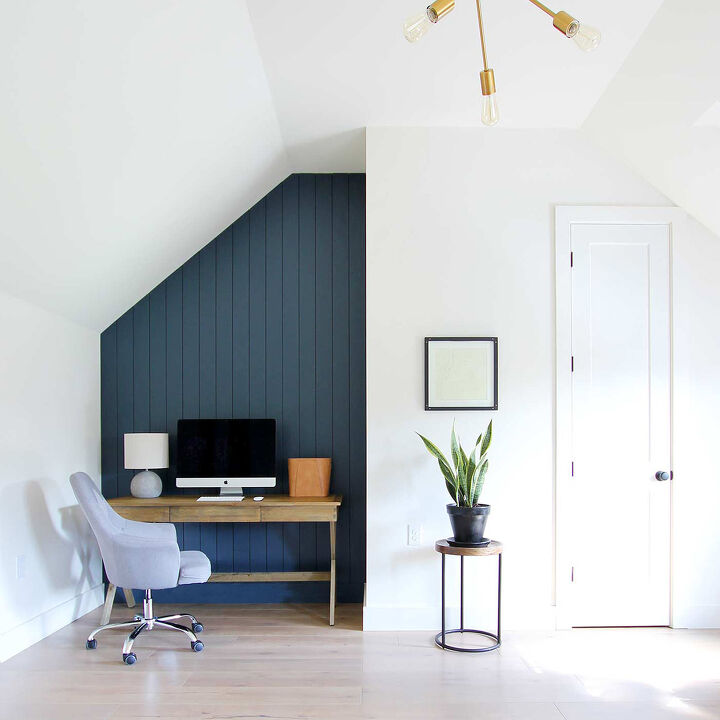
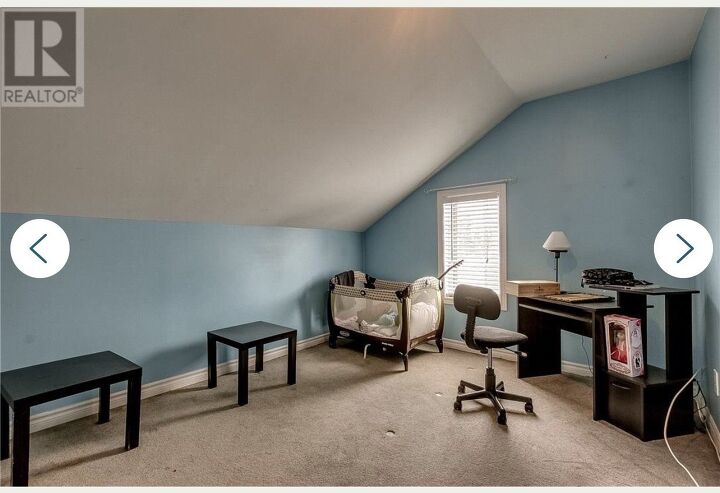
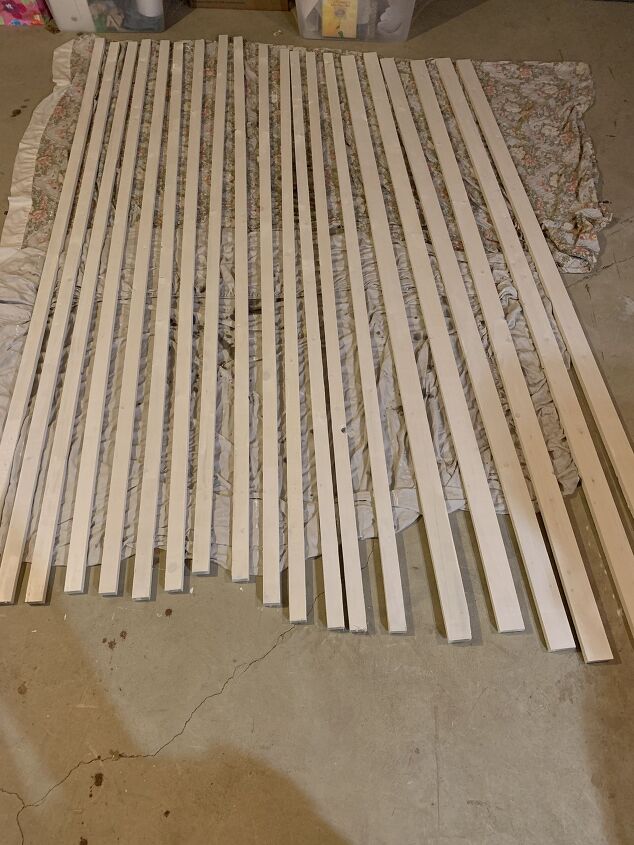
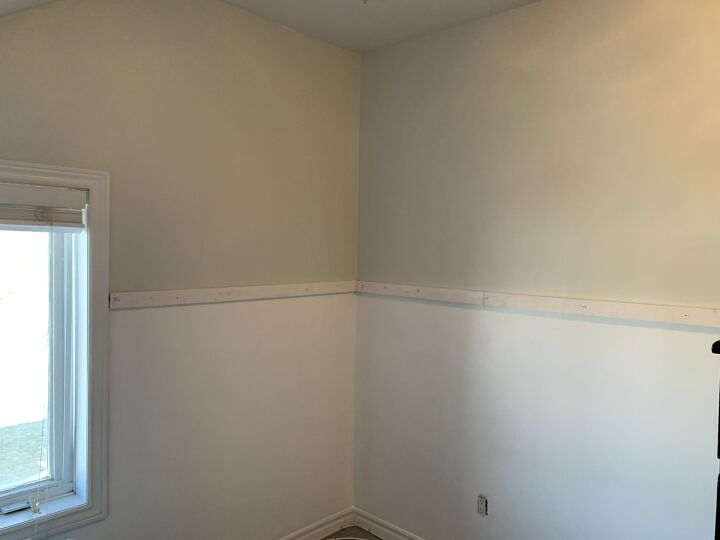
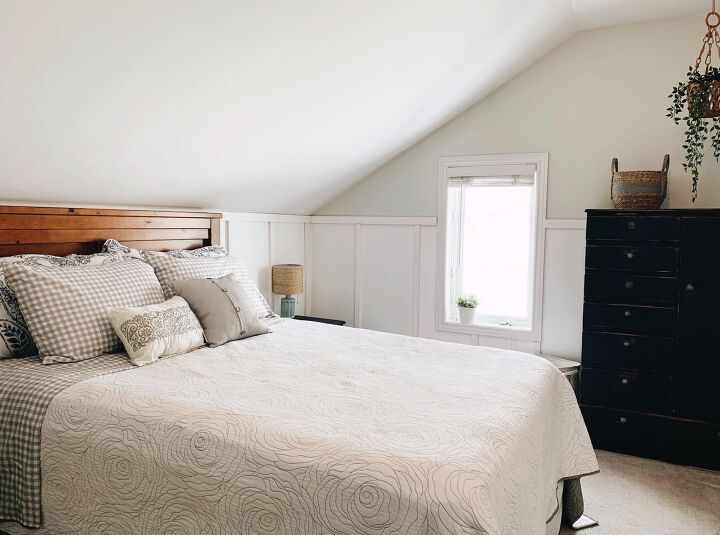
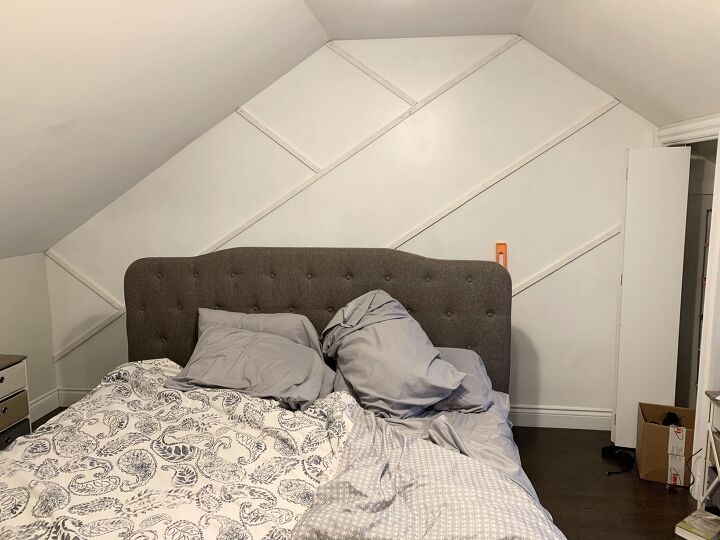
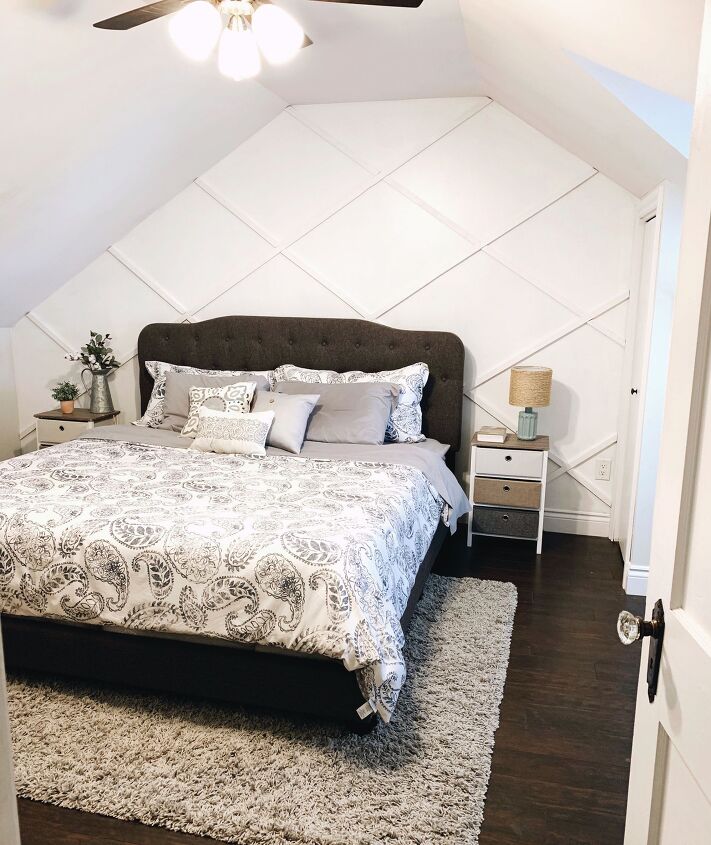
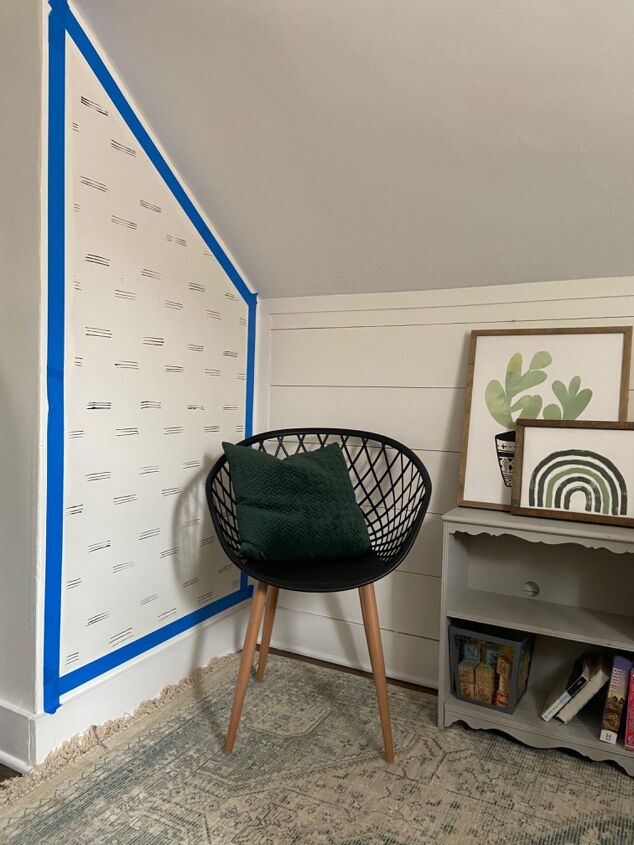
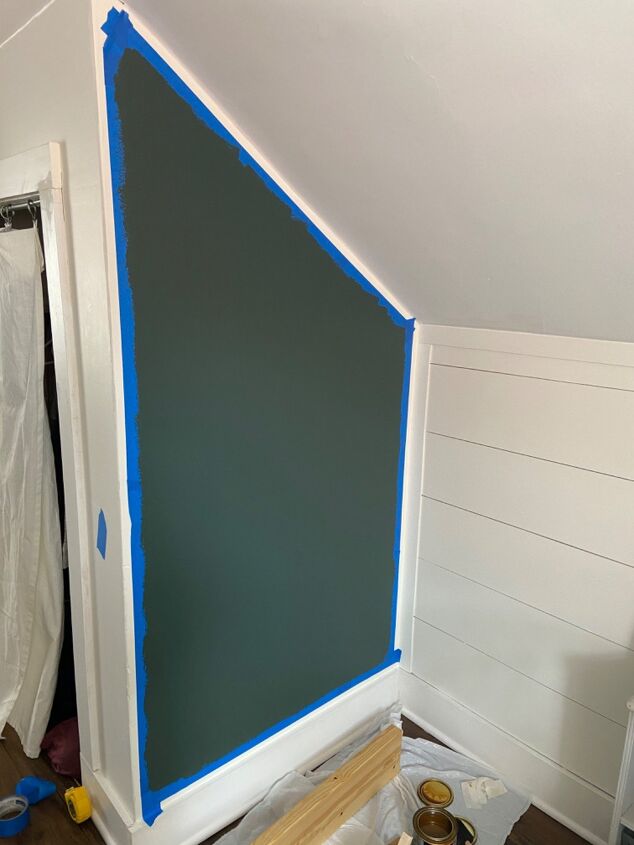
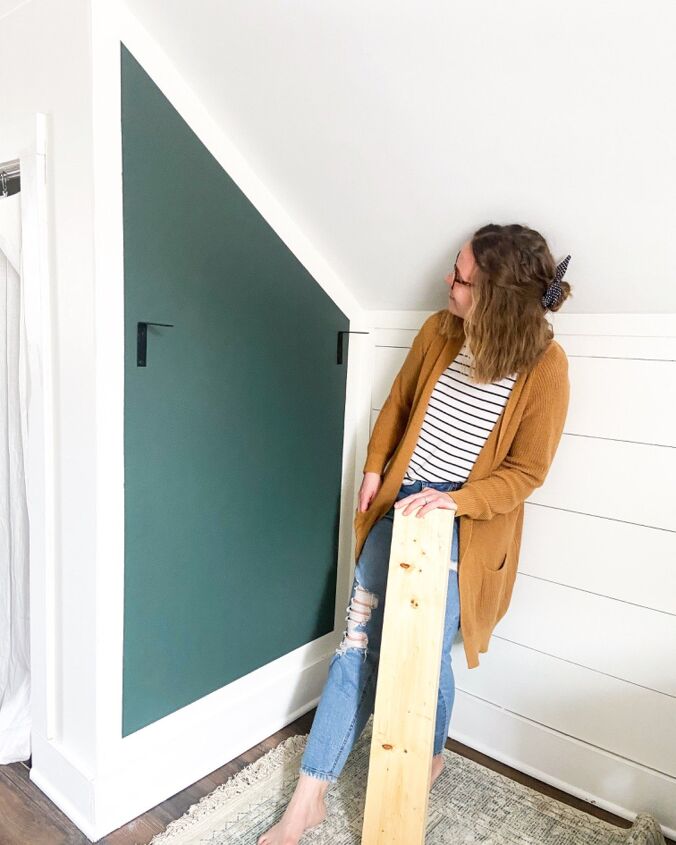
See how you can turn sloped ceilings into your room's best feature.


By Hometalk Recommends
Pin Slideshow Edit Slideshow Open Activity Tool
  • Español
  • Português
1. Create a bold vertical shiplap accent wall

BEFORE Get tutorial here

4 beautiful ways to use an awkward sloped ceiling to your advantage, 1 Create a bold vertical shiplap accent wall
Brooke Jones Brooke Jones
Step 1: Paint the Shiplap

Get tutorial here

4 beautiful ways to use an awkward sloped ceiling to your advantage, Step 1 Paint the Shiplap
Brooke Jones Brooke Jones
Step 2: Measure

Get tutorial here

4 beautiful ways to use an awkward sloped ceiling to your advantage, Step 2 Measure
Brooke Jones Brooke Jones
Step 3: Cut

Get tutorial here

4 beautiful ways to use an awkward sloped ceiling to your advantage, Step 3 Cut
Brooke Jones Brooke Jones
Step 4: Nail

Get tutorial here

4 beautiful ways to use an awkward sloped ceiling to your advantage, Step 4 Nail
Brooke Jones Brooke Jones
AFTER

Get tutorial here

4 beautiful ways to use an awkward sloped ceiling to your advantage, AFTER
Brooke Jones Brooke Jones
2. Add simple board and batten to make the whole room feel cozier

BEFORE Get tutorial here

4 beautiful ways to use an awkward sloped ceiling to your advantage, 2 Add simple board and batten to make the whole room feel cozier
Lauren Ann Design | Farmhouse on Gunn's Hill Lauren Ann Design | Farmhouse on Gunn's Hill
Step 1: Paint the boards

Get tutorial here

4 beautiful ways to use an awkward sloped ceiling to your advantage, Step 1 Paint the boards
Lauren Ann Design | Farmhouse on Gunn's Hill Lauren Ann Design | Farmhouse on Gunn's Hill
Step 2: Place the horizontal boards

Get tutorial here

4 beautiful ways to use an awkward sloped ceiling to your advantage, Step 2 Place the horizontal boards
Lauren Ann Design | Farmhouse on Gunn's Hill Lauren Ann Design | Farmhouse on Gunn's Hill
Step 3: Place the vertical boards every 18"

Get tutorial here

4 beautiful ways to use an awkward sloped ceiling to your advantage, Step 3 Place the vertical boards every 18
Lauren Ann Design | Farmhouse on Gunn's Hill Lauren Ann Design | Farmhouse on Gunn's Hill
Step 4: Paint

Get tutorial here

4 beautiful ways to use an awkward sloped ceiling to your advantage, Step 4 Paint
Lauren Ann Design | Farmhouse on Gunn's Hill Lauren Ann Design | Farmhouse on Gunn's Hill
Step 5: Caulk

Get tutorial here

4 beautiful ways to use an awkward sloped ceiling to your advantage, Step 5 Caulk
Lauren Ann Design | Farmhouse on Gunn's Hill Lauren Ann Design | Farmhouse on Gunn's Hill
AFTER

Get tutorial here

4 beautiful ways to use an awkward sloped ceiling to your advantage, AFTER
Lauren Ann Design | Farmhouse on Gunn's Hill Lauren Ann Design | Farmhouse on Gunn's Hill
3. Create a diamond pattern with molding

BEFORE Get tutorial here

4 beautiful ways to use an awkward sloped ceiling to your advantage, 3 Create a diamond pattern with molding
Lauren Ann Design | Farmhouse on Gunn's Hill Lauren Ann Design | Farmhouse on Gunn's Hill
Step 1: Paint the wall

Get tutorial here

4 beautiful ways to use an awkward sloped ceiling to your advantage, Step 1 Paint the wall
Lauren Ann Design | Farmhouse on Gunn's Hill Lauren Ann Design | Farmhouse on Gunn's Hill
Step 2: Buy 1"x2"x8' boards to use for the trim

Get tutorial here

4 beautiful ways to use an awkward sloped ceiling to your advantage, Step 2 Buy 1 x2 x8 boards to use for the trim
Lauren Ann Design | Farmhouse on Gunn's Hill Lauren Ann Design | Farmhouse on Gunn's Hill
Step 3: Paint the trim

Get tutorial here

4 beautiful ways to use an awkward sloped ceiling to your advantage, Step 3 Paint the trim
Lauren Ann Design | Farmhouse on Gunn's Hill Lauren Ann Design | Farmhouse on Gunn's Hill
Step 4: Nail the trim to the wall

Get tutorial here

4 beautiful ways to use an awkward sloped ceiling to your advantage, Step 4 Nail the trim to the wall
Lauren Ann Design | Farmhouse on Gunn's Hill Lauren Ann Design | Farmhouse on Gunn's Hill
AFTER

Get tutorial here

4 beautiful ways to use an awkward sloped ceiling to your advantage, AFTER
Lauren Ann Design | Farmhouse on Gunn's Hill Lauren Ann Design | Farmhouse on Gunn's Hill
4. Create a color block wall

BEFORE Get tutorial here

4 beautiful ways to use an awkward sloped ceiling to your advantage, 4 Create a color block wall
Mari Mari
Step 1: Tape & paint

Get tutorial here

4 beautiful ways to use an awkward sloped ceiling to your advantage, Step 1 Tape paint
Mari Mari
Step 2: Add a little shelf using brackets and a piece of 2 x 6 pine cut to size

Get tutorial here

4 beautiful ways to use an awkward sloped ceiling to your advantage, Step 2 Add a little shelf using brackets and a piece of 2 x 6 pine cut to size
Mari Mari
AFTER

Get tutorial here

4 beautiful ways to use an awkward sloped ceiling to your advantage, AFTER
Mari Mari
About Privacy Terms Guidelines Media Support Advertise
Follow us
© 2025  Hometalk.com By Hometalk Inc.