DIY Multipurpose Storage Tote

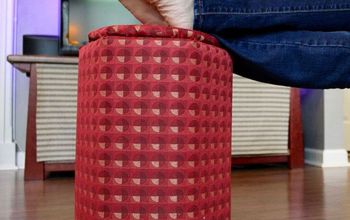
Turn a simple cardboard box into a versatile and stylish storage tote with the help of contact paper! This DIY project is perfect for organizing and carrying items both at home and on the go. You can see more of my crazy creations (Click Here)
Use it to neatly store toys, books, or craft supplies indoors, or as a sturdy container for groceries, laundry, or supplies when you're on the move. Let’s make this practical and attractive storage solution with ease!
Materials Needed:
- Cardboard box
- Contact paper (pattern of your choice)
- Scissors
- Utility knife (optional)
Choose a durable cardboard box in a size that fits your intended purpose.
Ensure the box is clean and free of any stickers or labels. If desired, cut down the flaps for an open-top design.
Use the box's dimensions to cut contact paper into manageable pieces that will cover the box's sides, bottom, and interior.
Peel off the backing and press the contact paper onto the box, smoothing out wrinkles or bubbles as you go. Cover the interior for a polished finish.
Tote Uses:
Store toys, books, or blankets in style.
Keep crafting materials or tools neat and portable.
Carry clothes from one room to another.
Transport groceries with ease from car to home.
Pack snacks, drinks, and essentials for outdoor gatherings.
I would love to have you stop by my blog Chas' Crazy Creations for the full tutorial as well as sign up for my latest creations, posts, recipes, exclusives, and more...
I would love for you to subscribe to my YouTube channel to see more of my crazy creations
Enjoyed the project?
Suggested materials:
- Box
- Contact paper
- Scissors

Comments
Join the conversation
-
 Chas' Crazy Creations
on Dec 10, 2024
Thank you
I'd love to invite you to join me ...
Chas' Blog - https://chascrazycreations.com/
Chas' YouTube - https://www.youtube.com/c/chascrazycreations
-








Frequently asked questions
Have a question about this project?