DIY Wing Back Chair Reupholster!

by
Lincluden Cottage
(IC: blogger)
$200.00
Medium
After seeing an inspirational photo of a dinning room table flanked by two wing back chairs, I knew I wanted to create the look! HOWEVER, being on a limited budget, I knew I couldn't afford to purchase new chairs or afford professional reupholstery rates. SO, out of desperation, I began my first DIY upholstery project. I purchased two chairs on Kijiji for under 100.00, rented a compressor staple gun, bought a few supplies and away I went!
First, I watched a series of videos on Youtube made by a professional reupholster to understand the process, although, once I began, I did not reference the videos as much but rather used what I call "free style"! ;) Protective eye glasses are recommended! ;)
I began by stripping the chairs fabric using a screw driver and a staple remover, beginning underneath and working my way up. Once you remove one portion of the fabric, the next section will reveal itself, so I worked that way.....like I said "free style"! Be prepared to break a few nails! It can get physical!
Along the way, I took photos to remind me how the chair was constructed. This is a picture of the flexible metal tacking. I also watched a Youtube video about how to use flexible metal tacking. It's pretty easy, you staple the tacking around the wings place you cut material on top, using a regulator (long metal upholstery tool) tuck the edges in and tap it lightly with a rubber mallet (or in my case, a hammer covered with a sock).
Here, you see the cardboard stripping stapled in place under the arm of the chair to keep it lined up and tight.
A photo of the underneath of the chair before the side fabric was removed.
See how the bottom of the chair fabric was removed exposing the next section to work on.
Chair number two being stripped down.
While removing the fabric, I saved all of the pieces and the backing to use as a pattern for the new material. After the new pieces were cut out, I then began to staple them back on to the chair beginning with the front (pulling tightly and smoothing the fabric through the sides and stapling on the back frame). Next the inside wings, pulling the fabric through the sides, smoothing and wrapping it around to the back. In order to fit the fabric, in certain places small cuts were made. I played with the fabric and where it buckled, I made small cuts, tucked them under until it smoothed out. Once the top wings were in place, I began working on the arm rests, pulling material through to the bottom stapling on the underneath frame and the outside bottom frame. I wrapped the material around the front of the arm rest folding and stapling as I went to create the look seen in the bottom photo.
Wrapped arm rest. Done by folding and stapling material to the side frame. Once this is in place, the outside of the arm rest can be stapled using cardboard stripping to keep is tight and aligned.
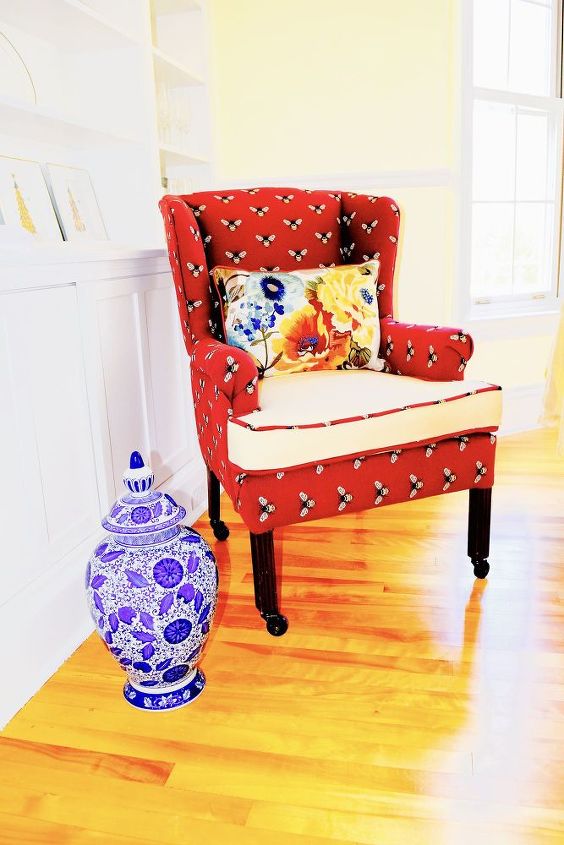
Finished product. The chairs were too low for the table so I........
ADDED CASTERS for height! Now I can move them around the room with ease! I obviously haven't re-stained the legs yet.....on my list! ;)
They add a pop of colour and give the table a formal look.
Enjoyed the project?

Want more details about this and other DIY projects? Check out my blog post!
Published March 9th, 2016 3:39 PM
Comments
Join the conversation
4 of 75 comments
-
-
Wonderful! Go for it! ;)
 Lincluden Cottage
on Aug 22, 2016
-
-
-
That Bee fabric is precious. Good work.
 Mickey Baron
on Aug 22, 2016
-
Thanks so much! ;)
 Lincluden Cottage
on Aug 22, 2016
-
-









Frequently asked questions
Have a question about this project?