Creating a Stone Mosaic Front Garden Path

The Mission: Replacing an ugly concrete pathway with a unique and intricate stone mosaic pathway. (Yes I have the Mission Impossible theme in my head)
A lot of hard work but well worth the effort!
⚠️Please research if this will work in your area before attempting this project. I’m in the Pacific Northwest and have mild winters.
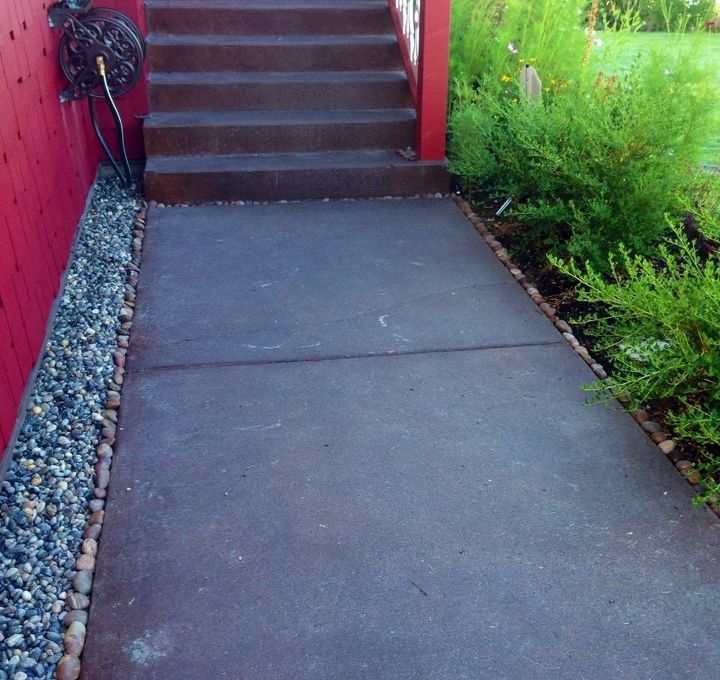
Our front path was originally ugly grey concrete (With a huge crack you can’t see in the pic) that I water stained brown 3 years ago to make it bearable and so it would go with our new siding. Finally it’s time to put in the pathway I’ve dreamt about!
First...I had help removing the old pathway. It was jackhammered, dug down, framed and tamped in 4 inches of gravel for a solid frost friendly base. What a nice clean palette to play with!
Over the past several months, I’d gone to Home Depot and a few different landscape suppliers to gradually build up my stone collection for this project.
I ended up with quite the stockpile of stones in a variety in sizes, shapes and colors. I also started buying 80lb bags of Type S mortar 2 at a time.
I used larger flatter stones as stepping stones and lots of smaller stones for the detail work.
First, I had to separate all the smaller stones into color groups. Then I laid out the larger stones for placement and get a sense of how much detail work I was looking at, which was a lot!
laying it out first really helped with the planning!
Mixing the mortar was my least favorite part. I was so nervous that I’d mix it too thin! I just had to be patient and add the water gradually and it all worked out.
Each little stone needed to be set by hand so I worked with one bag at a time. I had to work fairly quickly to get them in before the mortar set too much. I lengthened the dry time by working early in the morning before the sun worked it’s way around.
It looked like an unholy mess while I was setting them but I kept reminding myself it would be fine :)
As each section dried, I would gently scrub away the excess mortar with a wire brush and rag. I had to be quite gentle because I did not want to dislodge any stones.
Doing it this way made it possible for me to see what I’d done in the previous section and helped deciding stone placement for the next section.
In total for a 12’ x 4’ path, I used a 400-500lbs of stones and eight 80lb bags of mortar (phew!). The final steps are letting it cure for a week and spraying it down multiple times a day so it doesn’t dry too quickly and crack.
This part I still need to do..scrub it with muriatic acid to remove any mortar residue rinse really really well. The final step is to use a stone enhancer and sealer. This will make it absolutely pop and look exactly as it does when it wet!
Wait for it.....BLAM!!
I am so happy with the results! 
I keep getting asked how long it took and it’s so hard to pin down with the hours of hand sorting the stones, placing them, letting each section dry and cleaning it before starting the next one, and the controlled curing. I would have to guesstimate not counting the sorting and curing, about 4 hours per bag of mortar.
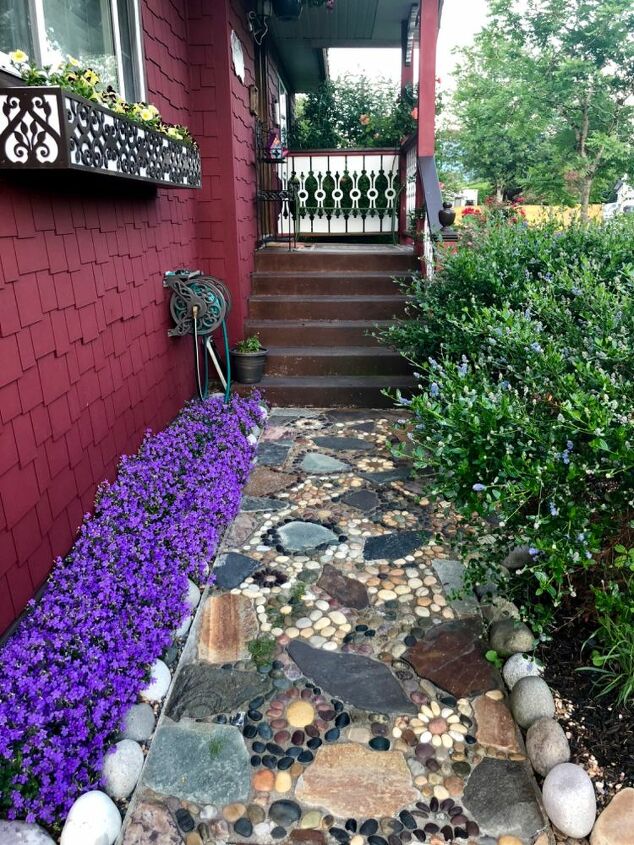
For the left side of the path, I’m planning to get some large stones and put some purple phlox or creeping rock cress flowers. I’ll add the picture when that part is all done! 
 UPDATE: Today the wood framing was removed and the muriatic acid wash was done! Now it really pops!
I will be applying the stone enhance/sealer next week!
 NOTE: The suggested materials after this post are not the products I actually used. They were added by Hometalk, not me. I used:
- Sakrete Type S Mortar (grey)
- Miracle Sealants Stone Enhancer and Sealer.
A year later the garden around it has filled in nicely and it has survived a winter with ice and snow!
More Gorgeous Garden Projects
Enjoyed the project?
Resources for this project:
See all materialsComments
Join the conversation
-
 Cindy Jernee
on Oct 24, 2023
Gorgeous! I just bought a fixer upper. I guess I know what I'm going to do next summer!!
-
-
 Carla Light Branham
on May 06, 2024
Beautiful. You are very talented.
-















Frequently asked questions
Have a question about this project?
That turned out beautifully. What about the stairs. Would it be too much to do the stairs the same way? I think it would be outstanding! You are so talented.
OUTSTANDING! Do you make house calls?????
Hi. First, this is absolutely stunning!
Next, I have a couple of questions...