#spring2020refresh. DIY Patio Towers

Looking to fill in an odd corner, lift up you planters or just want to liven up your outdoor patio? Here’s a simple and eye catching DIY! If you’re like me and have several brick around from patios, you can salvage what you have and create something perfect for your outdoor space.
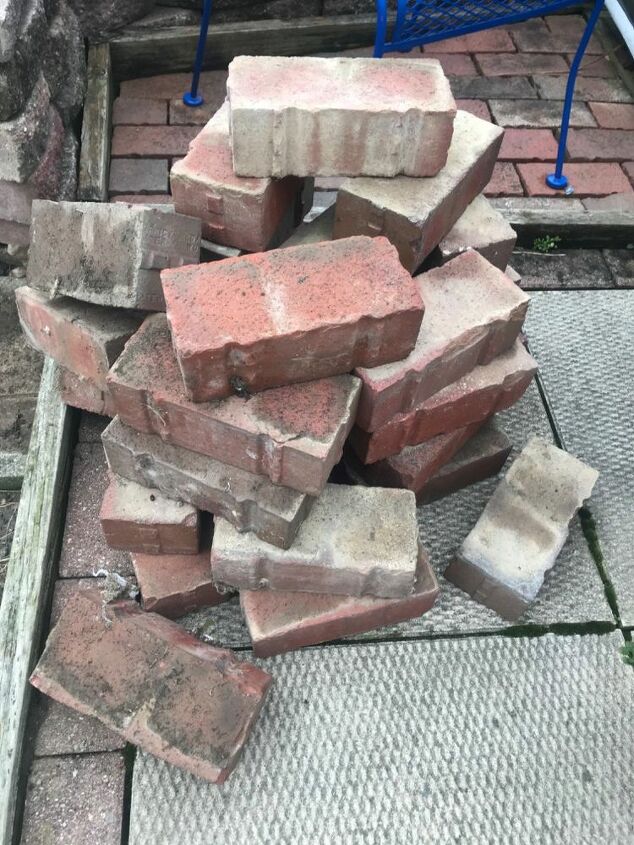
I had quite a bit of left over brick from an old patio that was dug up. You can use salvage brick or buy new brick pavers from a store. If you get the standard brick pavers, those are typically 2” thick, you will just need more to create the height you prefer. The ones I used are 4” thick.
-Measure the height you’d want your tower to be, divide by the thickness of brick to determine about how many you’d need to get that height then times by 4 to get your total brick/ pavers
(Ex. I wanted mine to be about 3 feet (36”). My pavers are 4” thick. 36 divided by 4 =9
9x4=36. So I’ll need 36 brick.
You'll need two square patio pavers for the bottom and top levels. Typically these are 16” square and 2” thick. Be sure to add the 4” to your height of the tower.
Position where you want your tower to stand. Make sure that it’s level before you begin stacking the brick/pavers
Start your first row with alternating directions. Be sure to center the brick/pavers on your bottom square paver. Next step shows how the next row will be stacked.
Alternate the way you stack the brick each row. Next picture shows the side view. Ass you stack keep your brick/pavers lined up and keep it square.
Each level will be a different side of the brick. Continue to the next level.
Be sure to use a level every other level of brick/pavers. This will be able to help you find issues with the balance during the stacking, rather then when your finished.
Once you get to your desired height, make sure your tower is squared up. It’s not going to be perfect, but just check it all around to make sure it’s all lined up. Mine looks a bit off, because of the old brick I used.
After you get your tower square up and level, it’s time to add the final square paver. Again, check the tower with the level, to see if any tweaks need to be made.
My patio is far from finished, but I love the addition of these towers. It will really complete the look.
I plan on using planters on mine as soon as it’s warm enough to plant. But you certainly can leave them as is or decorate how ever you want! After all it’s your home!
I hope this inspires you! Please follow me on my social media accounts! The links are posted.
Enjoyed the project?
Resources for this project:
Comments
Join the conversation
-
 Mary Porod
on Mar 14, 2020
Love the look of the old brick! I might try a modified version!
-
-
-













Frequently asked questions
Have a question about this project?
You’ve just given me some great ideas! I love how it looks. You’ve added great architectural detail in a very clever way!
I have double windows could I make two and stack my window box on them?
What did you do to ensure that each layer of brick was level?
Just keep trying different individual bricks?