How I Turned the Space Under My Deck Stairs Into a Deer Proof Garden!

I was constantly fighting with the deer in my neighborhood! Even though my backyard is fenced in, they are able to hop the fence easily and made quick work of anything I planted last year being it flowers or even a plum tree that they murdered! This year I wasn't messing around! plus I wanted to find a spot that was out of the way for my garden.
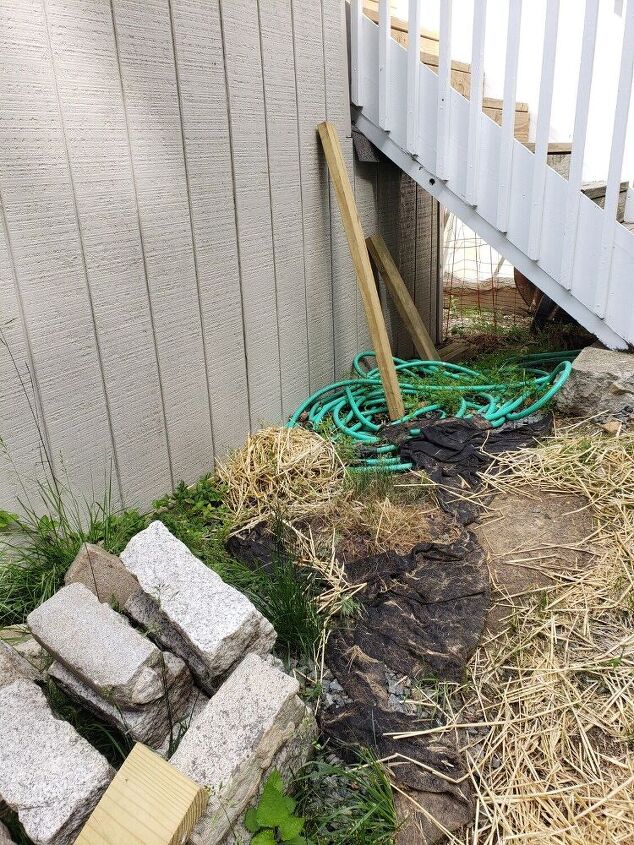
I chose the area under my deck stairs. The shed is already under the higher portion. It seemed like the perfect spot for a garden that was out of the way in an otherwise, wasted space. Plus, I wanted to use the wall of the shed on the left hand side, as well as the stairs themselves for the back, as part of the frame to keep critters out! Plus this area was a place for junk to accumulate!
The first thing was cleaning up the space and framing out a garden bed. A friend of mine gave me the pave stones for free but there are many different materials that you can use to create the raised bed. For the left side there was already a wood plank the previous owners had place in connection to the shed. The back I used a 2 by 4 and screwed it into the deck stairs.
I used 1/2 PVC tubing that I cut to create a rectangular frame around the garden bed. I used two 3-way elbows to connect each tub at the corners and then drilled a screw into the shed wall that the open tub is hanging on.
I then used deer netting that comes in 12 ft length to drape over the PVC frame.
Using a staple gun, I stapled the netting to the shed which made the back wall of my garden bed.
For the corners, I used zip ties and pulled the netting taught around the rectangle including the opening at the top to make sure no birds would swoop down into my garden!
Here is a look from the other side of the deck stairs. I stapled a piece of deer netting here is well. Its unlikely that a deer would have been able to get into this narrow space behind the stairs but a chipmunk could!
Here is the completed look! A secure place for my vegetables to grow and thrive :)
Even though I wanted animals OUT, I still wanted to be able to get in! For the area towards the bottom of the stairs, instead of putting staples there I used hooks so I could open the netting when it comes times to harvest my crops. I think Velcro would work was well.
I used Popsicle sticks to mark which crop was in each row.
A few weeks later my little plant babies are growing with no disruption from pesky animals!
The cost was approx. $50 for the pvc, fittings, deer netting, hooks and zip ties. That does not factor in the cost of the stones I used because they were free to me. However, I don't think this is a necessary material as a bed can be made from a variety of different material some of which are more or less cost effective.










Frequently asked questions
Have a question about this project?
How do you keep other animals like birds and opossums from getting caught up in the plastic fencing?
Thank you. I had been wondering how to keep the pest from climbing over the top of my fence into my garden. Great idea.
You mean to tell me after all these years, Bambi is a pest?, lol.