


Pringles Can Craft: The Velcro DIY Hack You Need to Try!

What if I told you that your next great organization hack is sitting in your pantry, disguised as an empty snack container? Yep, that leftover Pringles can is about to get a second life, and all it takes is a little Velcro!
This Pringles can craft is proof that DIY storage solutions don’t have to be expensive—or complicated. Whether it’s taming cords, storing kitchen utensils, or keeping remotes from disappearing into the couch abyss, this clever Velcro trick turns a simple container into a surprisingly useful organizer.
So, before you toss that empty pringles can in the trash, let’s put it to good use!
Tools and Materials:
- Empty Pringles can (regular or mini)
- Velcro strips (self-adhesive)
- Scissors
- Decorative paper
- Glue
- Markers or paint for decoration (optional)
Hometalk may receive a small affiliate commission from purchases made via Amazon links in this article but at no cost to you.
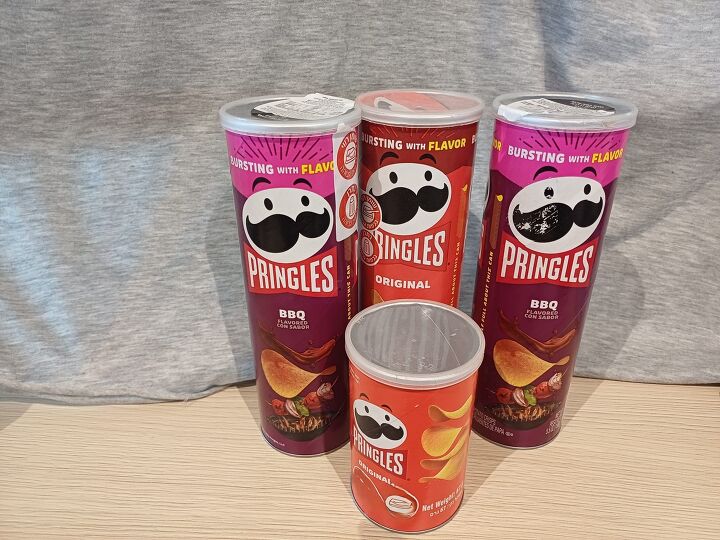
1. Choose Your Pringles Can
Start by selecting your Pringles can. You can go big or small, depending on the organization job you have in mind.
If you're aiming to store larger items like kitchen utensils or cords, the regular-sized can works great. But if you’re looking to organize smaller items—think keys, lip gloss, or pens—the mini can will do the trick.

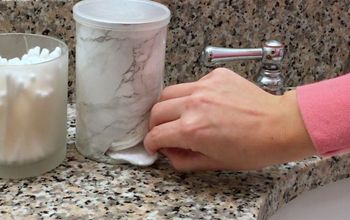
2. Clean and Prep the Can
Before we get crafty, let’s make sure our Pringles can is fresh and ready for its big transformation.

Since these cans are designed to keep chips crisp, they tend to hold onto grease and odors.
But don’t worry—this quick cleaning method will take care of that.

Start with a Baking Soda & Rice Scrub: Add 2 tablespoons of baking soda and a handful of uncooked rice into the can. Close the lid and shake it like you're making a maraca solo. This scrubs away grease and any stubborn crumbs. Dump it out when you're done.


Rubbing Alcohol Wipe: Pour a little rubbing alcohol onto a paper towel and wipe the entire inside. This breaks down lingering oils, making sure your can is grease-free.
Vinegar Steam Treatment: Soak a paper towel with white vinegar, place it inside, and seal the lid. Let it sit for two hours to absorb any leftover chip smell.

Final Wipe & Air Dry: Remove the vinegar-soaked towel, wipe the inside dry, and let the can air out for a few hours.
Now, it's fresh and ready for crafting!

3. Personalize Your Pringles Can
Now for the fun part—decorating!
This is where you can get creative—fabric, paint, ribbon, scrapbook paper—the possibilities are endless!

I had some cute scrap fabric lying around, so I used Mod Podge to attach it to the can, covering both the lid and the base for a seamless look.

But I wanted a little extra flair, so I dug through my craft stash. That’s when I found a red hairband my daughter no longer used—perfect! I secured it around the top of the can with E6000 glue.

I placed hairbands around the fabric to keep it in place while the glue dried.

For the bottom, I needed another red accent but couldn’t find anything that matched. Then I spotted a red balloon—yes, a balloon!
I snipped off the top and stretched it over the bottom of the can, sealing it with a layer of Mod Podge. It worked like a charm!

4. Cut Velcro Strips and Attach
Now for the magic ingredient—velcro! Cut two strips of velcro: one for the lid and one for the bottom of the can. You’ll attach the velcro to surfaces that will be hidden when the can is attached to a wall, desk, or cabinet.

If you want to make this a removable storage option, apply velcro to both the can and the surface where you plan to attach it (like under a desk or inside a cabinet).
Press firmly to make sure the velcro adheres well.
Pro Tip:
Use velcro with a strong adhesive backing for the best hold. You don’t want your can falling down mid-use!

5. Use It for Storage
There are many ways you can use this to store items around the home.
Stick it to the side of the bed to store your phone.

Velcro the decorated Pringles can under a desk or table to store emergency cash, snacks, or keys. It’s a secret stash spot only you know about!

You could even stick it to the back of the couch to keep remotes easily available but out of site.
More Clever Ways to Use Your Container:
Car Organizer
Stick your Pringles can under the seat to hold sunglasses, extra charging cords, or even snacks. It’s a great way to keep your car tidy without taking up much space.
Portable First Aid Kit
Line the inside with soft padding, fill it with band-aids, antiseptic wipes, and mini scissors, then velcro it to the inside of your car door or backpack. It’s a handy emergency kit that’s always within reach.
Velcro Charging Station
Cut holes in the lid of the can for charging cables to pass through. Stick the can under your desk to organize all those pesky cords!
DIY Kitchen Utensil Holder
Store spatulas, wooden spoons, or whisks. Velcro the can under a cabinet or pantry door to keep your counter clear!
More Brilliant Upcycling Ideas
Pringles Can Craft with Velcro: The DIY Hack for Clutter-Free Spaces!
There you have it! Who would’ve thought that a Pringles can could become such a handy, versatile organization tool?
With just a few simple materials and some velcro, you’ve got a creative way to keep your home neat, tidy, and clutter-free.
Now it’s your turn—grab an empty can and get crafting! I’d love to hear how you use your Pringles can, so don’t forget to share your creations with me.
Comments
Join the conversation
-
Use a lays plastic chip container instead much better less work they are blue just take the label off and wash the inside out


Frequently asked questions
Have a question about this project?