


How To Make a DIY Crate Organizer Using Dollar Store Supplies

Looking for a budget-friendly way to tidy up your desk?
This crate organizer is easy to make using affordable materials from Dollar Tree.
With just a few wooden crate bins, cork bulletin boards, and some glue, you can create a desk organizer with built-in storage.
Follow these simple steps to build your own!
This post was transcribed by a member of the Hometalk editorial team from the original HometalkTV episode.
Tools and Materials:
- 2 cork bulletin boards
- Several wooden crate bins (2 sizes)
- Hot glue gun and glue sticks
- Small wooden block pieces
- Scissors or utility knife
Hometalk may receive a small affiliate commission from purchases made via Amazon links in this article but at no cost to you.

1. Arrange and Glue the Crates
Lay out your wooden crate bins to decide on your design.

Start by hot gluing two bins together to create a pair.

Next, glue and stack three bins to form the main structure.

Then, create another stacked section of crates to match the opposite side.

2. Attach the Top Crates
Take the first pair of glued crates and insert them between the stacked crates, positioning them near the top.

Secure them with hot glue. This will create compartments for extra storage.

3. Add the Cork Bulletin Boards
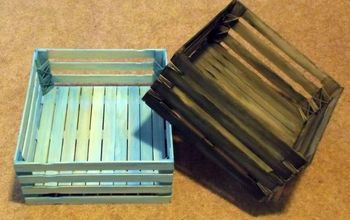
Remove the handles from the cork bulletin boards so they fit flush against the crates.

Turn the crate organizer onto its side and apply hot glue along the edge.

Place one cork board on top and press firmly to adhere. Flip it over and repeat on the other side.

4. Create Drawers with Small Crates
Use smaller wooden crate bins to make sliding drawers.

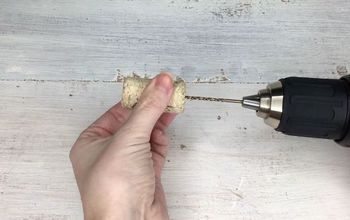
Attach small block pieces to the center of each for easy pulling.
Then, slide them into the larger crates to create functional storage compartments.

5. Fill and Enjoy Your Organizer
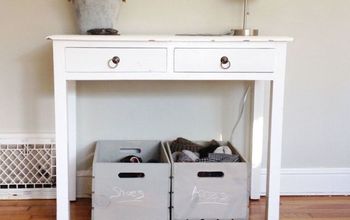
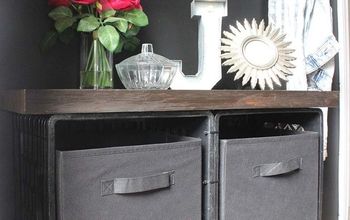
Now that your desk organizer is complete, it's time to put it to use!
Store office supplies, craft materials, or small accessories inside the compartments and drawers.

DIY Crate Organizer Tutorial
And that’s it! With just a few simple steps, you’ve made a stylish and functional crate organizer using budget-friendly supplies.
This is a great way to keep your desk tidy without spending a lot of money.

Need More Wooden Desk Storage?
Have you tried making your own desk organizer before? Let us know in the comments!
Comments
Join the conversation
-
👏 Very clever 👍 That seems it could be constructed various ways. Two draws even. 🤷♀️


Frequently asked questions
Have a question about this project?