


Transform an Old Fridge

A client of mine lives in a studio apartment in Queens. His space is very industrial -dark gray ceiling, metal cubes for a coffee table, and he even poured his own concrete floors to add to the industrial look he is going for. So, when faced with what to do about his out-dated white appliances, we decided to paint his fridge instead of getting him a new one! There are a few products out there that promise stainless steel like finishes because they actually contain real stainless steel pigments! I tried Rustoleum's Stainless Steel appliance paint. The can promises a "single application" and although that is far from the truth, the outcome is pretty good if you have the patience for several coats. In the end, we took an old 80's apartment sized fridge and updated its look for the cost of a can of paint.
Best Rustoleum spray!
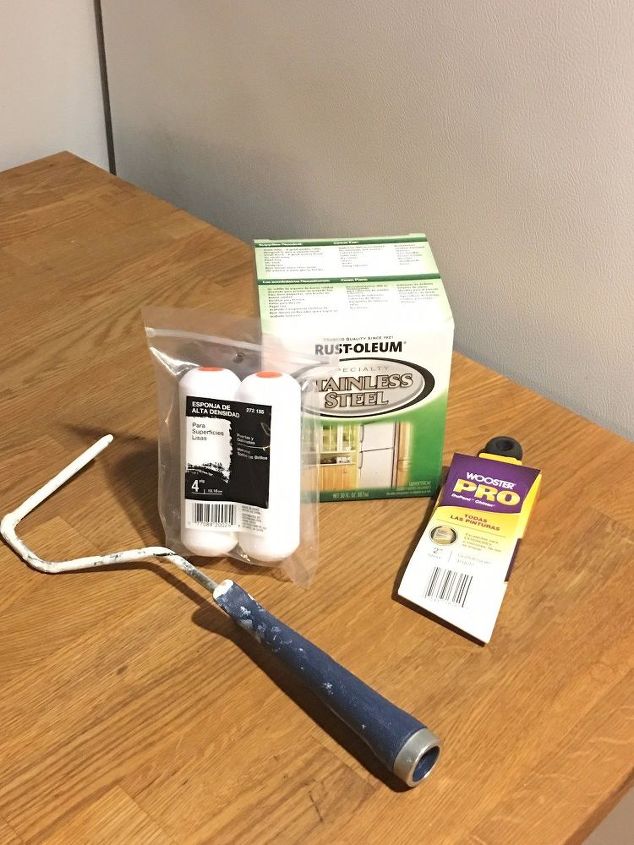
MATERIALS: 4" roller tool 4" foam roller (later on in the project I switched to a regular roller) Angled paint brush Paint Tray Rust-Oleum's Stainless Steel paint Black spray paint (optional) Phillips head screwdriver Wrench Respirator
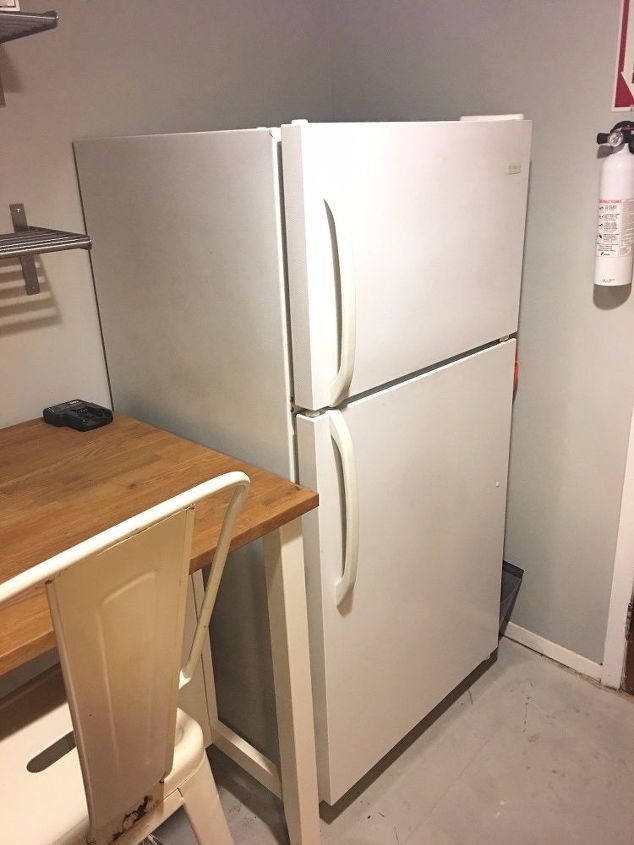
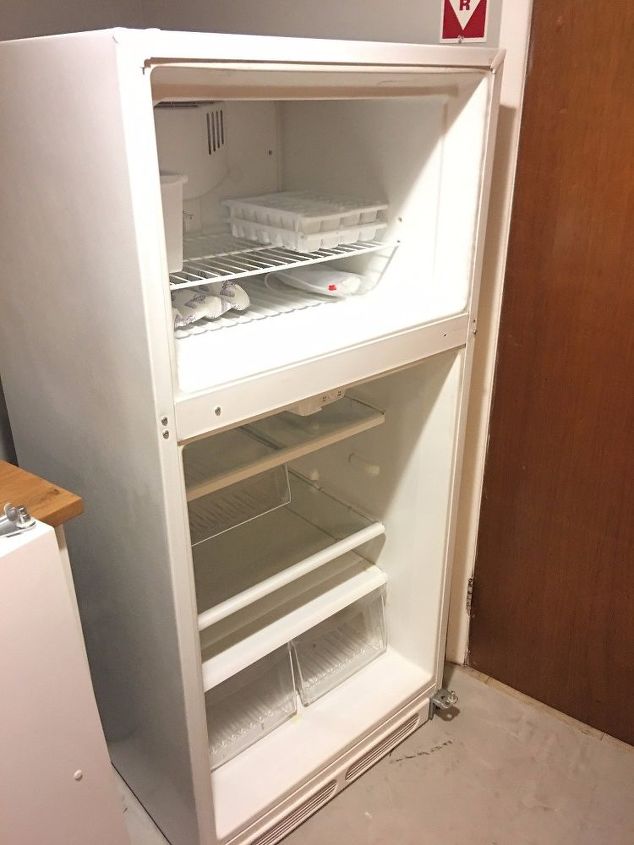
STEP 1: We started out with an all white fridge. The product states that if you're painting an appliance there is no need for primer. I decided to follow the instructions, but I wonder if that's why I had to apply 3-4 coats.
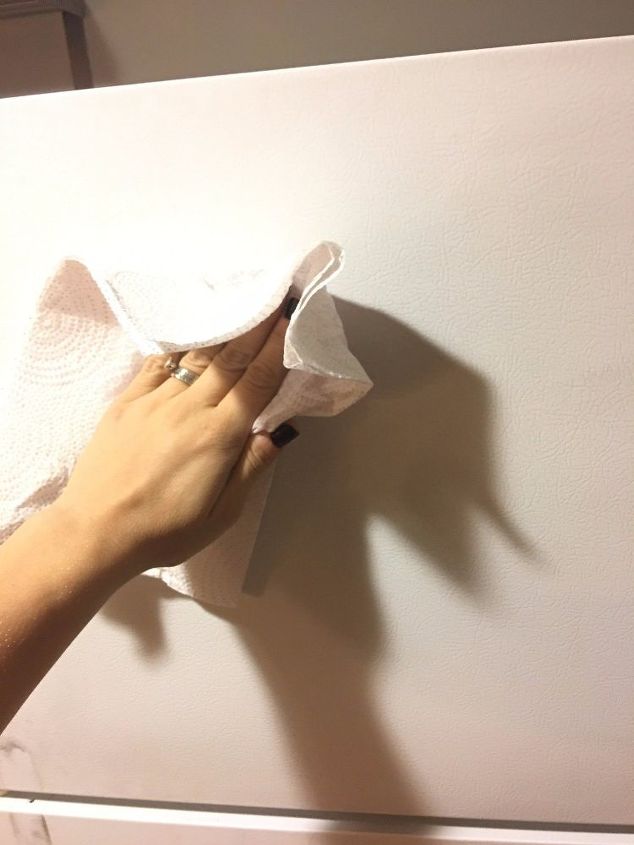
STEP 2: Next step was to clean the outside of the fridge thoroughly. I used a simple solution of rubbing alcohol and water, but you could also use vinegar and water. It removed a lot of the old grime that can burry itself into the little grooves of the fridge. STEP 3: Next I opened the product and poured a little into a paint tray. This is very stinky, so wear a respirator if you can't haul your fridge outside!
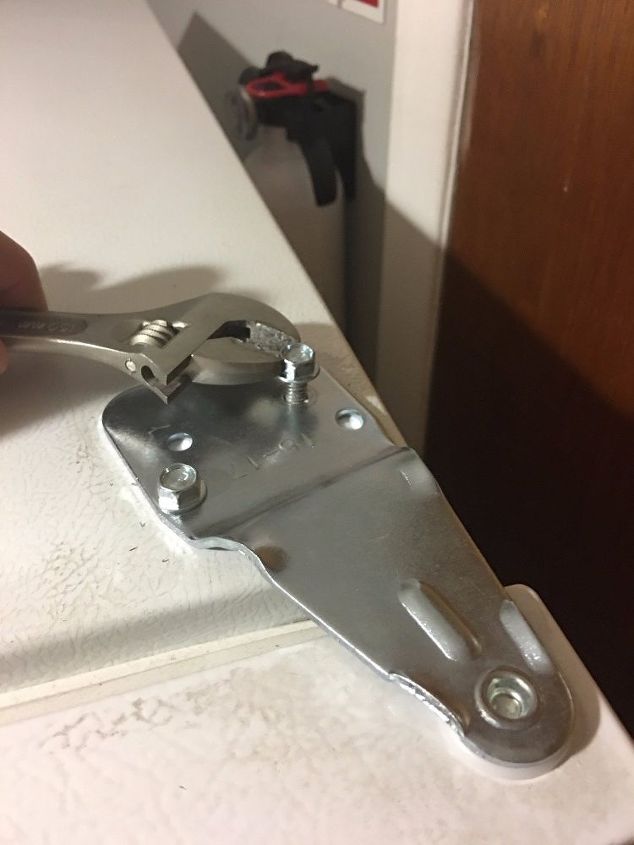
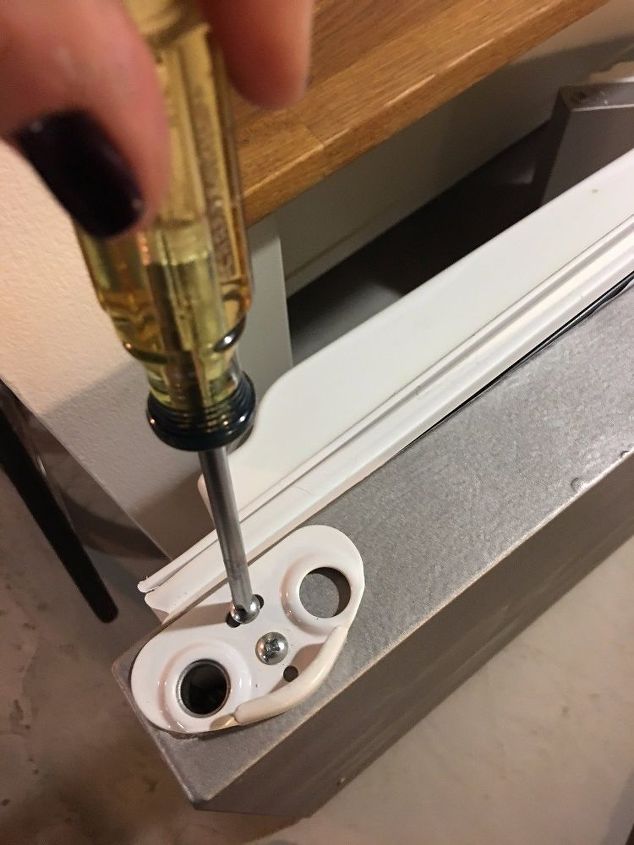
STEP 3: Remove the doors. Different fridges will require different tools for this step; I had to use both a wrench and a Phillips head screw driver. I put all the hardware to the side.
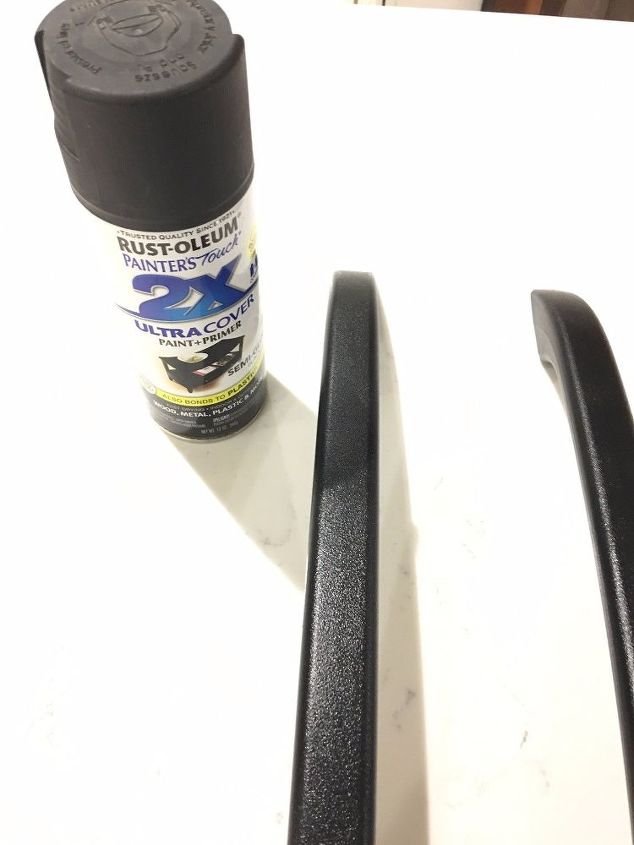
STEP 4: I removed the white handles and, instead of painting them stainless steel as well, I decided to paint them a glossy black. I set them aside to dry.
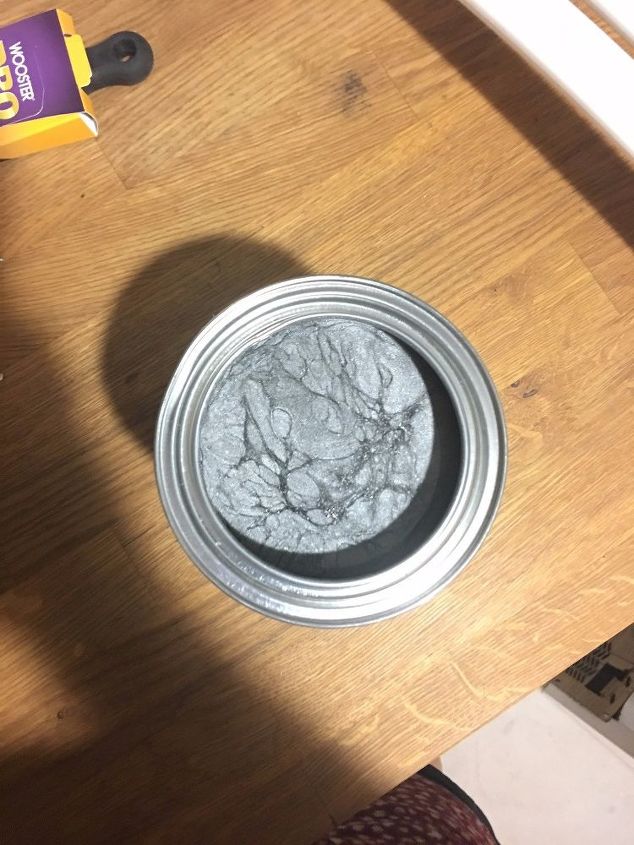
STEP 5: I was finally ready to paint. The product contains real stainless steel pigment, so that's pretty cool! It's a very stinky paint, so if you can't haul your fridge outside, make sure you wear a respirator.
STEP 6: I started with my brush and trimming out all the smaller area around the open spaces.
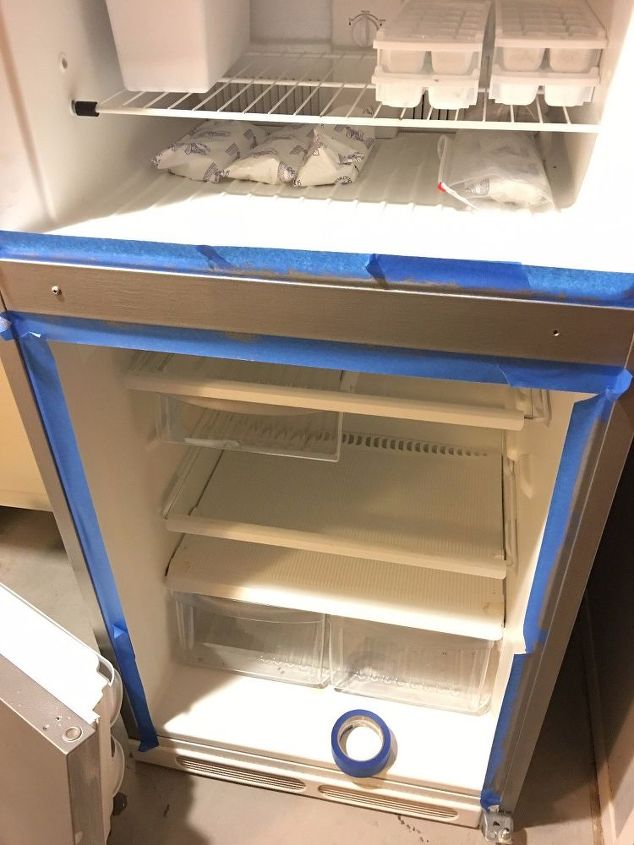
STEP 7: After attempting to just cut the paint, I decided to tape it off first and then paint the smaller areas. I wanted to see how meticulous I could get with this paint job; I didn't want it looking sloppy.
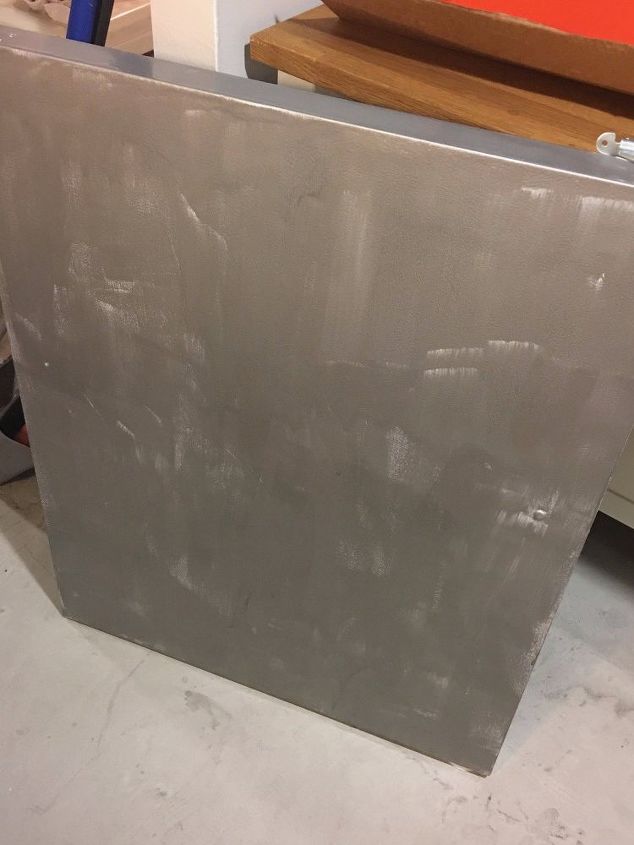
STEP 8: After 2 coats, this is what the fridge looked like. Since the instructions said it was an "easy single application" I was shocked to see it look this patchy. I decided to switch from a foam roller, like the instructions called for, to a regular roller. After I made this switch, the paint went on much better. Dry times also took awhile, so take that into account.
STEP 9: After about 4 coats, I put all the hardware back on, put the doors back on the fridge, and got ready to step back and take in my handiwork!
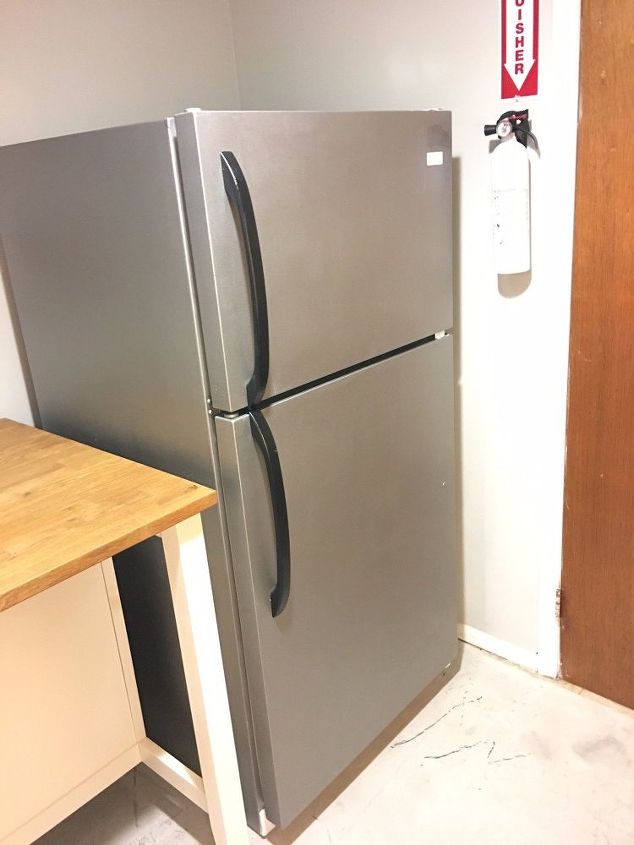
STEP 10: I put the handles back on and it looked great!

The result is pretty spot on!
Resources for this project:
See all materials


Comments
Join the conversation
-
it looks good.love the way you done the handles in black. great job
-
And here I am putting blue contact paper on my stainless steal; refrigerator. As I don't like having to polish it every day to keep it looking clean. But it was the one on sell when my old one quite working.


Frequently asked questions
Have a question about this project?
Question; I am about to paint a white fridge, rather new, less than 2 years old, but the coating is a disaster and looks rusty as if it had 2 years in the rain.
What is the white paint that you used? Can that paint be good to keep the fridge white???
I do not like the metal look for the fridge. I rather keep it white.
thanks!
I can't seem to find the Rust-Oleum stainless steel product used in this project. I think it may have been discontinued. Can anyone confirm this for me? I guess this was posted 9 years ago so it's likely no longer available. :(
I was wondering the same thing. Why rub alcohol on my fridge????? I'd like to know the answer to that.