Learn How to Transform an Ordinary File Cabinet Into Extraordinary

by
Theredpaintedcottage
(IC: blogger)
21 Materials
$85.00
Medium
Detailed tutorial on how to turn a file cabinet into extraordinary using paint, wood and corrugated metal.
Hometalk Recommends!
Keep your hands and face protected when working with metal with these best selling work gloves and safety goggles that Amazon reviewers swear by!
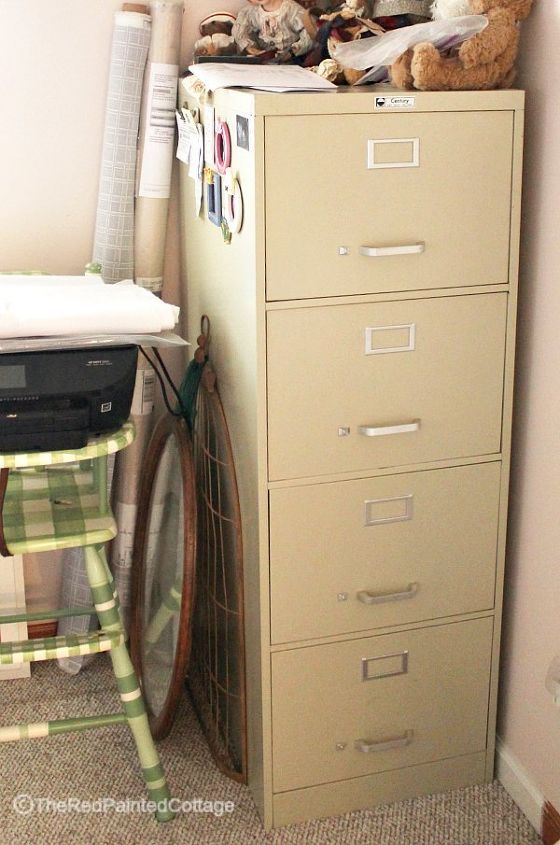
Start with any metal file cabinet. This is the before photo of our file cabinet. Make sure to clean the cabinet using TSP before painting or gluing.
I painted the drawers and handles with dark brown chalk paint. After it dried, I dry brushed some grey chalk paint lightly over the brown, and then lightly stenciled the numbers.
We bought 1x4 pine boards, cut them to the correct width and length for both sides. I stained all the wood with 2 coats of Minwax Special Walnut. After it was thoroughly dried, I applied one coat of Minwax Classic Grey and then wiped it off, leaving only as much grey as I desired to keep. I finished this off with 2 coats of Minwax Wipe-on Poly. Make sure everything dries between coats. We used heavy duty construction Gorilla Glue on the back of the boards and clamped them until they dried.
Obviously, you need to buy a piece of corrugated metal. There wasn't anything left after we used the above, other than tiny scraps.
There's different ways to cut the corrugated metal. We used a reciprocating saw with blades for cutting metal. Afterwards, I used the tin snip above and leather work gloves to trim the metal to fit in perfectly. Make sure to use leather work gloves and goggles when working with metal.
Three holes were drilled top and bottom on each side and self-tapping screws were used to secure the corrugated metal to the cabinet.
I had a pine board cut to fit the top and after it was securely glued on, we applied the moulding.
Just make sure you use moulding with a flat back to it.
After the moulding was on, I filled any gaps with stainable wood filler and used the same stains as I used on the wood. This is looking down onto the top of the cabinet.
After it was finished!
Here it is in our newly decorated guest bedroom. I have much more detailed information on my blog that you'll want to read, along with ALL the materials and tools that were used, including links to the exact products that were used.
Enjoyed the project?
Resources for this project:
See all materials
Any price and availability information displayed on [relevant Amazon Site(s), as applicable] at the time of purchase will apply to the purchase of this product.
Hometalk may collect a small share of sales from the links on this page.More info

Want more details about this and other DIY projects? Check out my blog post!
Published May 17th, 2017 3:27 PM
Comments
Join the conversation
2 of 465 comments
-
 Kee31581524
on Dec 19, 2024
I love the look but I’m confused about the numbers, too. I reread to see if I missed something 🤔 I would just leave them off. Great piece, though!
-
-
 Shelly Moore
on Dec 31, 2024
I've seen several file cabinet redos and like this one best!!!
-











Frequently asked questions
Have a question about this project?
I'm a lover!! The numbers don't mean a thing to me. TO YOU? I would put a handle of some sort on the metal door.. I love corrugated metal. I like the idea of rolling wheels also. Just what do YOU USE it for? It is beautiful, but what is its PURPOSE??? I'm a little lost here.......please clue me in, because I do like the looks.
So numbers are for sake of numbers? Is that like putting up sign that says kitchen n the kitchen? Dang them farmers weren’t very bright were they? Why not something not so silly. Farmhouse look is ok until you have to tell yourself your in the kitchen, laundry, or outhouse or as cousin Eddy says the @*itter
Love the idea. A thought: how about a mirror instead of the corrugated steel?