Build a Removable Trellis Screen to Hide Your Air Conditioners

My removable ‘outdoor air conditioner screen fence thingy’ will hide those air conditioners, allow proper air flow for the condenser, and make the AC guy happy when he sees how easy it is to remove. I made these easy and lightweight lattice screens to hang on the posts. You can easily have this project done in a weekend. So let’s get started. Here’s how to hide an air conditioner unit outside…the easy way.
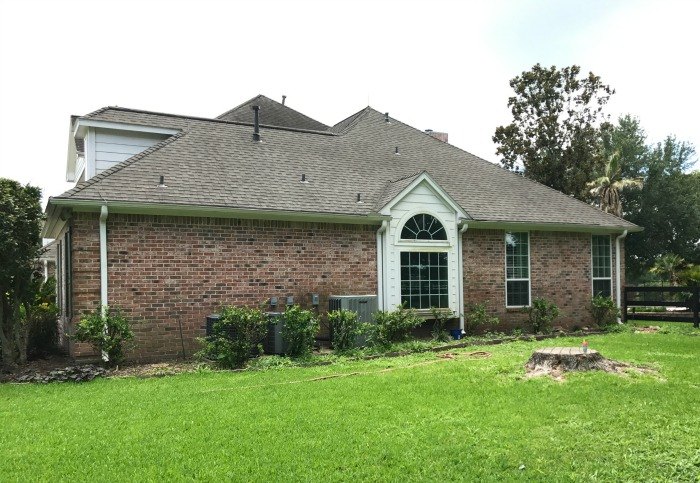
First, I want to say, you don’t have to hide an air conditioner unit outside. Generally, they aren’t that noticeable. But sometimes they just stand out too much. Last month, we had to cut down a very large tree in our side yard. It was constantly attacking our roof and we just couldn’t safely keep it trimmed anymore. This tree was so large, it shaded the whole side yard. In fact, not much would grow there and the shade sort of made the whole area unnoticeable. So, we never did much with it.
Removing the tree unexpectedly put a spotlight on our 3 air conditioners, the really scruffy shrubs, and weedy flower beds. We live on a corner near the start of our street. Suddenly, that side of the house seemed to stand out as the focal point for the longish approach to our house. I know it was probably more noticeable to me than anyone else, but I had to do something about it.
The 2 key design factors for my screen were; proper air flow for the condenser, and something easily removable when the A/C’s need servicing or replacing.
As the daughter of an AC guy, I have to say it’s important to follow the airflow guidelines for your units. Usually you need 5 to 6 feet above the units to be clear and 18″ around. When you start putting units together, like my 3, you may need to add more free space. If you block off air flow with screens or plants, your A/C could overheat and break or plants could clog the unit. I had to carefully design a screen that would hide the units while letting them work properly.
I just wanted the screens to fade into the house, so I didn’t need anything fancy. Traditional lattice would work just fine. We’ve planted beds full of knock out roses and butterfly attracting plants. Once they grow in, they can be the star of that side of the house.
Get the full details by following the link to my site.
Hometalk Recommends!
The shabby before picture. With the shade tree gone, all you could see was the A/C's and some really scrubby bushes and weeds.
Start by setting 4x4 exterior posts in fast setting concrete. Follow the directions on the bag for best practices.
After allowing the concrete to set, I was ready to start building these panels. I did all of this alone. So, it's easier than it looks!
Grab some exterior screws, a drill, and some Heavy Duty Double Keyhole Hangers. I coated my hangers with an exterior spray enamel for metal, to protect them from rusting.
Hold the hangers up to the post to see where your screws should go. Use a Mason Line to make sure the Keyhole Hangers are level from one post to the next.
My middle post got 2 hangers. If you only need 2 posts to hide your air conditioners, then each post only needs 1 hanger.
After using the keyhole hangers to place the screws in the posts, use those screws as guides to mark where the Keyhole Hangers should be attached to your 1" x 6" frame sides.
NOTE: EXACT MEASUREMENTS DEPEND ON YOUR SPACE.
Get the full details by following the link to my site.
Attach exterior grade trellis to those frame sides using a brad nailer or small screw.
I used the pre-cut 2' x 8' trellis panels. You can purchase 4' x 8' panels to cut to the correct size too.
Frame out the front with more 1" x 6" boards. I used my brad nailer to attach the trellis to the boards. Then used a few long exterior screws in the corners to attach the front framing boards to those back side boards.
After applying Valspar's Weathered Wood Accelerator, the trellis screen blends into the brickwork. Job done. Now the focal point of the side of my house can be those freshly planted flowers...once they grow in. :)
One panel treated with the Weathered Wood Accelerator.
The new panels are lightweight and easy to remove when the AC guy needs access to the space.
Check out my DIY for a pretty and durable L-shaped bench for your backyard, too
More Incredible Projects to Update Your Front Yard
Enjoyed the project?
Suggested materials:
- Key hole hangers (amazon)
- Pressure Treated Lumber (Home Depot)












Frequently asked questions
Have a question about this project?
How do you grow grass where you have dog pee stain
Why did you not wrap the sides too? It can be seen at the sides.