High End Wall on a DIY Budget

How to transform a wall, and a room, with inexpensive wood lath!
Product links may be affiliate links which are no extra cost to you but your purchase helps me help you with more fantastic projects!
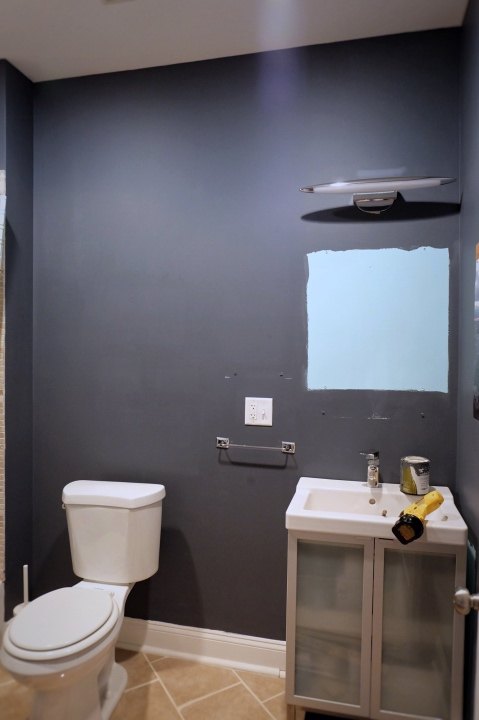
Yeah, I can't leave well enough alone. Good enough is never enough for me. Take our guest bath.... so so. It never felt done or right. Suddenly it hit me, a great wall idea, but all my material options were too expensive.
Alas, never fear. That means it's time to get creative. Enter wood lath. So for under forty bucks, I transformed a room like mad.
This bathroom is hardly ever used for a shower if you're concerned about the wood; it's been used maybe all of six times and won't be for years, so lath will be a-ok. But hey, this idea is great for any room in the house!
Sure, lath is tricky. It's wonky, it's bowed, it's not consistent. It's also rough and tumble. But! It's a budget saver and it actually looks great without veering into design styles I didn't want to veer into.
Here's what I used:
- bundles of wood lath (two of fifty plus a few loose extras for this particular wall)
- quart of Golden Mahogany stainGolden Mahogany stain
- paint thinner
- 1" brad nails
- brad nailernail gun
- hand saw
First I stained it with a mix of Golden Mahogany and paint thinner.
Be sure to come by my blog for the fun story of my unsuspecting husband's reaction to this wall over at Flipping the Flip!
Next, tacking it to the wall time. I did not plan the vertical seams but I did want an eighth of an inch between each horizontal seam. Easiest, most consistent way to get that? A free paint stirrer.
I have all sorts of great tips on this project, like how I got around the outlet and the light fixture so stop by the post to be in the know!
It took a lot of trimming, to say the least. If you don't have a pneumatic nailer, either borrow from a pal or rent from a hardware store.
And there it is! Definitely a high end look on a budget!
Be sure to drop by Flipping the Flip to discover loads more great DIY projects, ideas, and inspiration!
Get The $100 Room Glow-Up Guide cheat sheet freebie here and too, subscribe here to be first in the know on new projects!
Affordable Ways to Update Your Home
Explore our guide on 12 High-Impact Ways to Refresh Your Home on a Budget for more creative and affordable home improvement projects!
Enjoyed the project?
Resources for this project:
See all materials
Comments
Join the conversation
-
-
 Becky at Flipping the Flip
on Nov 09, 2024
Thank you so very much!
-
-
-
 Emily Harris
on Aug 15, 2025
Nice! I did something similar in my entryway last year, and for under $50, it looked like a high-end custom feature. Honestly, creative projects like this remind me of reading Meritage Homes reviews, sometimes the best results come from smart planning and resourcefulness, not just throwing money at a problem.
-
 Becky at Flipping the Flip
on Aug 15, 2025
Thank you!
-
-












Frequently asked questions
Have a question about this project?
Don’t rent a compressor and Brad nailer. You can purchase a good compressor and nailer combo very inexpensive and have it to fill bike tires, fill air mattresses, blow up hundreds of balloons, loan to friends (or rent to friends) rental on a Brad nailer is $20 per day, compressor is $50 per day. I doubt you will finish this project in a day. If you don’t have room to store it then sell on Marketplace or Craigslist
Do you have to leave a space between the pieces of wood? I would rather not have spaces.
If the wood lath is rough,what about dusting or just general cleaning?