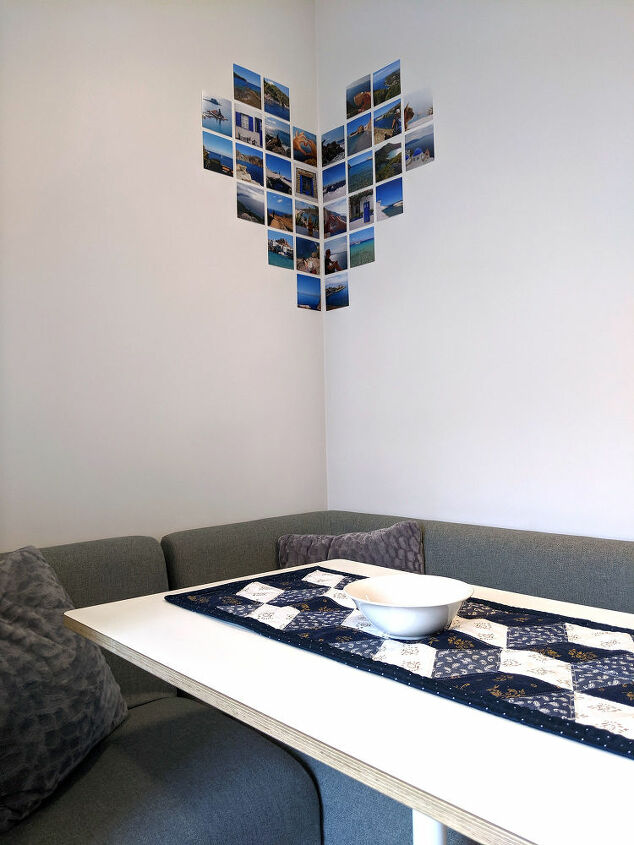
Heart Shaped Wall Photo Collage

We moved to the dorms almost two months ago.
The room is big enough for our needs but the wall space is relatively small.
I wanted to decor the room to make us feel comfortable and positive during our stay.
Since I'm a student on a budget now, I sketched my vision on the computer before printing tons of pictures and fitting them together.
On the computer, using Illustrator (but any software will do) I began cutting the pictures to fit into a square shape and straightening the horizon.
It's was important to me to fix the horizon before printing it because my design was based on perfect squares and I didn't want it to feel crooked.
When I was pleased with the way it looked (after an hour of moving pictures around and correcting its colours) I printed out 32 pictures (4" by 4"). The colour palette was blue and white, to fit the runner my mom made us for the dining table. So I mainly used pictures from our vacation to Greece 2 years ago.
If you are following my projects in the past few months, you probably know by now that I'm an impatient person, so I had to order it to arrive on the next day...
In the meantime, I cleaned the wall using a wet wipe and a dry towel, so the Blu Tack will stick better.
I placed four pieces of Blu Tack, one on each end of the picture. Blu Tack is great when you want to place a picture on the wall without leaving a mark when you remove it. As we are only planning on living here a year, it's important to keep in mind that we need to leave the room as neat as we got it.
I started with the bottom left picture and built it up.
Once I was pleased with the setting and the distance from the edge, my husband made me a spacer as a jig to help me stay straight as I go. It was made out of the package that the printed pictures came in, a 0.6" by 4.6" square to place between each picture before hanging it on the wall.
After I placed the first 10 pictures, aligned with each other, I could place the images on the sides as well.
Only when the right-wing was complete I could start the left side, this way it will definitely be as straight as possible.
I began placing the pictures on the right-wing. Using the jig and the left row as a base point of alignment.
I built a faced down copy of what I want to hang on the table, with Blu Tack glowed to it, ready to go. This helped me stay focus on my design and not making any last-minute changes that I usually do and then regret afterwards.
It's Done!
Close up on the final piece
Enjoyed the project?
Comments
Join the conversation
-
-
 Carla Estevez
on Nov 30, 2020
I love this idea! I'm going to do this in my daughter's room. Her room does not have a lot of wall space as a door, a window, a closet take up three walls so this would be perfect to put pictures of her friends and stuff up. Thank you for the awesome idea!
-











Frequently asked questions
Have a question about this project?
How would I go about making it larger to cover more of the wall space?