


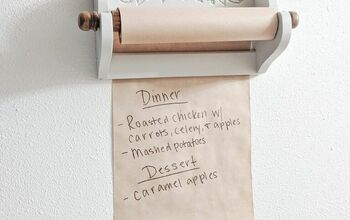
Plan Your Dinners in Style With This Weekly Dinner Menu Board!

Are you tired of asking, "What's for dinner?" every day? This DIY weekly menu board will not only end the dinner dilemma but also add a fun touch to your kitchen.
With a simple wooden cutting board, wooden clothes pegs, and ice cream sticks, you'll have a meal-planning system that's both functional and creative.

This easy-to-make project will help you stay organized while giving you a fresh way to plan your weekly dinners, from takeout nights to family favorites.

Tools and Materials
- Wooden cutting board
- Wooden clothes pegs
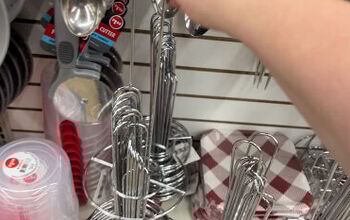
- Wooden ice cream sticks
- Hot glue gun & glue sticks
- Strong wood adhesive
- A fine-tipped marker or paint pens
- Optional: Decorative items (like washi tape, paint, or stencils) for personalization
Hometalk may receive a small affiliate commission from purchases made via Amazon links in this article but at no cost to you.

1. Prepare Your Cutting Board
First, you’ll want to clean your wooden cutting board thoroughly, I like to use a rubbing alcohol swab for this.
Once it’s clean, let it dry completely before starting.
You can leave it as-is for a natural look, or paint/stain it for a more personalized touch. A coat of paint in a fun color (think chalkboard paint, white, or even a soft pastel) could make it stand out!
I went au natural!

2. Prep and Attach Your Pegs
I decided to mix things up with two different types of wooden pegs for a bit of variety.
This step is simple—just take each peg and label it with the days of the week. A fine-tip marker or a paint pen works great for this!
I'm waiting for my Cricut to come back from servicing, but once it does, I'll be adding beautiful labels to both the pegs and meal sticks.
PRO TIP:
Want to add an extra creative touch? Try using letter stamps for a fun, rustic look!

Attach the wooden clothes pegs to the board using E6000 for a strong, lasting hold.
For extra security, add a dab of hot glue to keep the pegs in place while the E6000 sets.
Space them out evenly, one for each day of the week.

3. Write Your Dinner Ideas
Now for the fun part—writing your dinner ideas on the ice cream sticks!
Think about your favorite meals, quick go-to recipes, or even “Out for Dinner” or “Take Out” for those busy days.

Some examples could be:
- Pasta night
- Taco Tuesday
- Salad bar
- Pizza night
- Leftovers
- Stir fry
- Out for dinner
- Take out

4. Clip the Ice Cream Sticks to the Pegs
Once your ice cream sticks are ready, clip them onto the wooden pegs according to the days of the week.
You can make it fun by switching up the order each week, depending on your mood. The best part is that it’s versatile—if you don’t feel like cooking a certain meal, just swap it out!

Personalizing Your Menu Board:
The great thing about this project is that there are endless ways to personalize it to match your style! Here are a few ideas:
- Paint the Cutting Board: Choose your favorite color or theme for a pop of personality. If you're into rustic farmhouse style, a natural wood stain would work perfectly. For a modern kitchen, consider a sleek white board or even a chalkboard finish.
- Add Labels: Use stencils or a hand-lettering technique to add fun labels around the board (like “Menu for the Week” or “What’s for Dinner?”).
- Decorative Washi Tape: Wrap some colorful washi tape around the edges of the cutting board or use it to decorate the clothes pegs for an extra touch of flair.
- Embellishments: Add small wooden shapes, stickers, or even magnetic clips for a unique design.
Hang your menu board somewhere easily accessible, like on the fridge or on the wall in your kitchen.
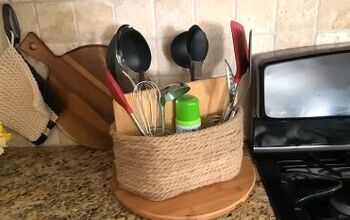
I put mine on the counter and leaned it against the wall. It’ll serve as both a functional planner and a cool piece of kitchen decor.
If you’re worried about where to store your ice cream sticks when they’re not in use, you can create a little storage solution. Maybe use a small mason jar, a box, or a fabric pouch to keep your extra sticks handy.
Never Ask ‘What’s for Dinner?’ Again with This DIY Menu Board
By making this dinner scheduler, you’re not just getting organized—you’re adding a bit of fun and creativity to your kitchen.
This simple project takes the stress out of meal planning while giving you a unique way to stay on track with your dinners.


Frequently asked questions
Have a question about this project?