


How to Turn Waste Paper Baskets Into DIY Christmas Bells

Get ready to turn ordinary waste paper baskets into festive DIY Christmas bells! With just a few easy steps, I'll show you how to transform dollar store finds into DIY oversized Christmas decorations.
Let's dive in and bring some holiday cheer to your space!
This post was transcribed by a member of the Hometalk editorial team from the original HometalkTV episode.
Tools and materials
- Waste paper baskets
- Jingle bells
- Spray paint
- White vinegar
- Drill
- Half-inch spade bit
- Scissors
- Hot glue gun
- Embellishments
Hometalk may receive a small affiliate commission from purchases made via Amazon links in this article but at no cost to you.
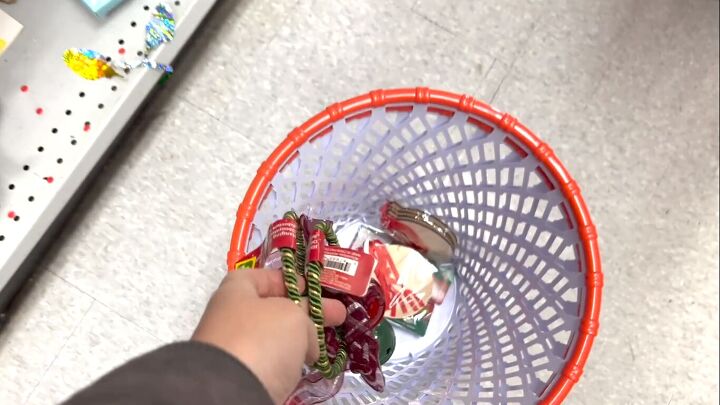
I was in the dollar store the other day and I came across these waste paper baskets. They're actually meant to be basketball nets but when I flipped them upside down, I realized they would make the perfect giant Christmas bells.
So I picked up two of those and then I also picked up some jingle bells. I'm going to head back home and we're going to make them over into fun Christmas bells.
Steps
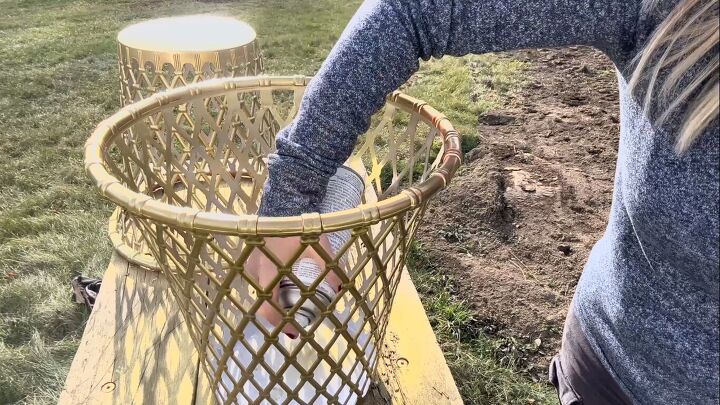
1. Spray-paint the waste paper baskets gold
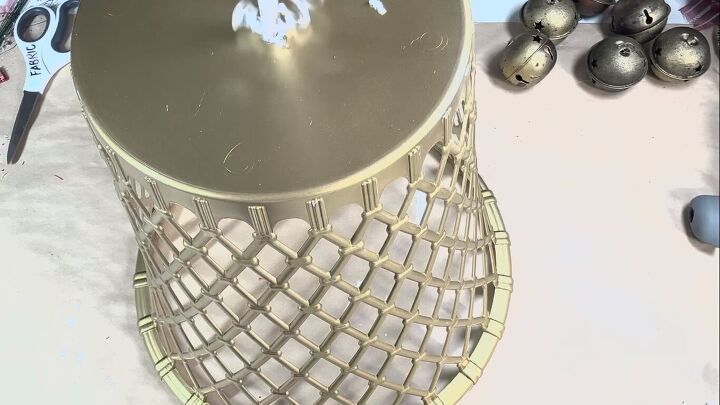
To begin my project, I used some gold spray paint and I just spray painted both the baskets. I started with the baskets flipped over, did a generous coat on both baskets, and let them fully dry.
Once that was dry, I flipped the baskets back over and made sure to spray paint the inside as well, making sure that I got the full rim of the waste paper basket so that everything was nice and gold. I let these fully set and dry.

2. Spray-paint the jingle bells
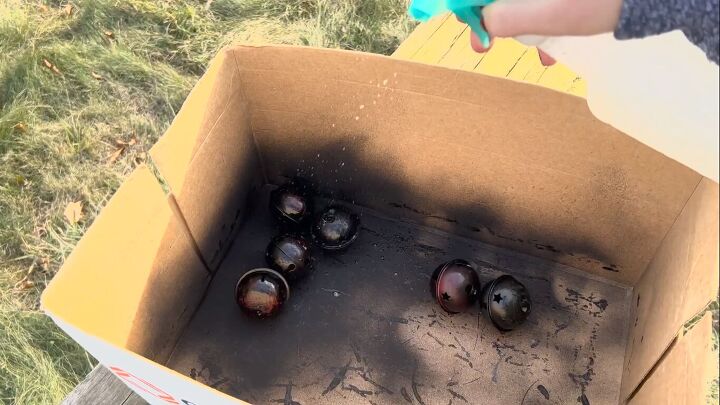
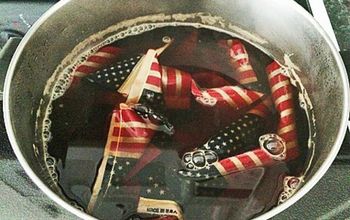
I want to make these jingle bells look a little more antique. So I'm going to take them off the string and put all the jingle bells into an old cardboard box.
Then, I'm going to take some black spray paint and spray them. While I'm spraying them, I'm also going to move them around. Don't worry too much about doing a perfect coat of spray paint because I want these to look vintage. So moving them around is actually attributing to the style.
Once those dried, I sprayed them with some white vinegar.
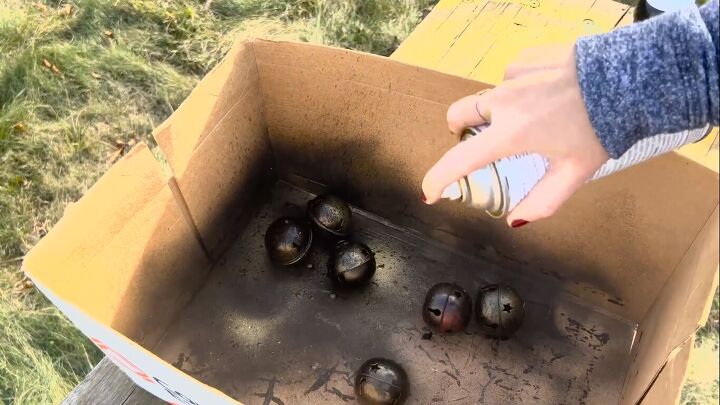
While the vinegar is still wet on the jingle bells, I'm going to come in with some gold spray paint. I'm going to just lightly spray paint over the vinegar and the black jingle bells.
3. Make the hole for the clappers
Next, I'm going to take a half-inch spade bit and drill down through the top of my waste paper basket to make a hole.
4. Attach the clappers
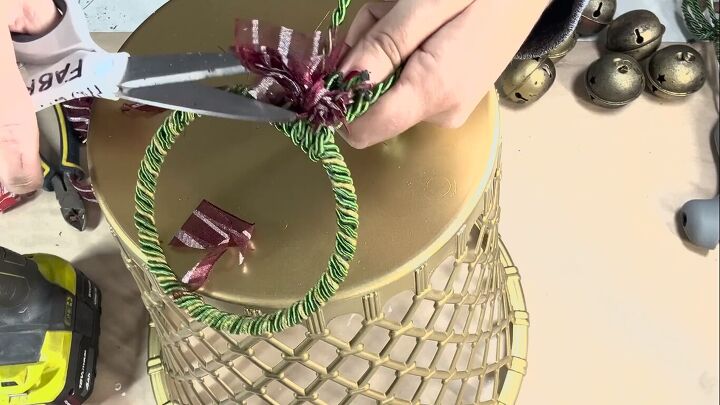
Then I'm going to take the ribbon and the hoop that my jingle bells were originally attached to and remove this bow. I'm just cutting it off. It was glued in place and I couldn't get it off but I don't want that.
I'm going to take the ribbons and slide them down into the hole, pulling them through so I have this nice handle here for my bell.
5. Embellish
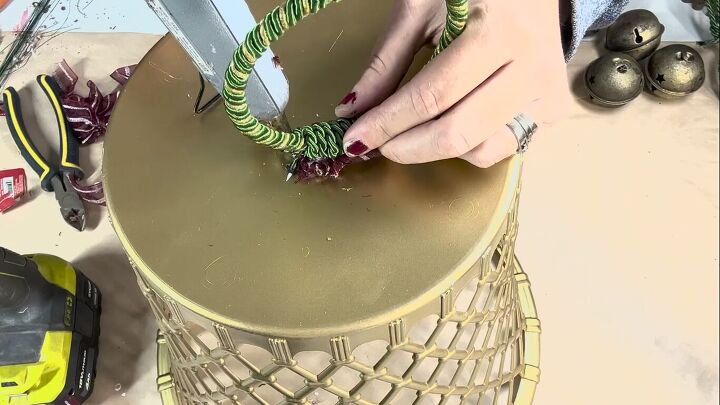
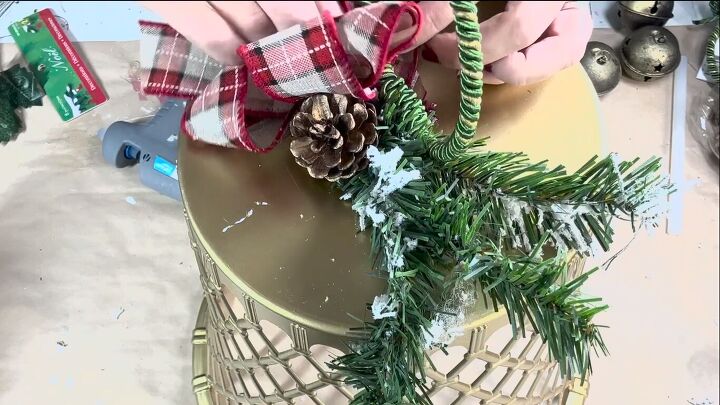
Hot glue the hoop in place and then come in with some nice embellishment. I'm using some greenery here; some picks, little pine cones, and a fluffy bow. I'm going to attach that as well just using hot glue to hold it in place.
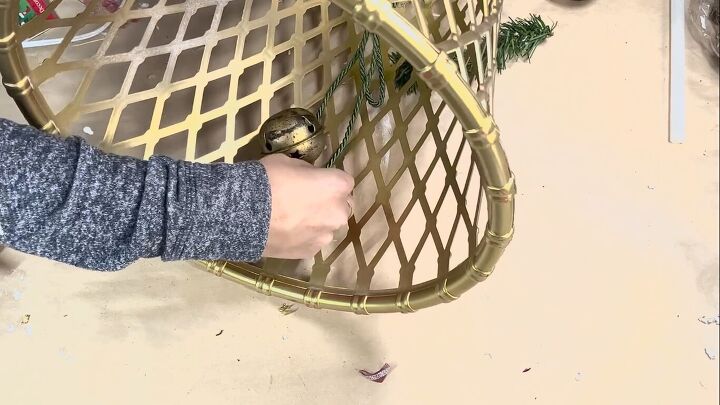
6. Reattach the jingle bells
I'm going to reattach my now vintage jingle bells back in the original place where they were.

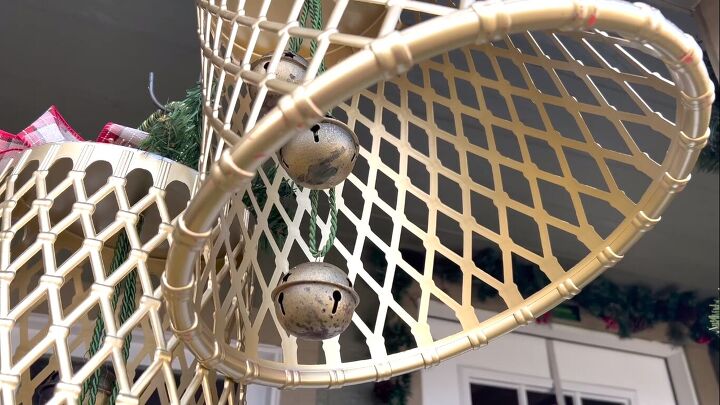
DIY Christmas bells
These are my finished DIY Christmas bells here. I've displayed them here on the outside of my cabin. I think they're so cute and I love that these were so easy to do just with a few dollar store items.
I hope this inspires you to get creative this Christmas season with things you find in the dollar store. Let me know what you think of this DIY Christmas bell project in the comments below.
Comments
Join the conversation
-
I’d love to see a video just to make sure re attaching everything
-
Great idea, I would love those copper solar lights intertwined in these ❤️


Frequently asked questions
Have a question about this project?
When do they stop looking like a trash can? Nope for me. Use bell shaped plastic pots and now your have faux bell. Various sizes suggest bells in bell tower with each size giving different tone all the more authentic. No lights inside but low wattage spotlight into bells will make “read” more plausible