


Peeps Spring Wreath: The Cutest DIY Easter Craft You Need to Try

Turn a pack of Peeps into an adorable door decoration!
Bo (my 2.5-year-old son) was beyond excited when he saw this Peeps wreath!
When he woke up from his nap and spotted it hanging on the door, he gasped, "Ooooh, what's that?! What's that?!"
The excitement faded a little when he realized it wasn’t a snack, but he still loved looking at it. This Peeps spring wreath was such a fun and easy project—perfect for making with kids or grandkids!
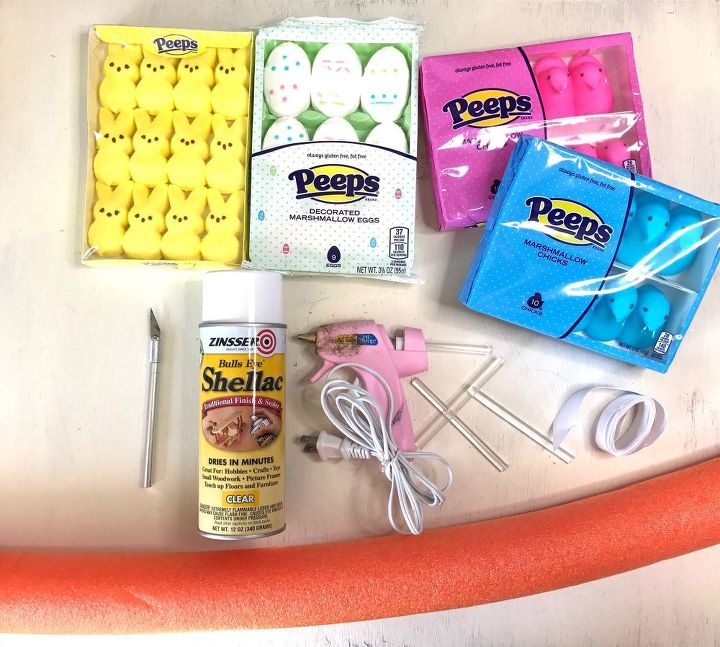
Tools and materials:
- Peeps (I used 4 packs and didn't use all of the bunnies or eggs.)
- Zinsser Bulls Eye Shellac (This is very important because you need to cover the marshmallows to preserve them.)
- Hi-Temp mini glue gun (I started out with my Ad-tech I've had for years but unfortunately it went to crafting heaven as soon as I tried to use it for this project so I had to go buy a new gun-- Elmer's Hi-Temp mini glue gun.)
- Mini glue sticks
- Ribbon (I started out thinking I was going to use some leftover white ribbon I had on hand but once the wreath was almost finished, I decided to use a wider ribbon I had on hand for another project.)
- Pool noodle
- X-Acto knife
- Easter basket filler (shredded paper)
Hometalk may receive a small affiliate commission from purchases made via Amazon links in this article but at no cost to you.
More DIY Pool Noodle Ideas
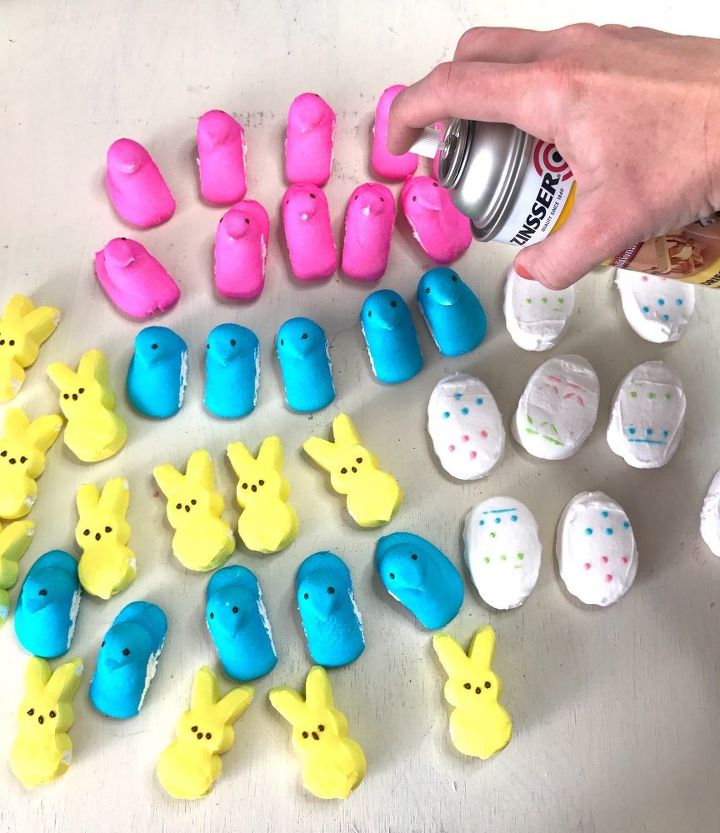
1. Spray Peeps with Shellac
Before starting this Peeps spring wreath, I did some research on how to keep marshmallow Peeps from attracting bugs.
Turns out, the best way to preserve them for crafts is with shellac spray!
I grabbed a can and gave each Peep three light coats of shellac, making sure to cover all sides.
This step helps seal the marshmallows, so they stay looking fresh without inviting any unexpected guests
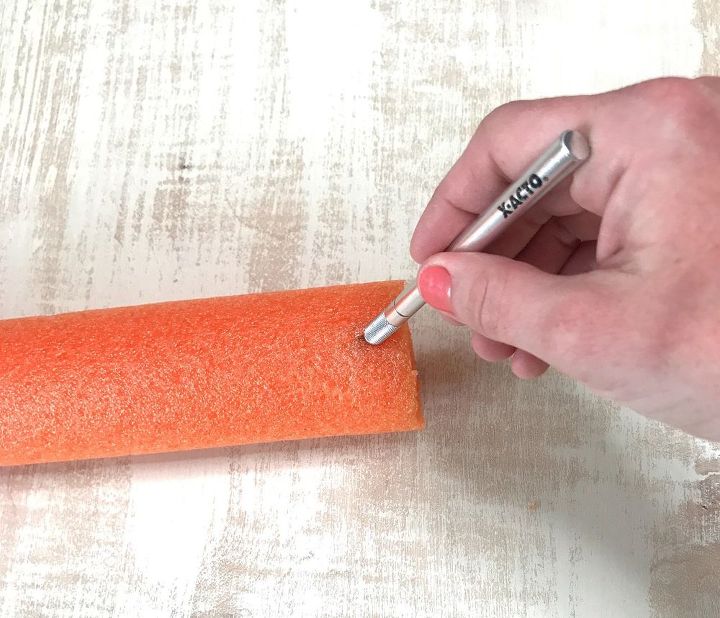
2. Cut the Pool Noodle in Half (Optional)
While the shellac-coated Peeps were drying, I grabbed an X-Acto knife and sliced my pool noodle in half lengthwise.
This step isn’t required, but I wanted to keep my Peeps spring wreath from being too bulky. Plus, I figured the flat side would sit flush against the door.
Spoiler alert: It didn’t! The noodle naturally curved back, making the flat side face inward instead. (I’ll show you how I worked around this in STEP 4.)
I could’ve made slits to help it stay flat, but I had another idea in mind!
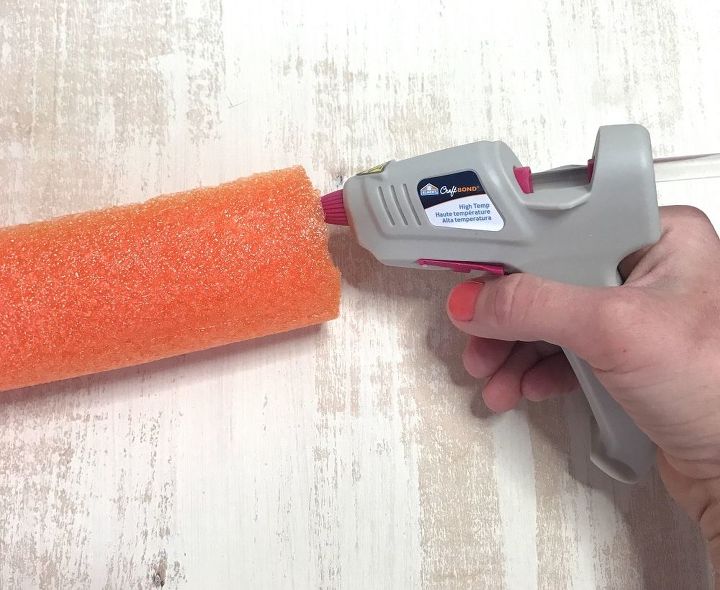
3. Glue the Pool Noodle Ends Together
Next, I grabbed my high-temp glue gun and applied a generous amount of hot glue to one end of the pool noodle wreath base.
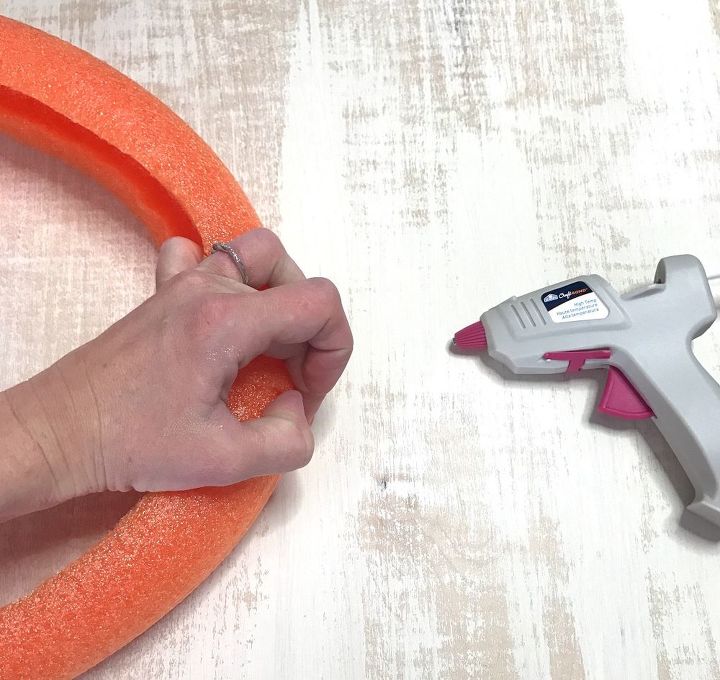
Then, I quickly pressed the two ends together and held them firmly until the glue set.
Once dry, the DIY wreath form was ready for the fun part—decorating with Peeps!
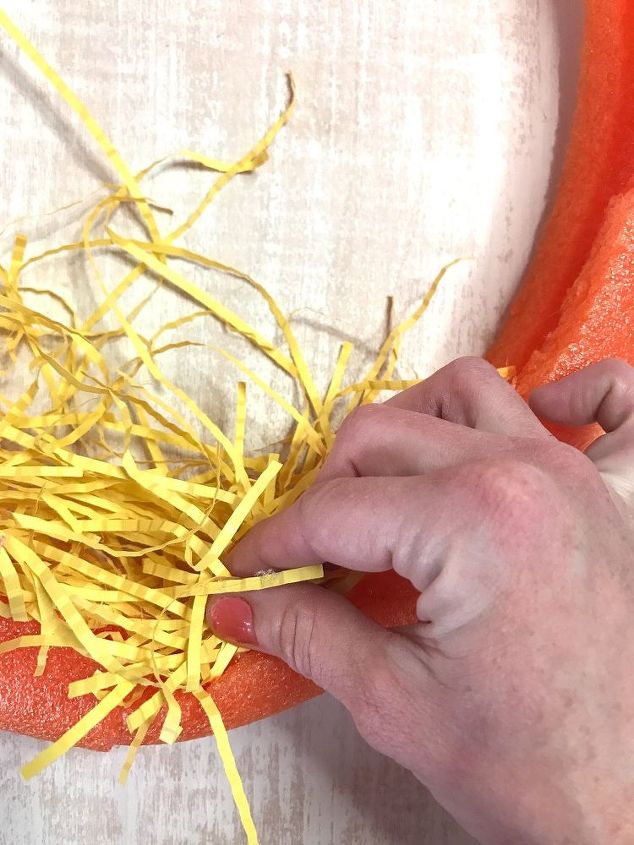
4. Add Easter Basket Filler to the Inside of the Wreath (Optional)
With the wreath base secured, I grabbed some Easter basket filler I had left over from another project and started hot gluing it to the flat inner section of the pool noodle wreath.
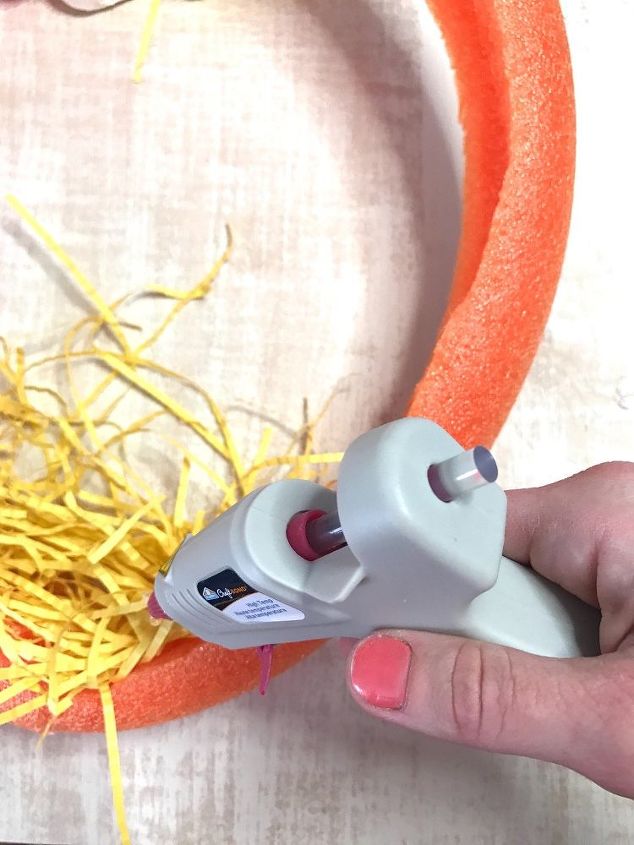
This step added a fun, textured background behind the Peeps and helped fill in any gaps.
I worked my way around the wreath, pressing the filler down as I went and gluing any loose pieces that didn’t want to stay in place.
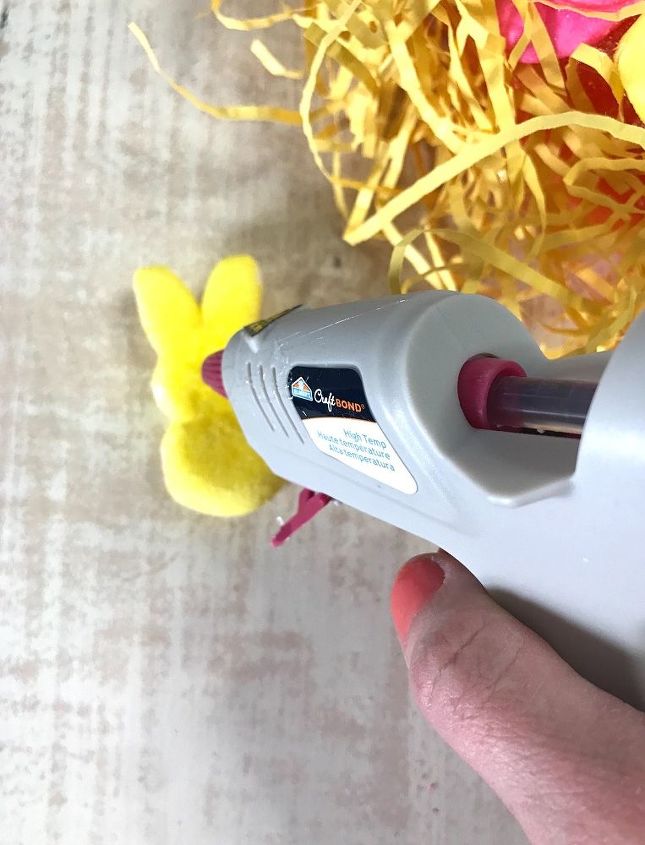
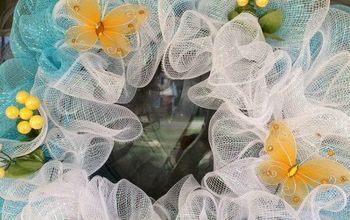
5. Hot Glue Peeps Around the Wreath
Once the Easter basket filler was secure inside the wreath, I moved on to gluing the Peeps in place.
I applied hot glue to the back of each marshmallow Peep and arranged them in a fun pattern around the outer edge of the wreath.
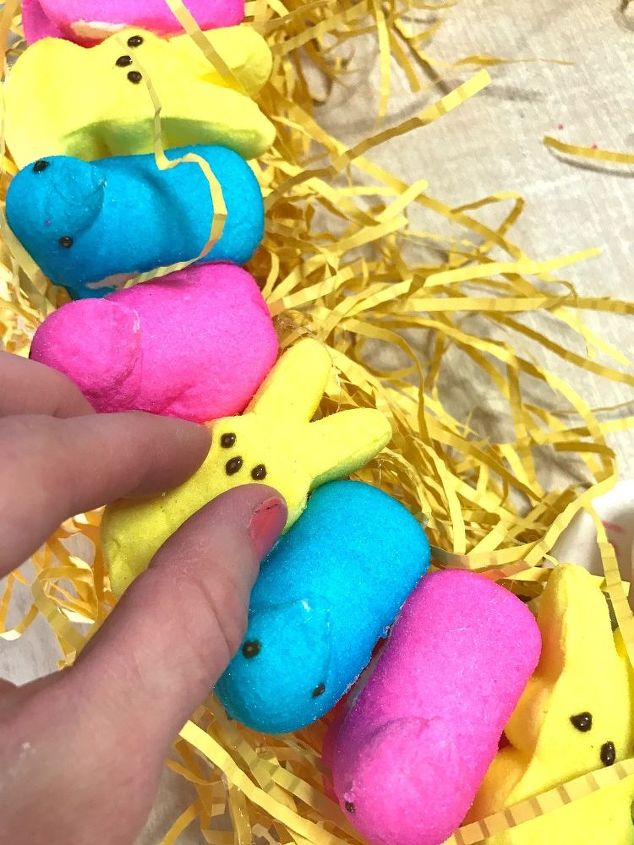
For my design, I alternated between a yellow bunny, pink Peep, and blue Peep, placing them in a colorful sequence.
At the bottom of the wreath, I added 5 Peep eggs to complete the look.
This step is all about getting creative and adding your own personal touch!

6. Add Easter Basket Filler to the Outside of the Wreath (Optional)
After arranging the Peeps around the wreath, I noticed it could use a little extra touch, so I decided to add the leftover Easter basket filler to the outside of the wreath.
The filler helped create a fuller, more festive look and gave the wreath a completed feel.
This step is optional, but it really enhances the design by adding texture and a pop of color around the edges of the wreath.
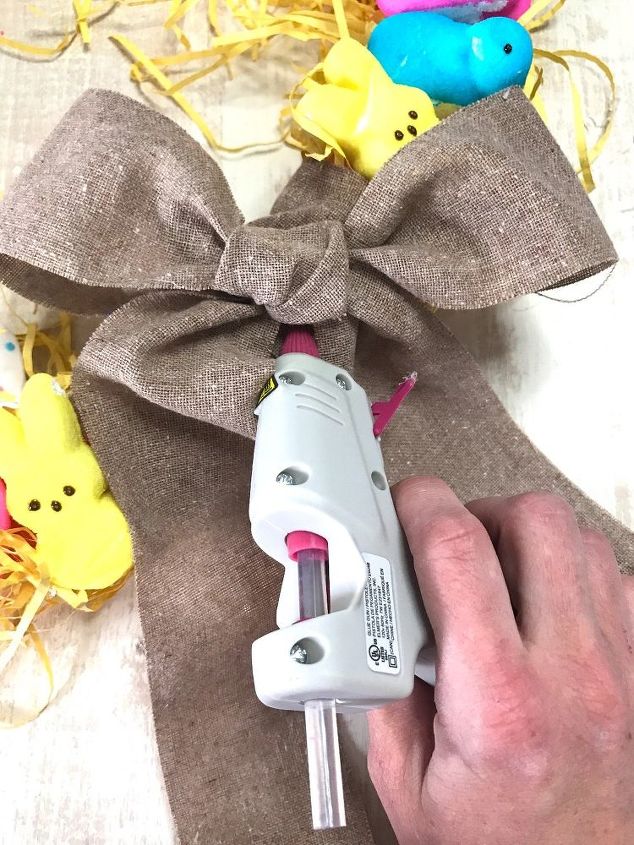
7. Add Ribbon to Complete Your Peeps Wreath
To finish off my Peeps spring wreath, I added a wide ribbon for a pop of texture and color. I cut a 6-inch strip of ribbon and wrapped it around the side of the wreath, positioning it off-center for a playful touch.
Next, I cut another piece of ribbon, tied it into a bow, and secured it to the wreath with hot glue. This final step added a charming, cohesive look to the wreath, making it even more festive for Easter and spring!
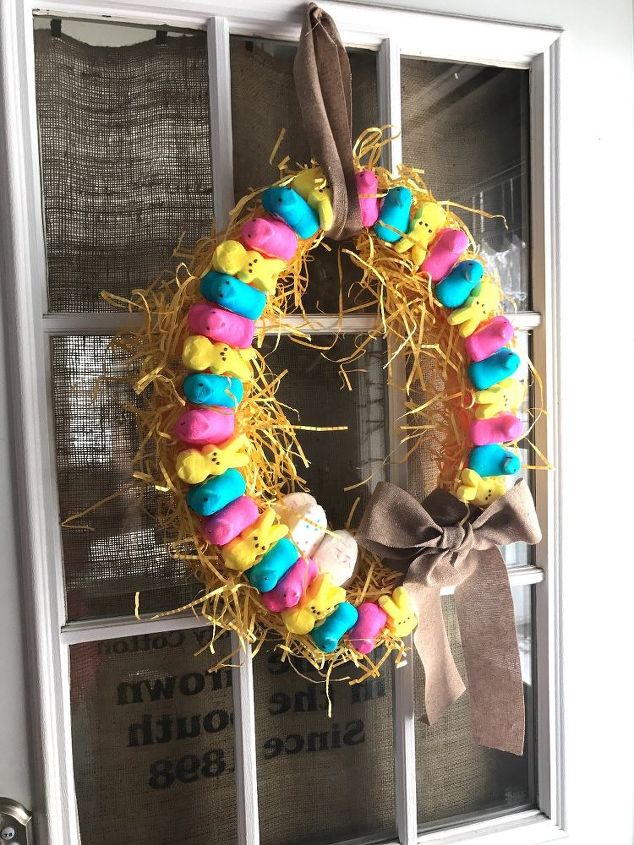
Peeps Spring Wreath Tutorial
I’m so happy with how this DIY Peeps wreath turned out!
While the final design didn’t quite match my initial vision (thanks to my old glue gun giving out mid-project), the wreath still turned out super cute and full of charm.
Even though I’m not a fan of eating Peeps myself, I now have a great excuse to grab them when they’re on sale for future projects!
This wreath is the perfect way to add a fun, festive touch to your door or home this Easter and spring season.
Resources for this project:
See all materials


Comments
Join the conversation
-
Using a pool noodle I made this wreath 5 years ago. The only difference is, I used all chick's and shredded paper sprayed green for the grass. I sprayed the chick's with shellac like 3-4 times over the span of a week. I left them on my crafting table to dry and to test whether/not rodents might like the chicks as a snack. Fortunately, there were none! Zero rodents came to feast on my beautiful wreath which I'm planning to hang again this year!
I live in Tennessee where our Temps are already in the high 60s! Will prob be much warmer by the time Easter rolls around! Still don't expect rodents. After all, the wreath has been hung and stored for 5 years and zero visitors!
This is a beautiful idea! Thank you for sharing!
-
such a waste of delicious peeps.... sigh


Frequently asked questions
Have a question about this project?
Does it draw bugs? Ants? Lotta sugar in those peeps
Are those burlap curtains/drapes in background? Did you make them yourself? Love them!
My porch is in in the sun all day, will the peeps melt, even though they’ve been sprayed?