


Gnome Paintbrush Ornaments

This ornament idea is SO cute and you can even do it with the kids. Take a look!
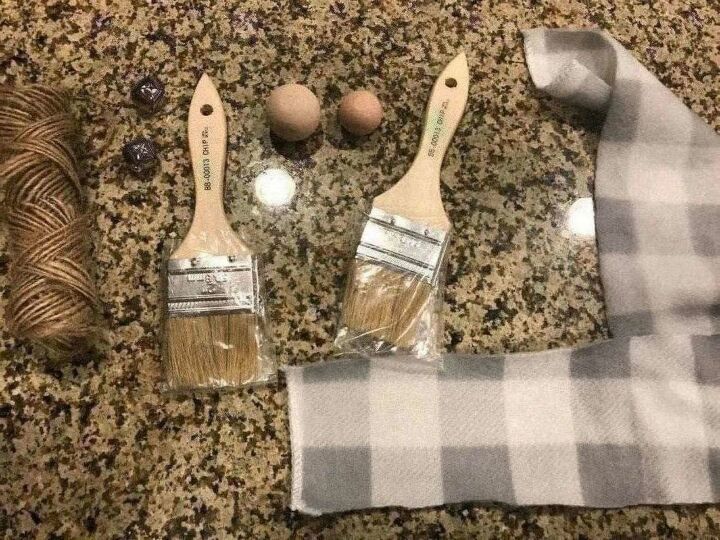
Here's what you'll use, grab some chippy brushes and wooden beads and a bit of flannel.
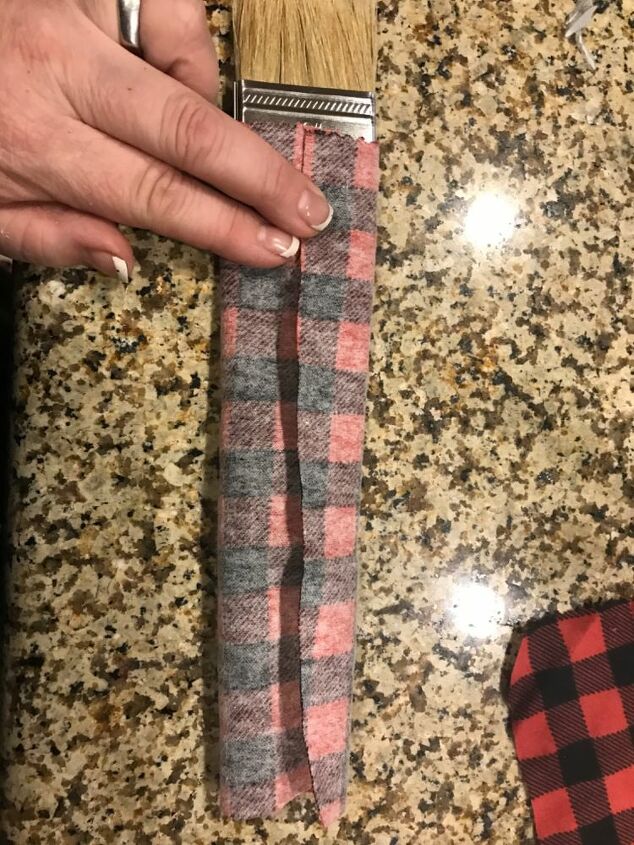
First step- just fold the flannel fabric oaround the handle of the paintbrush. Then slip it off and glue it down the side and adhere the sides together. It should be a tube.
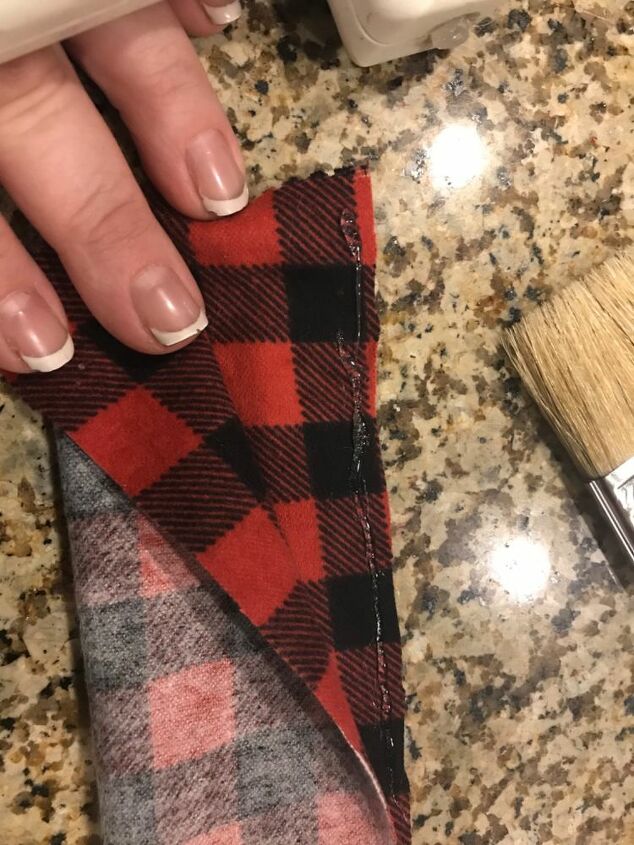
Glueing the two sides together.
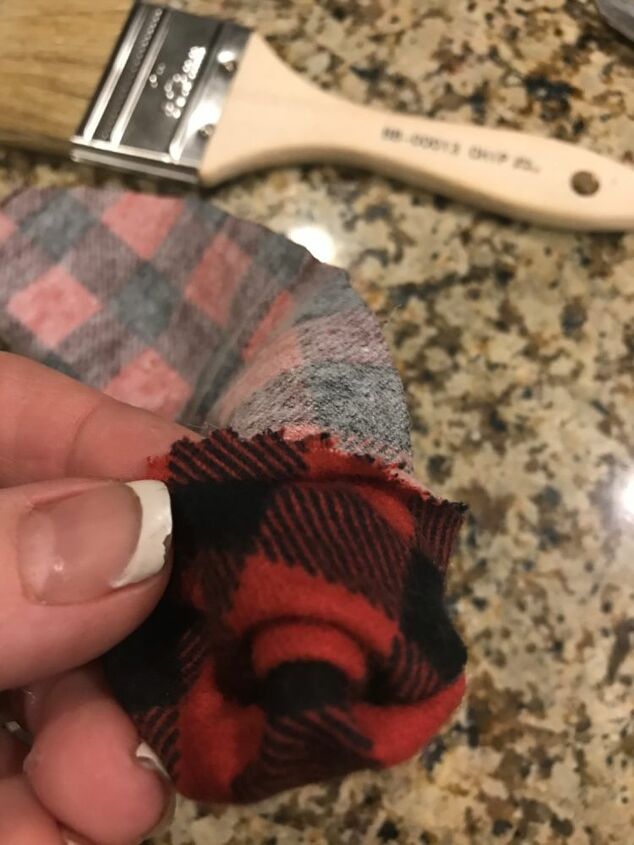
Then flip it inside out so you don't see the seam!
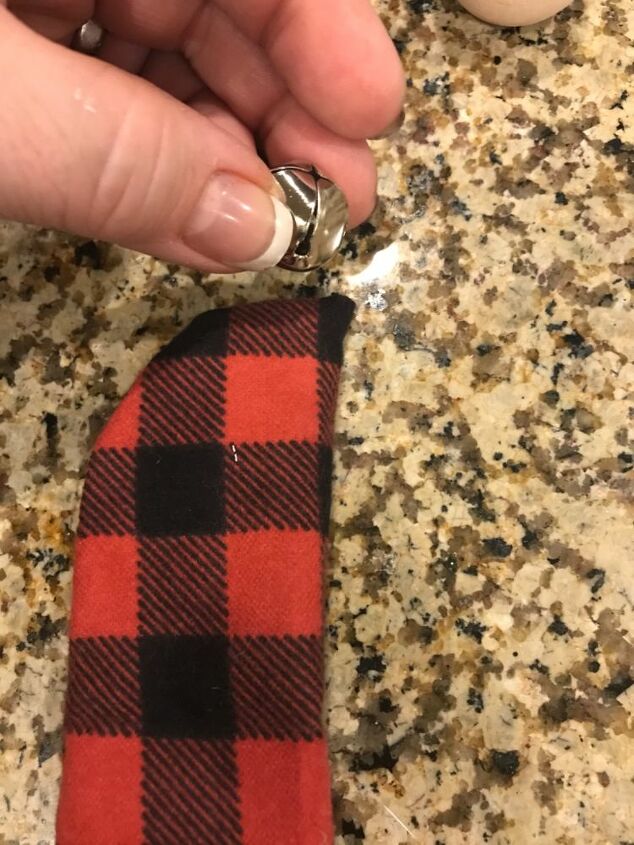
The, glue a little bell at the bottom.
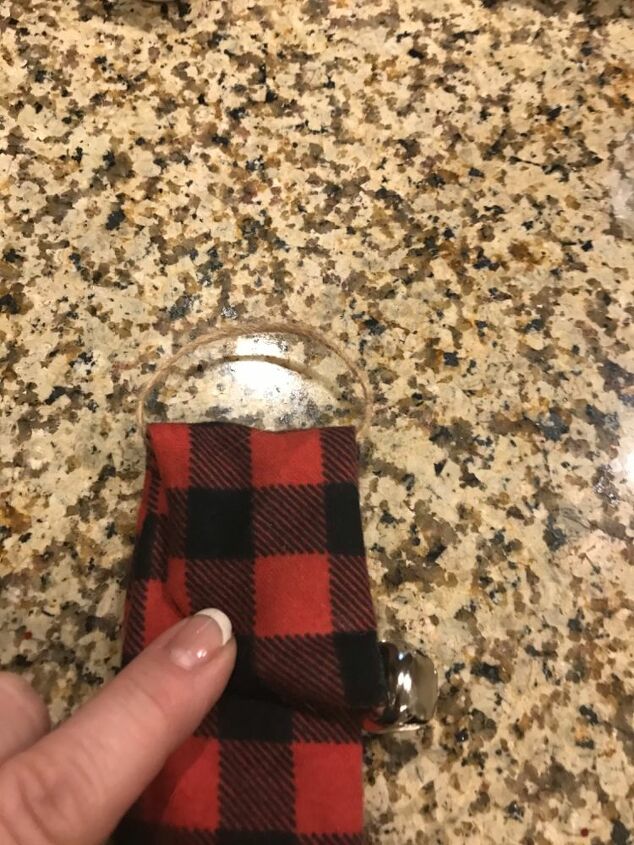
Next, loop a bit of string around the mid section of the fabric tube. then fold the fabric down. This will be the hanger so you can hang it on your tree.
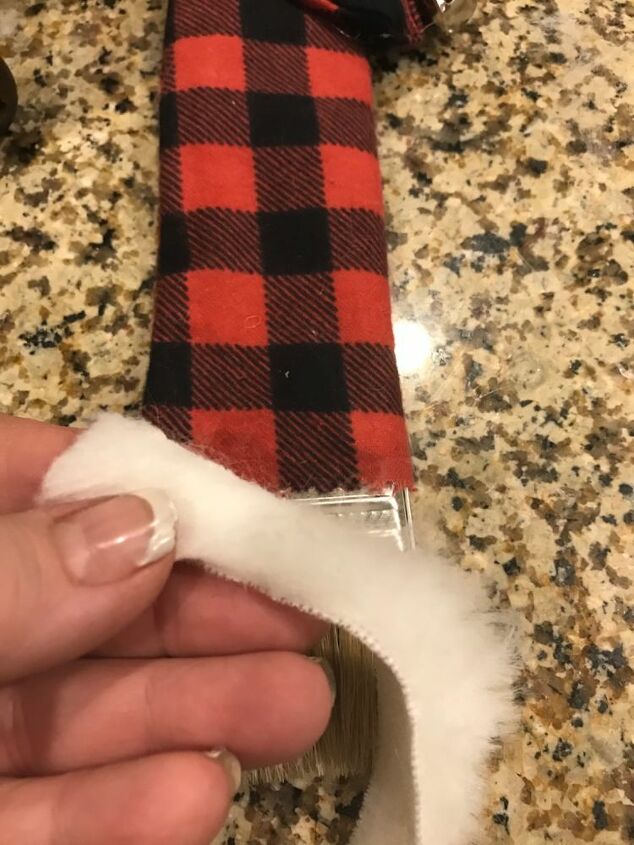
Next, glue the open end of the fabric tube to the paintbrush (the paintbrush should be inside the tube.
You can then glue a strip of trim (fur) and glue it to edge of the fabric. This'll look like a Santa hat!
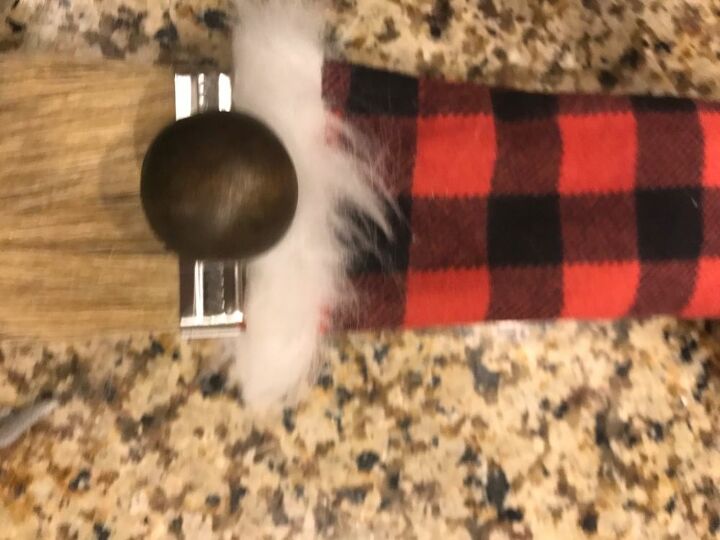
Then you can glue a wood bead onto the paintbrush as a nose.
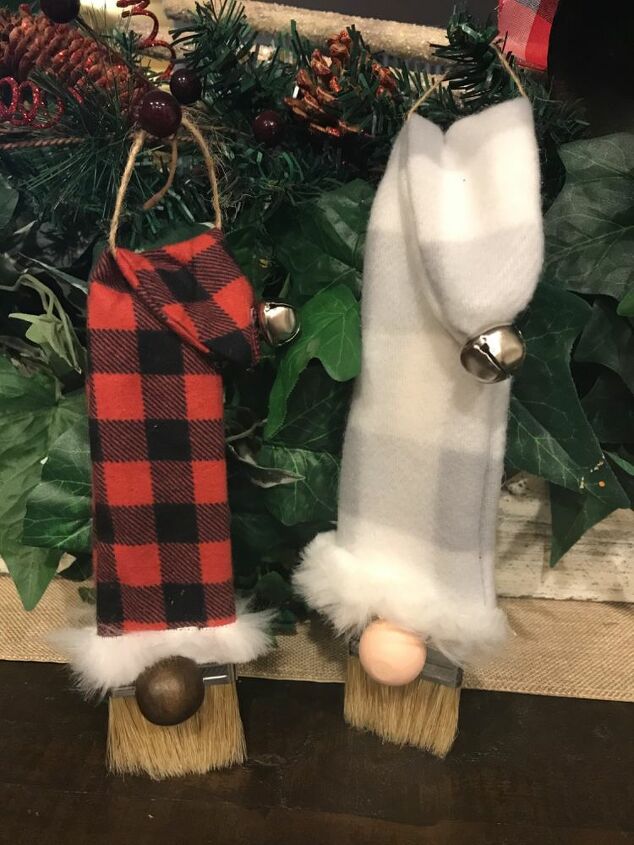
And that's it! It's ready to be hung on the tree. These look so so cute, I love them!
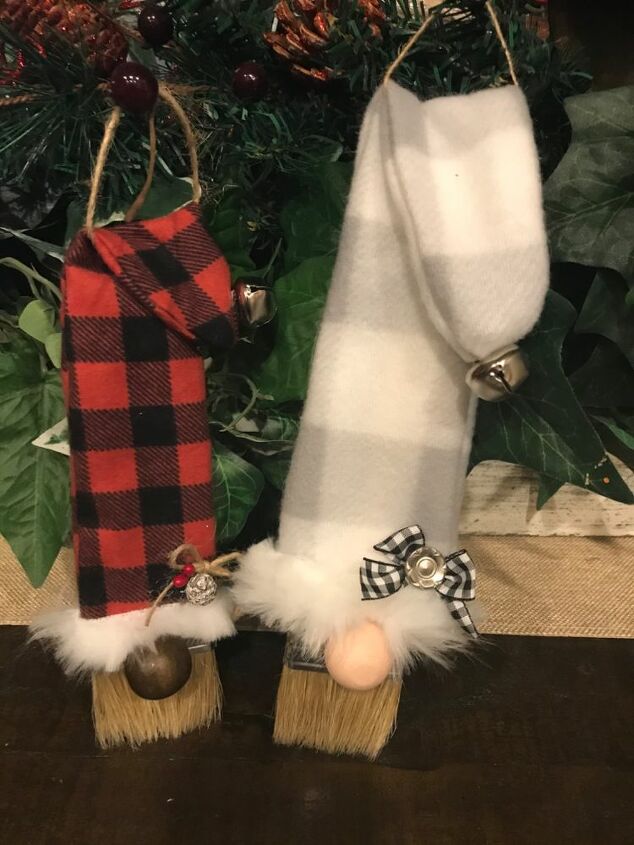
This is an easy and inexpensive homemade ornament project that the kids would love too!❤️ See more at Gilbert Marketplace
Resources for this project:
See all materials


Comments
Join the conversation
-
Love it!
-
These are adorable and so simple, great job!


Frequently asked questions
Have a question about this project?
Could you please post a picture of the finished product at the beginning? I would make it easier to understand the steps.
The top where u glue the bell is not square. How did u get it tapered?
You didn't provide measurements. How much fabric for the hat? How much fur for the trim?