Witch Legs Cauldron Candy Stand

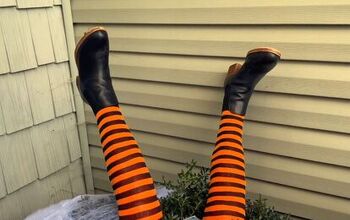
I am so excited about this post today! My Witch legs make the grandest of grand statements, this Halloween. My witch candy holder also can functions as a Halloween server which will be a sure party pleaser. It can be used with dry ice or you can fill it with candy, set it on the table with a tray on it for cookies. It is just a fun project so lets get started!
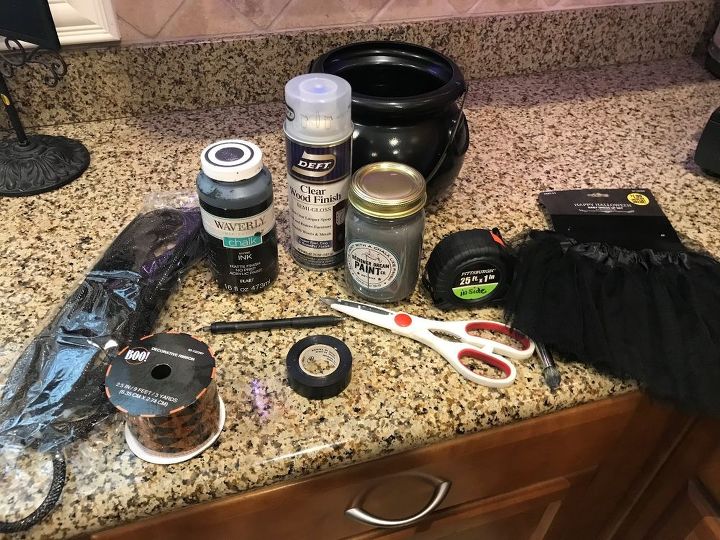
Supplies you'll need:
Sissors
Chop Saw
Hole saw Bit
Screw driver
Jig saw
Pencil
Tape measure
Paint
Electrical tape
Tulle Skirt
Ribbons
Cauldron
Wood dowel 3/4"
Screws
Glue gun & Sticks
Wood square 5"x5"
2" thick Piece of wood
Get the 3/4" poplar dowel first take the stickers off and then paint them the color you want your legs to be. Once you do that let them dry.
Once they have dried use the electrical black tape and tape around the legs about every 2" all the way up the legs. It will make it look like striped socks.
Next, you will need to cut a square piece of wood that is 5"x5"
Now, using a 2 inch thick board, you will also need to cut out a pair of witches shoes. For this I just copied a shoe I liked on the internet and traced it onto the board and used my jig saw to cut the shape out. After I did this, I painted them black and let them dry.
Once those dried I used my 3/4" whole saw bit and drilled a hole in the center. This is where you will be adding the wood dowel legs.
This is my 5x5" square, my drilled black shoes, my 3/4" poplar wood dowels, and my painted orange taped legs.
We will now assemble these. As you can see the first ones I didn't paint all up front what a mistake. I made an X on the 5''x5'' board to find the center then I pre drilled the holes 1 1/2" from the edge. I also predrilled the center of the dowels so that my screw would go in easier and not crack the wood.
Now that the top base is done flip it over and add your shoes. I chose not to glue my shoes in because they stay in naturally and have a tight fit. Plus, this way when your ready to store them for next year you can just pull them off and put them away!
Next I made some bows using ribbon I liked. Just folding and layering and attached it to the shoe with hot glue.
You can see what I did in the above picture, I also added this diamond embellishment.
Now I have the base, legs and shoes decorated.
This is where I chose to use a Cauldon that I also used vinyl on. One side I had my sir name and the other side I put Trick Or Treat. I just thought it needed something else and I was in the 99 Cent store and saw these skirts for baby dolls. I really thought they were for dogs Ha-ha! but it was the perfect size to fit perfectly around my base so I didn't have to make a skirt best $1.99 I spent :)
This was one of my favorite projects I have done. I love Halloween! It's not to hard and they came out super cute! At least I thought so. Hope you are inspired to make one! They are great for the season and would look great on a porch!
Here are just a couple more I did with short legs 18" great for table tops use on your Halloween buffet filled with candy or dry ice. Great for a fun look! You really can do in any size. Hope you enjoyed this post! Happy Halloween
More Haunting Halloween Decorating Ideas!
Enjoyed the project?
Suggested materials:
- Sissors (Dollar Store)
- Chop Saw (Lowe's)
- Hole saw Bit (Lowe's)
- Screw driver (Lowe's)
- Jig saw (Lowe's)
- Pencil (Dollar Store)
- Tape measure (Habor Freight)
- Paint (Walmart)
- Electrical tape (Dollar store)
- Tulle Skirt (99 Cent only)
- Ribbons (The Ribbon Store)
- Cauldron (99 cent only)
- Wood dowel 3/4 (Lowe's)
- Screws (Lowe's)
- Glue gun & Sticks (Dollar Tree)
- 2" thick Piece of wood (Lowe's)
- Wood square 5"x5" (Lowe's)













Frequently asked questions
Have a question about this project?
How thick does the 5x5 square for the top need to be??
Can you provide link to the witch shoe template?