


How to Make Hocus Pocus Portraits To Decorate For Halloween

Halloween is an awesome holiday, we can all agree on that. But we have so little time to make our cute decor, that we can't even enjoy it.
Worry no more, let's start early, and make all the cuties we want to add to our decor now. So we can enjoy them longer!
Today, I'm going to show you how to make cute Hocus Pocus portraits.
Here you can see how I made these beautiful portraits and more Sanderson Sisters-inspired decor. Let me know if you're coming from Hometalk!
These are so beautiful and are the perfect addition to your Hocus Pocus collection. I'm a huge fan of the Sanderson Sisters, but I like the more vintage look on Halloween decor, so these are perfect. Let's get to crafting, Sistaaaasss!
Tools and materials:
- Wood ovals
- Scrapbook paper
- Pencil
- Scissors or X-ACTO knife
- Mod Podge
- Antique wax
- Printed portraits
- Frame designs
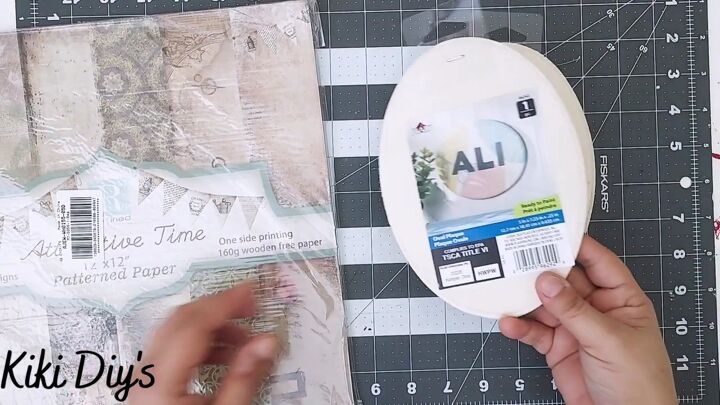
1. Cut out the scrapbook paper
We will start by making those wooden ovals look cuter, that's why we're using scrapbook paper.
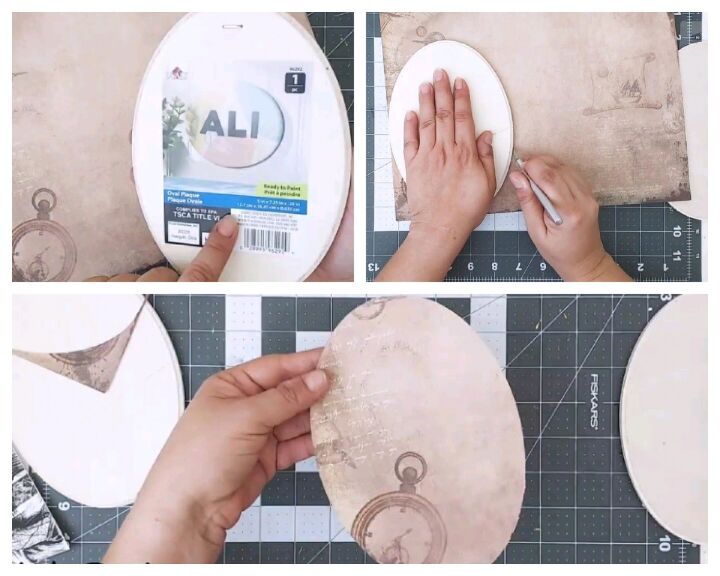
For that, we just need to trace our oval, and cut it with an X-ACTO knife or our scissors ✂️
Then it's time to glue the paper down, before Binx steals our pages...
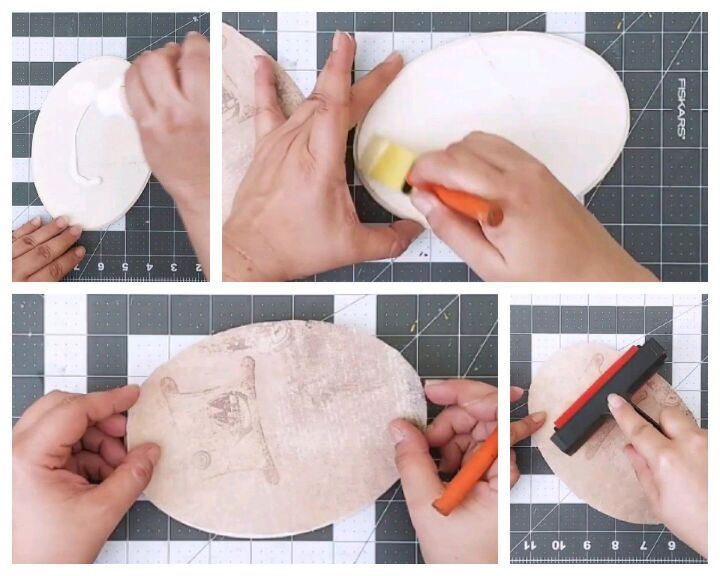
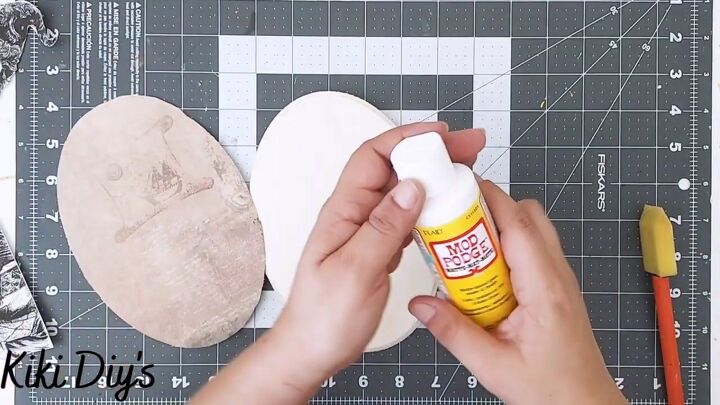
2. Glue the paper to the oval
Apply Mod Podge to the oval, and spread it with a foam brush. Then place the paper on top of the oval, and press it down using a scrapbook roller or your hands.
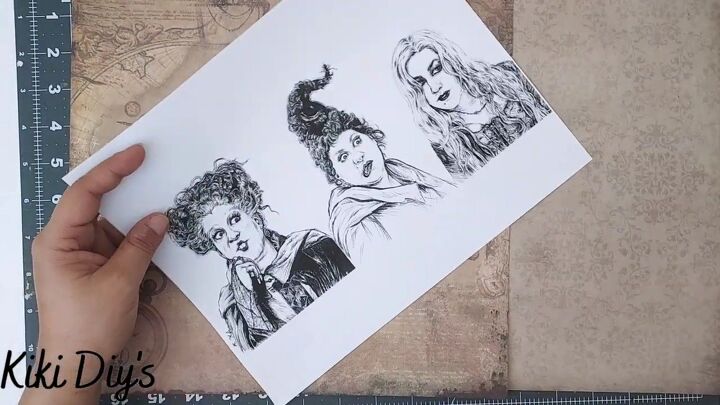
3. Print out the pictures
Here are our Sanderson sisters! Find a cute black and white image or drawing on Google, print it out on regular copy paper.
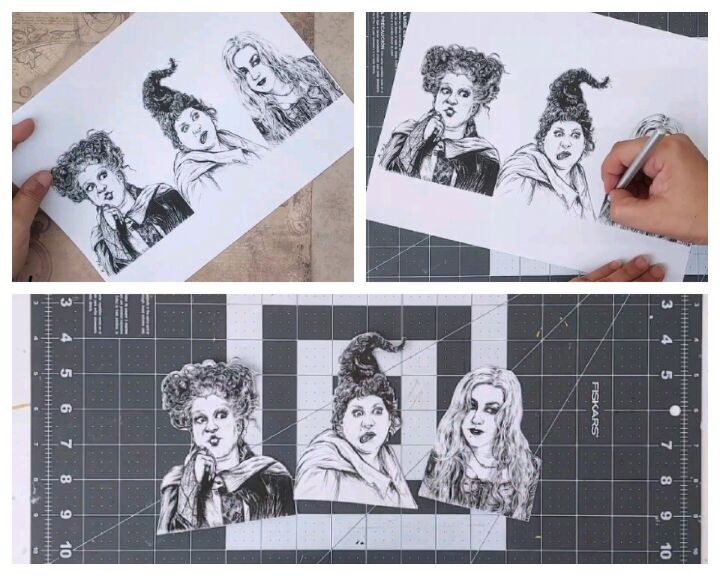
4. Cut out the portraits and frames
Using an X-ACTO knife or your scissors ✂️ cut the images, as close as you can to the borders.
Our sisters need a cute frame for their portraits, so go ahead and find a cute free SVG of a frame or make a cute one with stickers. Here you can get as creative as you want.
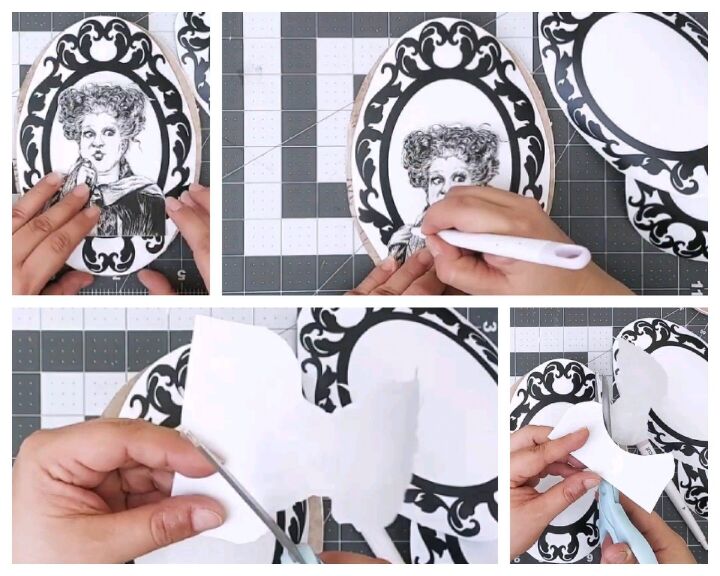
Measure the frame with the images, if they are ovals you'll need to adjust the bottom of your portraits, just mark the excess and cut with scissors.
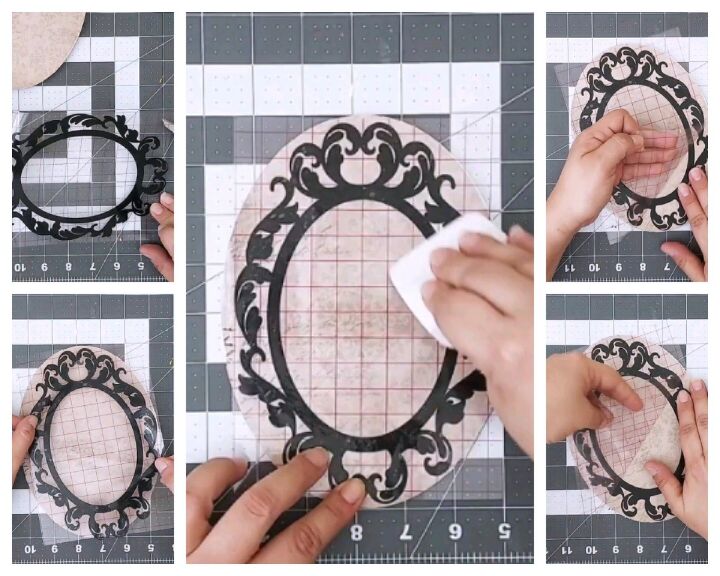
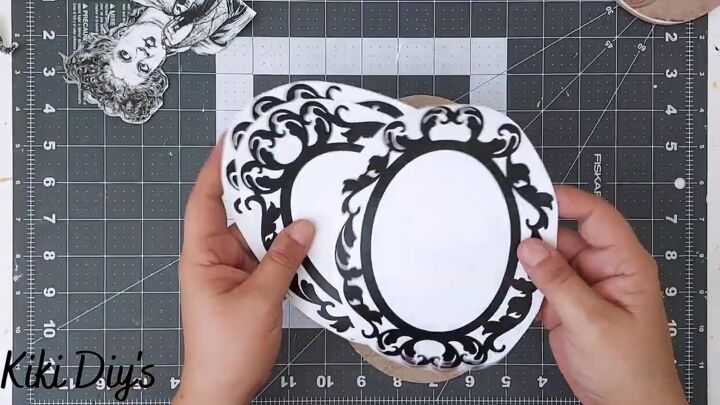
5. Apply the frames to the ovals
Apply your decal or stickers to your oval, take your time so you won't rip the paper. A little distressing is ok, so if you have small tears it's ok and would add to the final look.
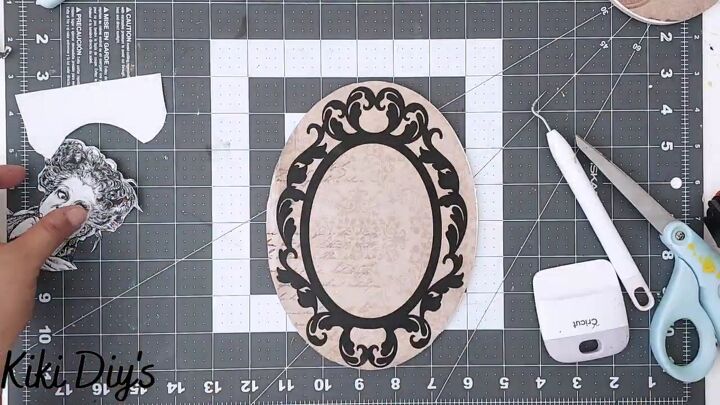
Your portrait frame should look like this by now. Super cute and perfect for our beautiful Sanderson Sisters!
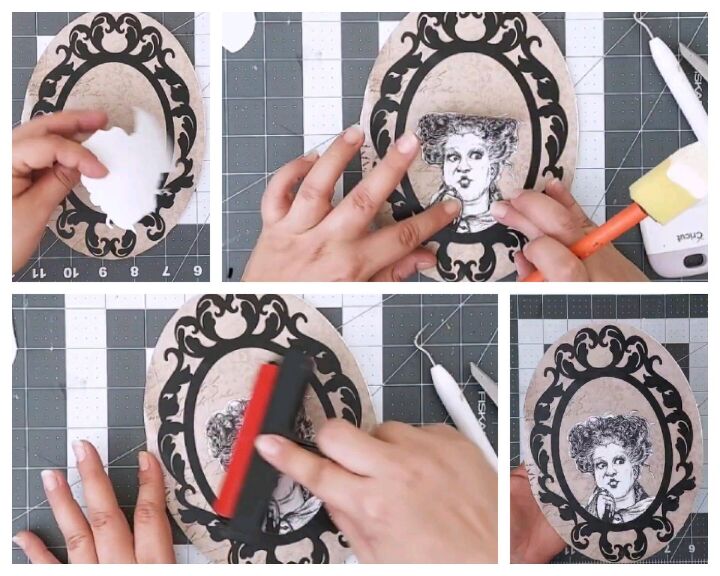
6. Adhere the portraits
Now it's time to add the sisters to the frames. Add Mod Podge to the back of the images and glue them on the inside of the frame. Make sure there are no spaces on the bottom, so they look like vintage expensive portraits.

7. Sand
Now using a sanding block, sand the edges to remove excess paper or splinters from the ovals.
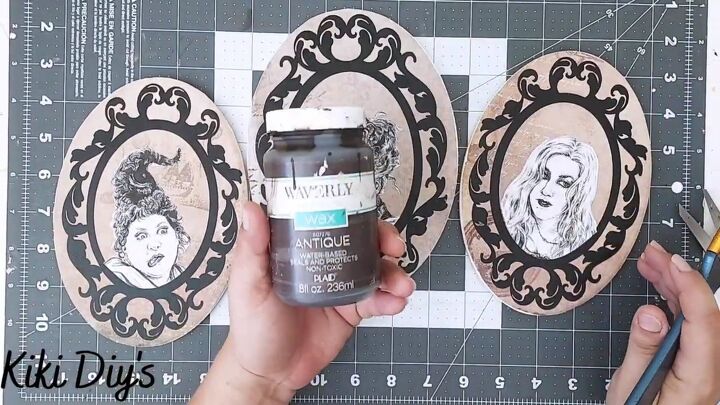
8. Distress
Now it's time to add the vintage, distressed look to these cuties. For this, you only need some antique wax and a brush.
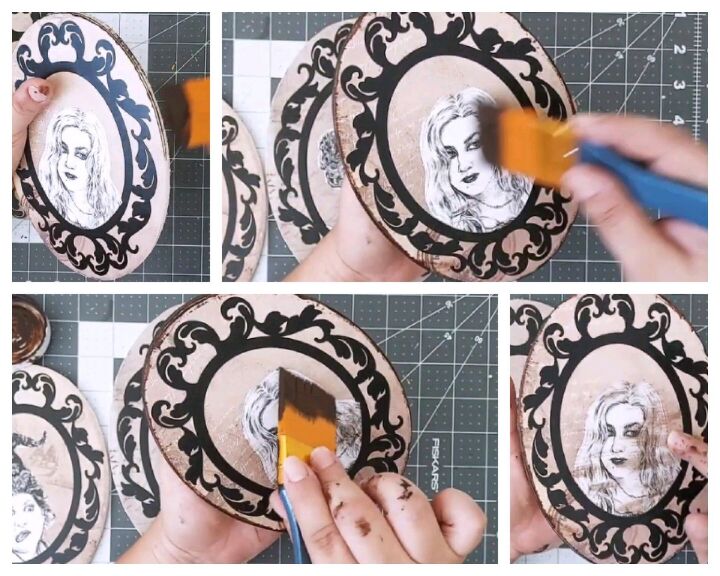
Take your brush and dip it in the wax, then remove all the excess. Paint the borders completely with the wax. Then lightly paint some of that wax on top of the portraits.
If you add too much, blend it using your fingers. Do this until you're happy with the distressed look of the portraits.
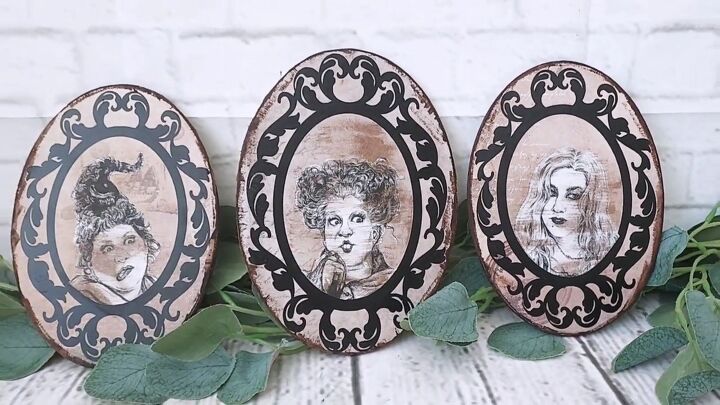
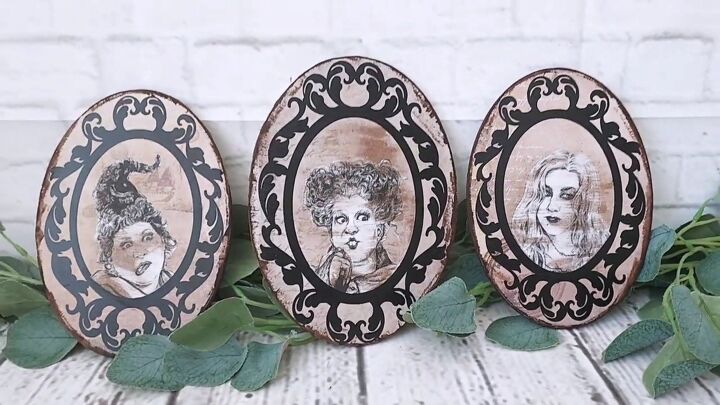
Hocus Pocus portraits
Here are the final Hocus Pocus portraits, with all their glory and the beauty obtained from all the children. Don't let Binx steal their glory, and decorate your home with high-end-looking movie memorabilia!


Frequently asked questions
Have a question about this project?