


DIY Floating Corner Shelves
Have an empty corner and wants some vertical shelves to fill with some fun items? Here's a step by step tutorial that's pretty simple and inexpensive.
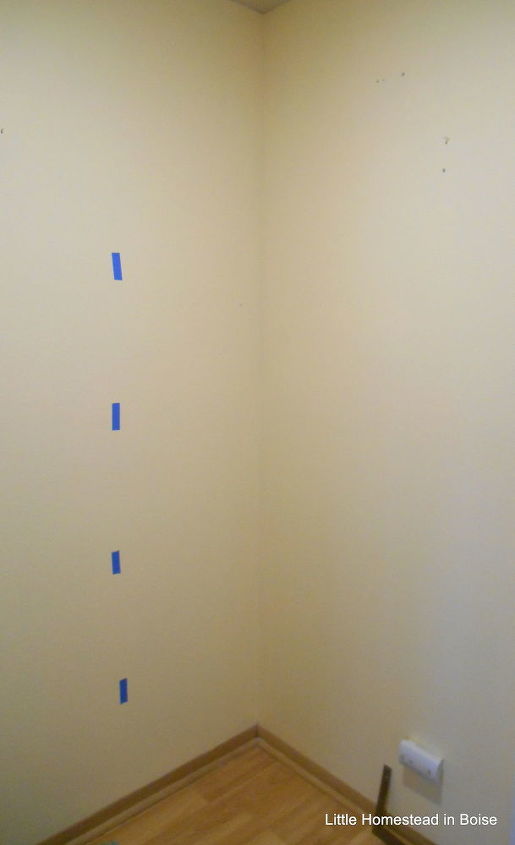
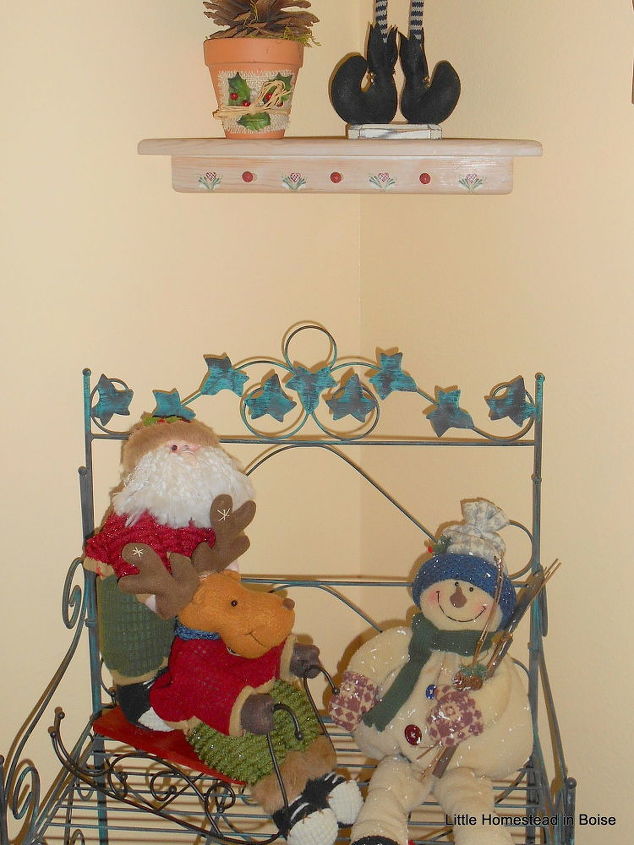
We had a main hallway corner where we had been using a small wire rack and 1 floating shelf, see below. I really wanted to jazz it up.
I first got the idea here- http://www.4men1lady.com/when-life-gives-you-lemons-make-corner-floating-shelves/ I asked Dave to build some in our front corner hallway. He looked at the plans and he said it was VERY overbuilt. Since he's great at carpentry I trusted his design. We used lighter weight wood, saved $ and it's very sturdy.
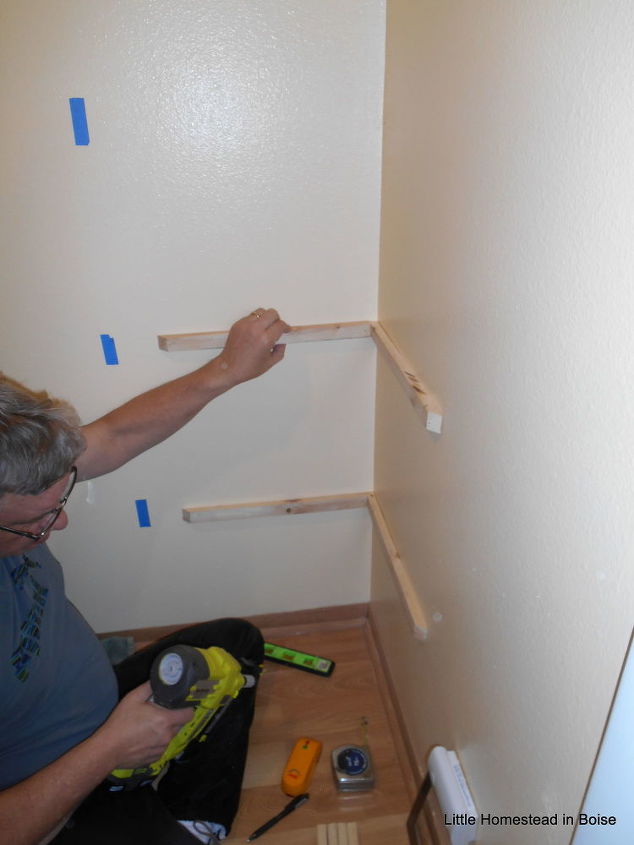
Dave took everything down, we talked about how wide and high the shelves should be, then marked with painters tape. The nice thing with this project is you can totally customize it's size! Next he leveled, then mounted the 1" x 2" supports to the studs and nailed in, using his little nail gun. It worked great for this, no huge, messy holes! You could use small nails and a hammer for this as well.
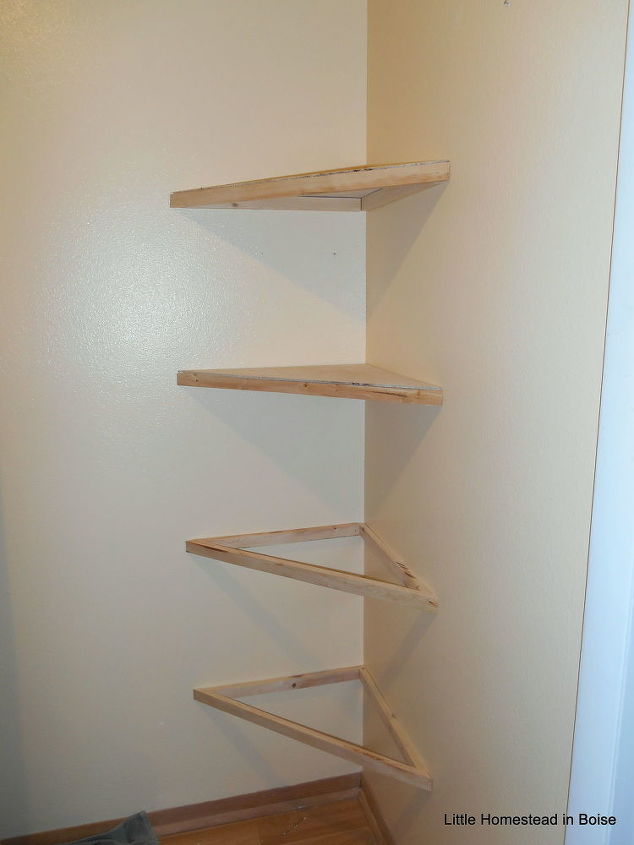
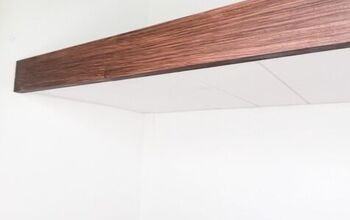
Supports all installed, ready for tops and trim. Next the plywood was cut in triangles to fit and nailed in. 1" x 3" finish grade wood nailed to the front edges. Last the quarter round trim for the top edge of the shelves was nailed in.
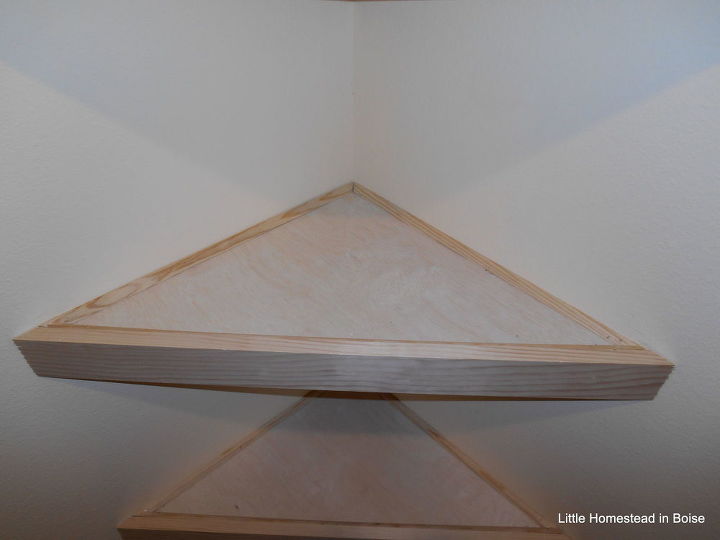
At this point the wood is bare, since I wanted to see the color in the lighting. I left as is for a few months then finished them. I did a tiny amount of spackle for a few holes in the walls from the previous shelf and touched up the paint.
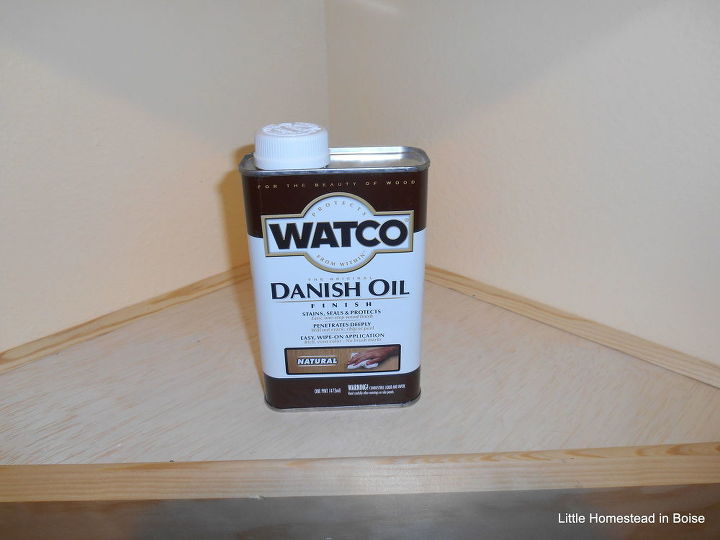
I thought about paint, stain and wasn't sure if we wanted to keep them light or dark. Both Dave and I really like the natural wood look and so I found Watco Danish Oil which is a one-step finish. Got it for about $10.00. It's oil-based product that protects the wood and is very easy to apply.

I went with Natural since that we didn't want a really big color change in the wood. We have a nice light wall color in the hallway and I didn't want to go dark since we're going for a bright airy look in the house. Just follow the directions on the can. Applied with paper towels, easy cleanup! I did 2 coats. Very low odor on this.
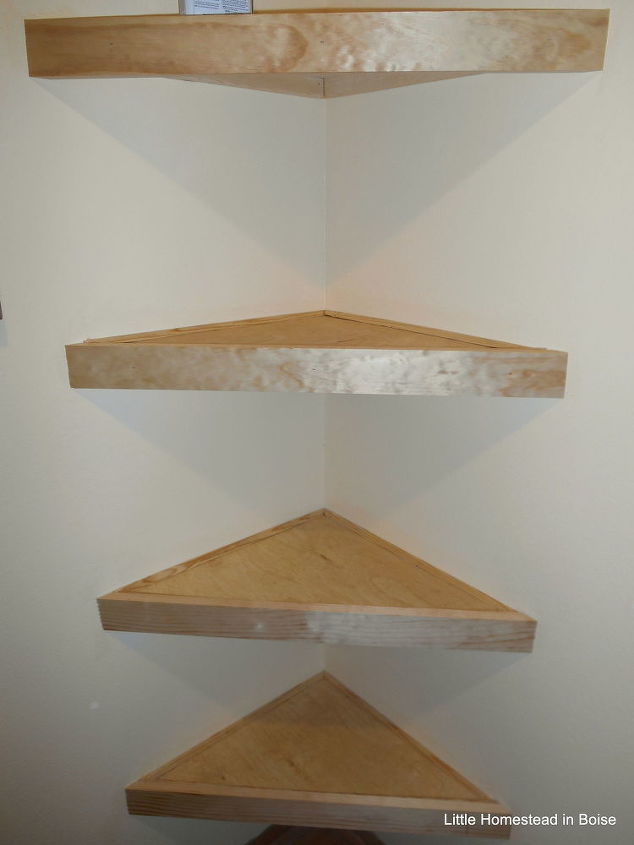
The finish came out great! A little darker, great luster! This will protect the wood for years.
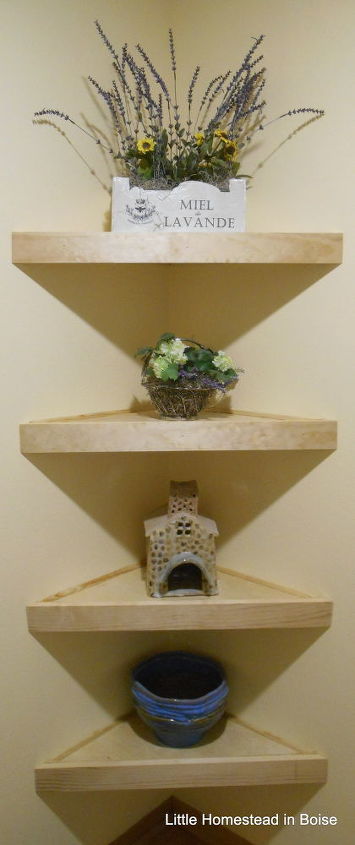
We love how it came out! Love the size, perfect for the space! Here's the materials list we used, all about $25.00 locally-
1/4 sheet of 1/4 " Birch plywood for shelves, cut in triangles
16' of 1" x 3" utility wood, he cut to 1/2" for 32' for the braces
25' quarter round for the top edge of the shelves, looks more finished
12' finish grade 1" x 3" for front edges
Nail gun nails, or use finish nails
Fine sandpaper for the edges, just to smooth a bit
You could have a big box store cut the squares for you, but then you'd have to cut the triangles another way.
Resources for this project:
See all materials


Comments
Join the conversation
-
Absolutely beautiful. You both did a fabulous job. You should be so proud. Very nice choice on color as well. Wouldn't have looked as good if it were all dark in that very light and bright hallway. Thank you so much for sharing with us.
-
Thanks so much and we are really loving it still!


Frequently asked questions
Have a question about this project?
What can I use if I'm not allowed to put nails or tac of any kind in the wall
I would like to do this beside my fireplace, but not in the corner. Just shelves that match on both sides of the fireplace mantle. Would I use the same idea?
Could you explain the quarter round trim for the top edges of the shelves a bit more? I am a little confused by what you did with the trim in this process and how you would have installed it to make it flush?