


How to Upgrade Your Porch With a DIY Topsy Turvy Planter

If there’s one thing that always catches my eye in a garden, it’s a bold and playful planter. And what’s more fun than a DIY topsy turvy planter?
This gravity-defying stack of colorful pots looks like pure magic, but it’s actually super simple to make. The best part? You can mix and match flowers, swap them out for the seasons, and even add a little whimsy on top!
Ready to build your own? Here’s how!
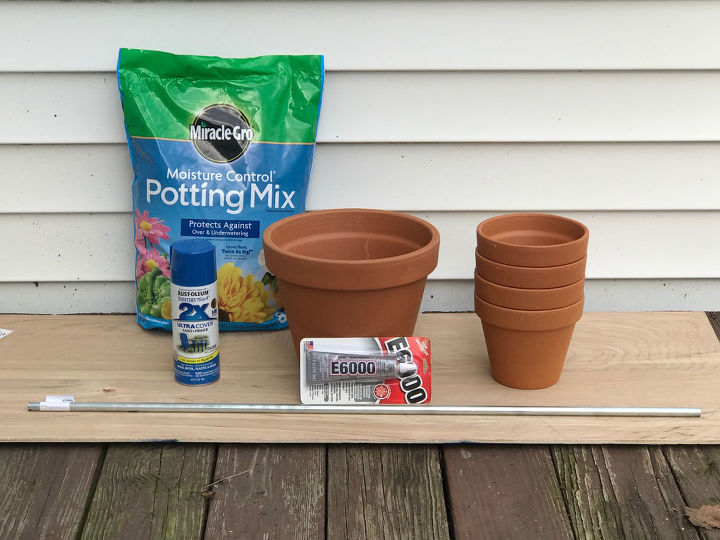
Tools and Materials:
- Potting mix
- One 10" pot
- Four 6" pots
- E6000 glue
- 36" metal rod
- Spray paint
- Flowers or greenery
Hometalk may receive a small affiliate commission from purchases made via Amazon links in this article but at no cost to you.
1. Paint Your Pots (Optional, But Fun!)
If you want a colorful stacked flower planter, grab some spray paint and give your pots a fresh coat.
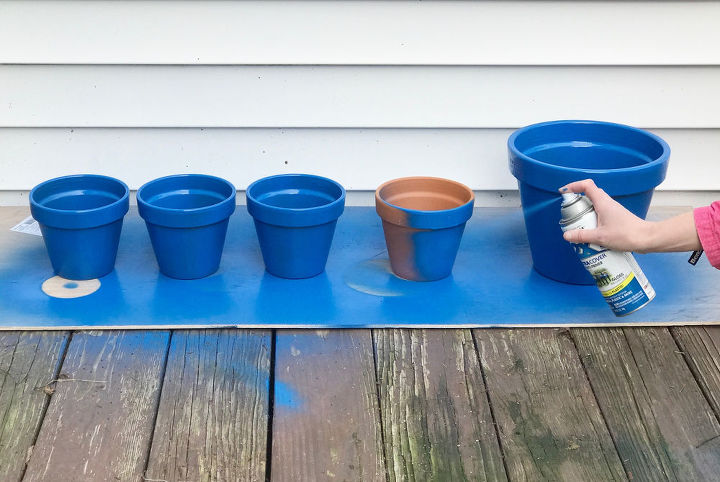
I used a bright blue outdoor-safe spray paint, but you can pick any color that suits your space.
Let them dry completely before moving on.
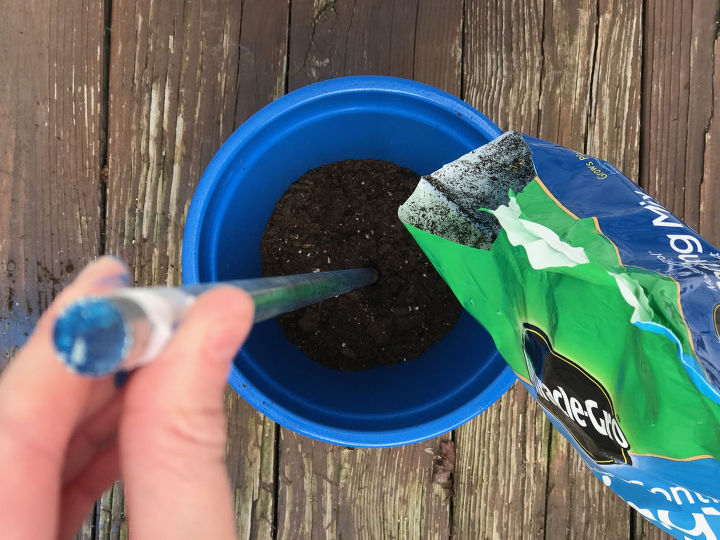
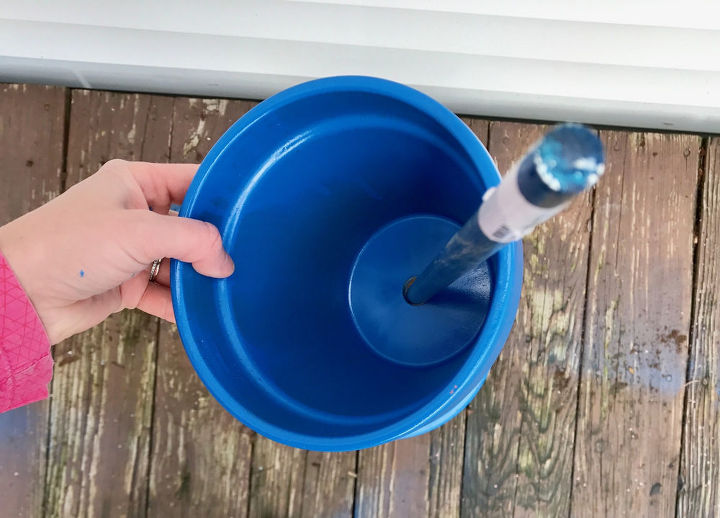
2. Prepare Your Base Pot
Take your 10" pot and fill it with nutrient-rich potting soil.
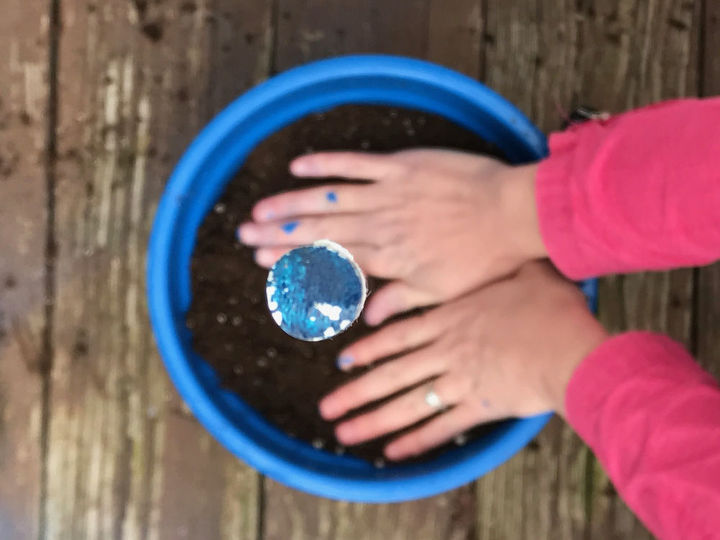
While filling, push the metal rod into the center, making sure it’s deep enough to hold the weight of the stacked pots.
Keep pressing down on the soil to secure the rod firmly in place.
3. Add The First 6" Pot
Thread your first 6” pot onto the metal rod through the drainage hole.
Tilt it to one side so it leans at an angle in the soil.
This is what gives the topsy tervy planter its fun, whimsical look!
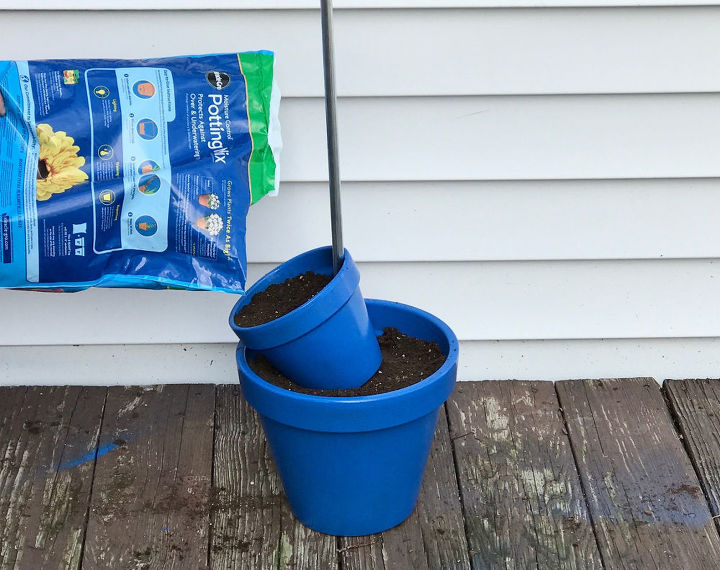
4. Secure And Fill With Soil
Once your first pot is in position, pack soil around it so it stays steady.
Then, fill it up with potting mix to prepare it for your plants.
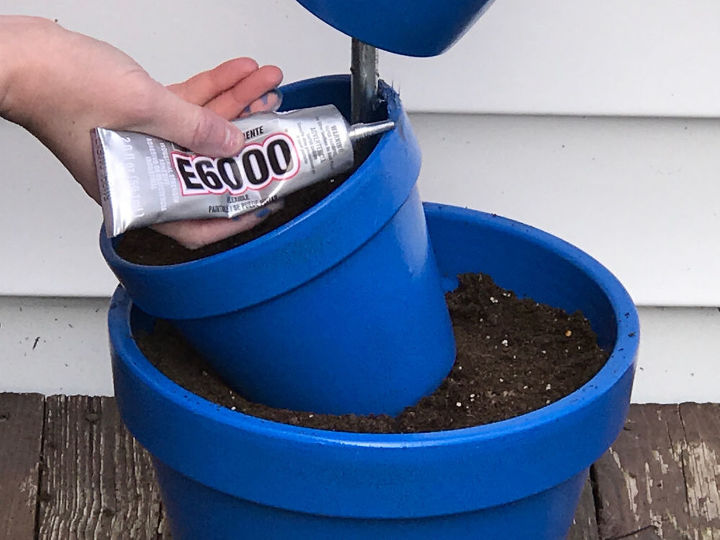
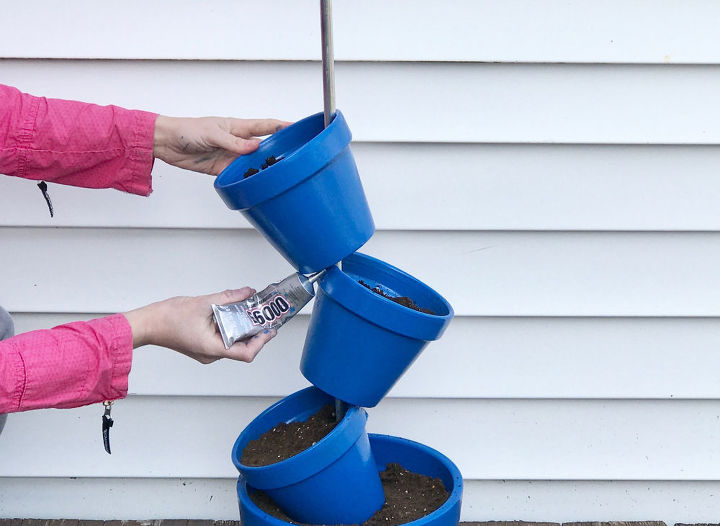
5. Glue The Edge
Take your heavy-duty E6000 glue and apply a small amount to the outer edge of your first tilted pot.
This will help hold the next pot in place and keep everything stable.
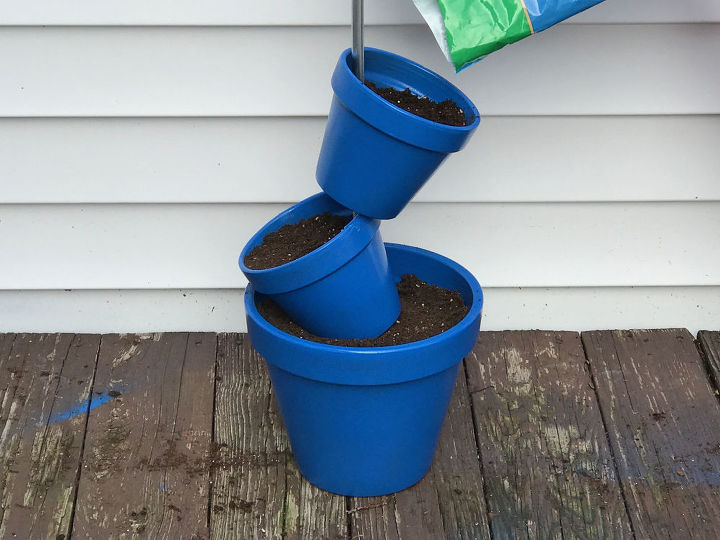
6. Stack The Second Pot
Thread the next 6" pot onto the metal rod and lean it against the glued edge of the first pot.
Hold it in place for a minute to let the glue set, then fill it with soil.
7. Repeat For The Next Two Pots
Follow the same steps: thread, tilt, glue, hold, and fill.
By the time you get to the last pot, you’ll have a stacked planter that looks like it’s defying gravity!
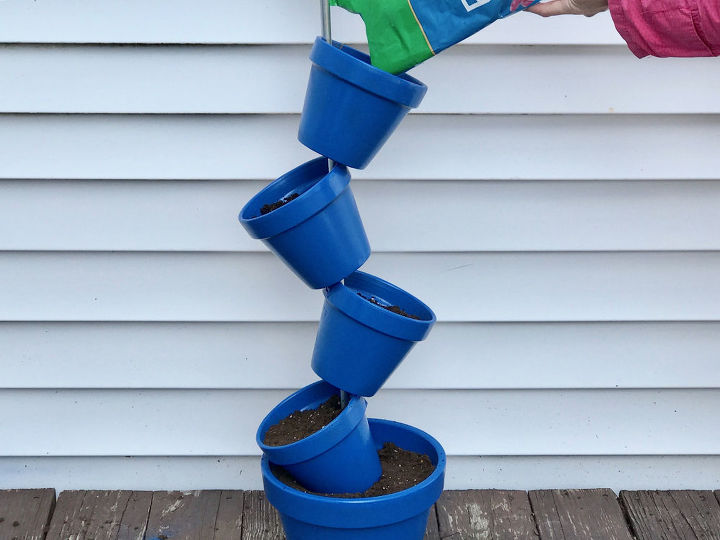
8. Plant Your Flowers
Carefully add your blooming flowers or trailing plants into each pot.
You may need to loosen the roots a little so they fit nicely in the smaller pots.
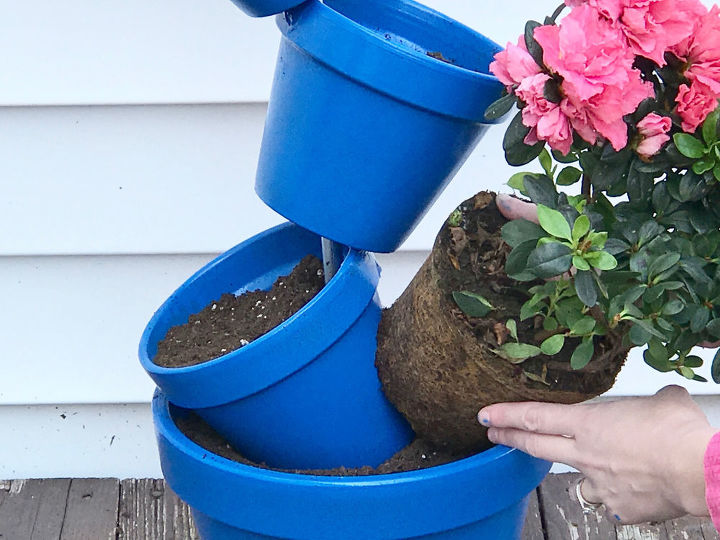
I love mixing vibrant petunias, cascading ivy, and cheerful marigolds for a lively look!
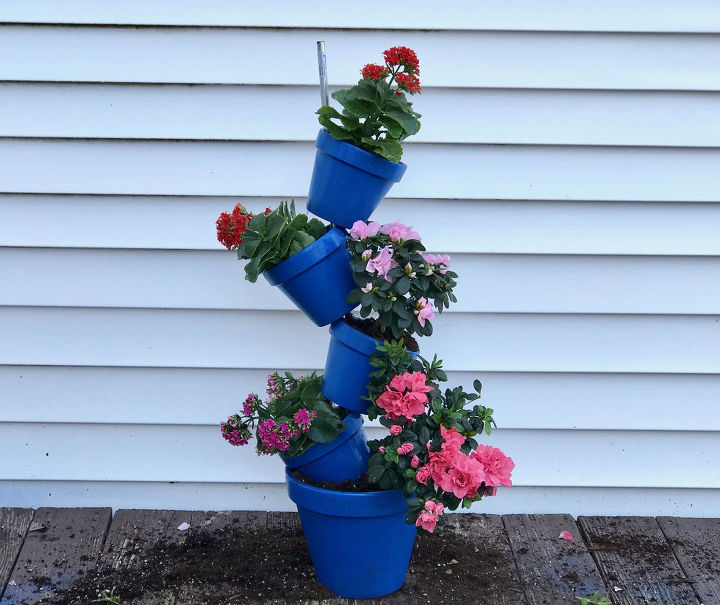
My flowers have been planted - but what to do about that extra foot of rod? It is intentional, I promise!
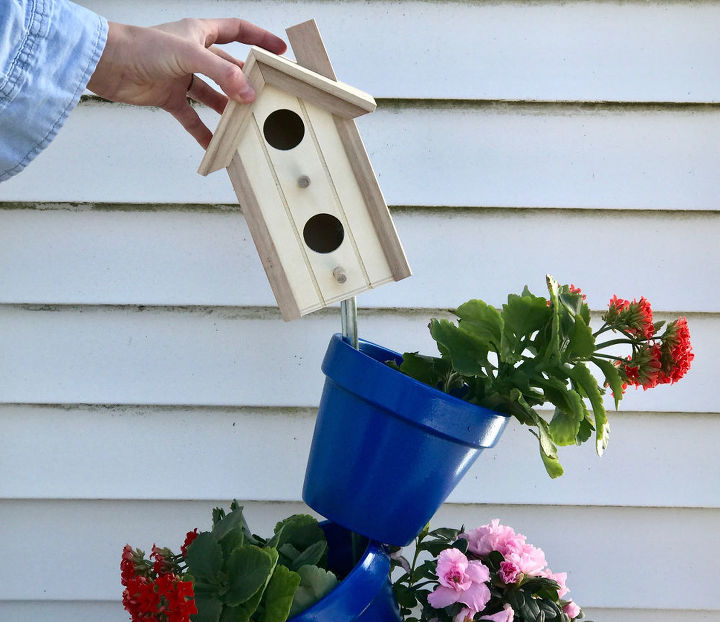
9. Add A Playful Touch On Top
Here’s where you can really have fun!
Since I had about a foot of the metal rod sticking out, I placed a cute wooden birdhouse on top.
But you could add a seasonal decoration, a garden gnome, or even a little sign that says ‘Welcome’!
Love garden projects?
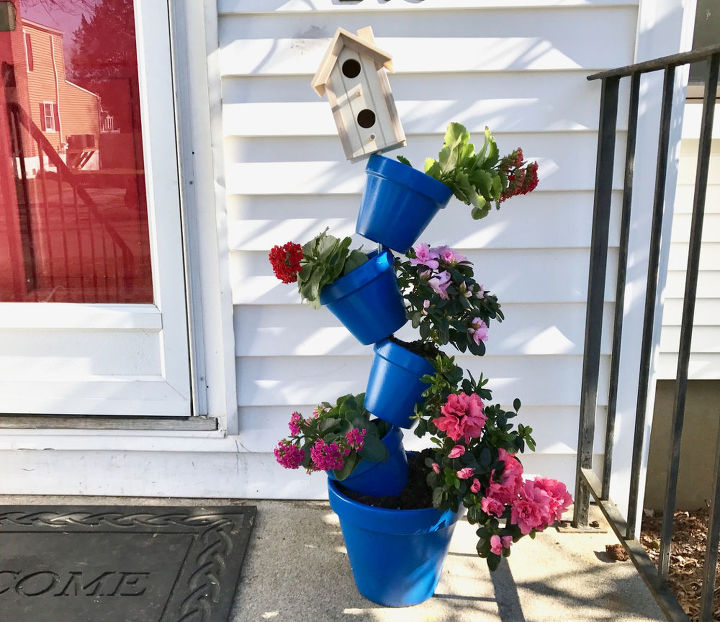
Topsy Turvy Planter: A Fun And Functional Garden Feature
And just like that, your DIY topsy-turvy planter is ready to brighten up your space!
You can swap out the plants for every season to keep it fresh year-round.
What do you think of my quirky and fun DIY garden idea? Would you add a fun topper to yours? Tell me in the comments—I’d love to hear your ideas!
Happy planting!
Resources for this project:
See all materials


Comments
Join the conversation
-
I've seen this idea done so many different ways but the birdhouse on top is just so creative !!!
-
Be careful with the tomato cage over. It's extremely top heavy. It won't tip by itself but if it gets barely bumped it can send the plant flying. You can bury the bottom into another larger planter or a basket filled with stones


Frequently asked questions
Have a question about this project?
When you water the plant on the top, does it go to the next one, and so on?
I love this! What is in the bottom pot? It doesn't look like the rod that runs up the center of the all the pots. (white item with blueish coloring on the top). Also how does the rod mount to that piece. Thanks
Did you attach the rod to the bottom pot? How do you keep it from tipping over in the wind?