How to Make a Simple Garbage Bin Enclosure in 4 Steps

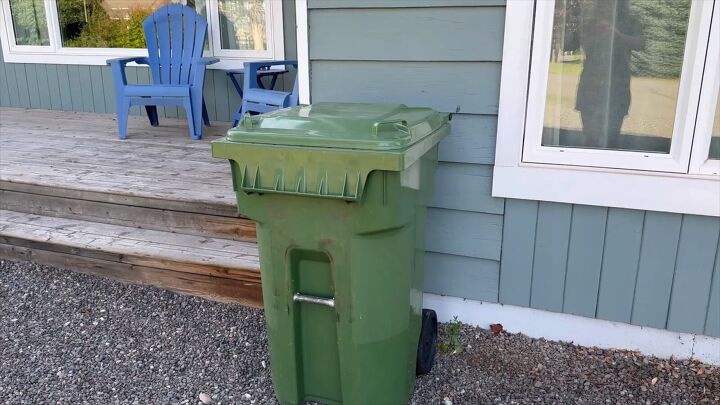
If you're tired of looking at your trash cans sitting in your front yard and want a simple, affordable solution, building a DIY garbage bin enclosure could be the perfect weekend project.
This easy tutorial will show you how I turned three pallets into a practical, stylish way to hide my garbage can using only basic tools and materials.
Follow these steps and soon you'll have a custom outdoor trash bin enclosure to help tidy up your yard!
This post was transcribed by a member of the Hometalk editorial team from the original HometalkTV episode.
Hometalk Recommends!
Tools and Materials:
- Three wooden pallets
- Miter saw (or hand saw)
- Brad nailer
- Nails
- Measuring tape
- Hammer or crowbar (to remove pallet boards)
- Bamboo beach mat (optional)
- Planter (optional)
Hometalk may receive a small affiliate commission from purchases made via Amazon links in this article but at no cost to you.
1. Set Up the Pallets
Start by positioning two pallets upright on either side of your garbage can.
These will form the walls of your outdoor garbage bin enclosure, and you might find that they’re already the perfect height (just like mine were) so there’s no need to cut them down.
Place them about 38 inches apart to give enough room for your garbage bin to fit inside comfortably.
2. Cut and Prepare the Third Pallet
Now, take your third pallet and carefully remove the boards using a hammer or crowbar.
Once you’ve removed the boards, make sure to pull out any old nails.
Then, measure the distance between the two standing pallets (mine was 38 inches) and cut the pallet boards to fit across the top of your outdoor trash bin storage using a miter saw.
For a clean look, I squared the edges of the boards before attaching them.
3. Attach the Boards
With your boards cut, it’s time to secure them.
Using a brad nailer, attach the boards across the top of the two standing pallets.
This will create a sturdy, enclosed space for your garbage bin.
Make sure everything is secure and even.
4. Add Personal Touches
At this point, your basic garbage bin enclosure is complete, but if you want to add a little something extra, now’s the time!
I decided to attach a bamboo beach mat I found at the dollar store to the front of the enclosure.
It added a neat texture and helped blend the enclosure into the rest of my yard. I also placed a small planter on top for a bit of greenery.
Want more DIY outdoor bin storage ideas?
How to Build a Low-Cost Garbage Bin Enclosure for Outdoors
Now that your DIY garbage bin enclosure is complete, your yard will look cleaner and more organized in no time.
It's a simple DIY project that transforms the look of your yard without breaking the bank.
Now it’s your turn! What do you think of this DIY outdoor garbage bin enclosure project?
I’d love to hear your thoughts or see your own versions in the comments.
Enjoyed the project?
Comments
Join the conversation
-
-
 Mkj175548991
on Aug 18, 2025
We can only store these large trash and recyling bins at the end of our driveway. So that is very unsightly! This is a great way to sort of have them blend in with the white fence they currently sit up against. It wouldn't take up much precious driveway space like premade 'mimi-sheds' that I see people using. You could paint the pallets white to match the fence. And I wouldn't mind wheeling them out each time I use them if it helps make them blend in. The only thing I would wonder is if they could survive winter weather. Thank you so much for coming up with this creative idea and sharing it!!!
-











Frequently asked questions
Have a question about this project?
So does the top open, so when you want to put garbage in you can lift it and then lift the lid to your garbage can? Or do you have to drag it out to put garbage in every time? If that's the case, then that's rather inconvenient.
I am looking for a way to 'hide' my robo cans. However, this doesn't seem to be user friendly. How do you lift the lid to put in your trash? Pulling the can out each time would be annoying to me. Why don't you make the top boards raise to make access easier??? And instead of that ugly bamboo mat, put a swinging door on the front. The pallets don't cost anything. Most companies throw them out or will just give them to you. Again, a nice idea but needs some refining. IMO 🤔
It’s a clever idea, not goofy at all if you do not have room to store your bin(s) in the garage. I wonder if you could put three pallets together with one open side, no cover, paint them and have one of the painted sides face the street and the open side face the house or side for easy access.