How to Hide a Sump Pump in a Small Family Room

We had a dilemma in our small family room (den). We had a sump pump in the corner. So, to maximize the room's storage space and hide the sump pump, we created a game storage cabinet. Follow along and check out how we made it.
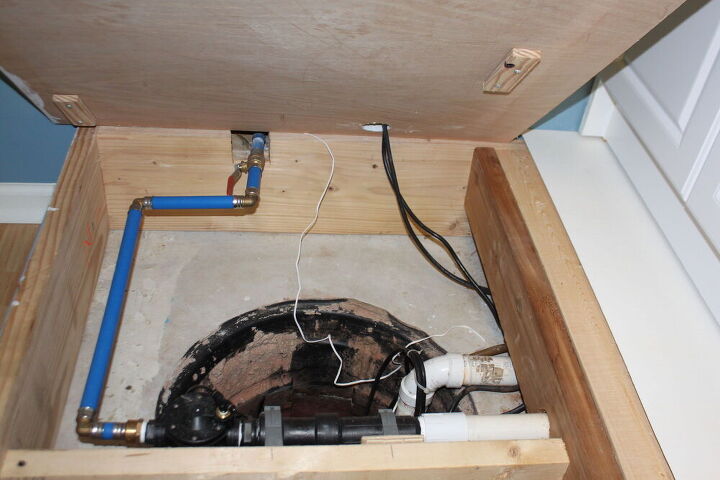
As you can see, we made a box around the entire sump pump with 2 x 6 inch pressure-treated wood. This went all the way to the wall and attached there.
We had to hide this as well. To create stability, we cut the box top into two sections. The back section was screwed to the 2 x 6s inch. The front section was removable to access the sump pump. (See the image before this one.)
Instead of building a cabinet, we bought a vanity cabinet in white that was open in the back. This cabinet was super cheap.
We made a shelving unit the wide of the box at the bottom. This will be against the wall. NOTE: The top of this unit is open to access the water line in the drop ceiling.
We removed the doors and added the cabinet to the unit we made. It was then attached with screws to hold the two pieces together.
This photo is what the cabinet looked like when the doors were attached to the bookcase.
We anchored it to the wall and added deep shelves so we would not have a gap.
We then painted the cabinet white. We used white gloss paint, and it helped match the cabinet front. Caulked up the seams to make sure it looked uniformed.
The lower cabinet holds the photo albums for the family. If we need to see the pipe, we can move the albums.
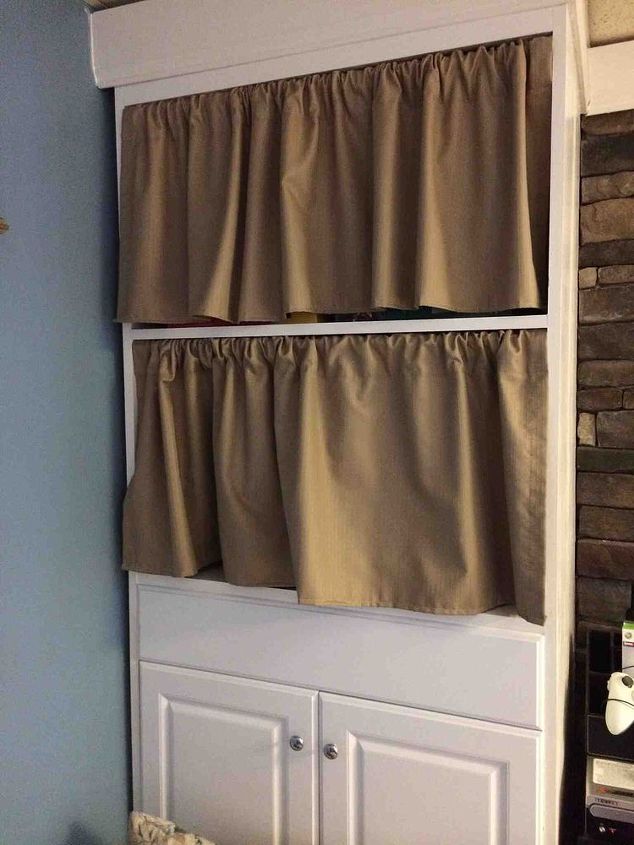
We added games to the top of the cabinet and filled it in. This is before I made the curtains.
I also made a cushion and a pillow to hide the sump pump top. It helped muffle the sound when it turns on. I used thick foam and home fabric from the craft store.
I made curtains with 1 thick room darkening curtain and used 2 pressure rods (small) to hold the curtains in place.
Note: we have a drop ceiling so the ceiling is only 7.5 feet high. So, we did not need to get wood longer than 8 feet.
We added a piece of 1 x 1 inch strip and glued it to the left side cabinet in the picture above. It filled in the gap. We caulked it and painted it white to finish off the cabinet. What do you think?
Visit our the rest of this wall transformation in the link below.
Enjoyed the project?
Suggested materials:
- 4- 24 inch x 1 inch sheets of wood 8 feet (2 x 6 2 - 8 foot pieces of wood)
- 2 x 2 pieces 8 feet (5 inch height molding for top)
- Wood glue (Screws)
- Drill (Sink cabinet white)
- Foam for cushion (fabric for curtain)
- Fabric for pillow and cushion (Table saw)
- Sander (White Glossy Paint)
- 3 inch molding for the bottom of the box around the sump pump (quarter round for the bottom of the box)
- Room darkening curtain - 1 (1 x 1 inch long for the filler on the side of the wall and cabinet)













Frequently asked questions
Have a question about this project?