DIY Farmhouse Desk

This Fall, with COVID, our school district did not allow the kids to come back to in person instruction. This meant our kids would be distance learning from home and that we needed to figure out a daily school space for them. We decided to turn our little guest room into the classroom/office. We started shopping around for desks that may fit our need of seating 2 kids and a parent. It became quickly evident that we were going to have to build our own. Of course we were excited about this project and jumped online to view plans and styles. We found the farmhouse look we wanted, took measurements, drew up a plan and got to work.
Hometalk Recommends!
Materials & Before Photo
Materials needed:
2- 2x3x8’ pine boards
7- 2x4x8’ Pine boards
3- 1x2x8’ pine boards
1- Spruce/pine/fir project board - 3/4”x20”x8’
1- Spruce/pine/fir project board- 3/4”x16”x4’
Kreg Jig
Kreg screws
Finish nails
wood glue
wood filler
paint/stain/polyurethane
clamps
sandpaper
Miter saw
Painters Tape
Orbital sander
sandpaper discs (220 grit)
rubber/latex gloves
lint free cloth
600 grit sandpaper
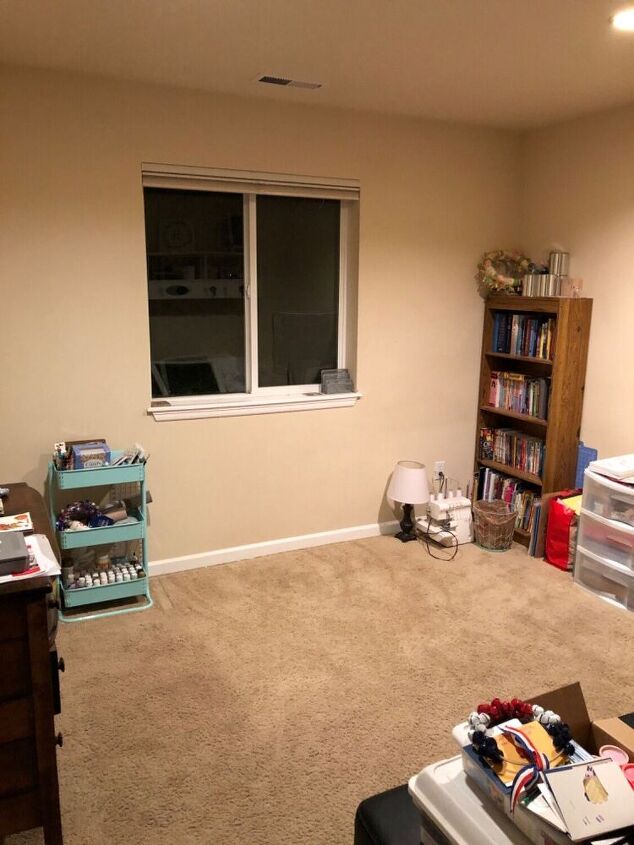
This is the space we had to work with. the desk would be going against the wall under the window. The bookshelf had to move to the other side of the room as did the dresser.
Lumber
I worked on clearing out the room while my husband went to buy lumber. We were on a time crunch to get this project finished by the time school started. With all the materials gathered it was time to begin.
Building the Base
Start by making the frames for the legs. This desk is “L” shaped and has 4 legs. Three of the legs are the same width and one is narrower.
For the 3 legs- The vertical legs consist of two vertical 2x4’s pieces measuring 30” tall. You will have 6 total this length. And two horizontal 2x4 pieces that measure 12 3/4”. Again you will have 6 total at this length as well. 2x3’s will be used to create an “X” in the legs. Sand each piece of wood after cutting to length.
Cut Vertical Legs
Cut the vertical legs to 30” pieces. On the bottom of each one, on one side measure up 2” and across the bottom measure over 1” and cut the corner off. This will create a taper in the legs.
Safety precautions
When using any power tool make sure you are wearing safety glasses and double checking your space before turning them on.
Taper in Vertical legs.
This is what the taper will look like on the vertical legs. This is an optional step that does not have to be done. It helps the piece look more finished than rustic.
Kreg Jig
With the Kreg jig, drill two pocket holes on each end of the horizontal 2x4’s. We set the jig to 1 1/2 “, and used 2” Kreg jig screws.
Attach
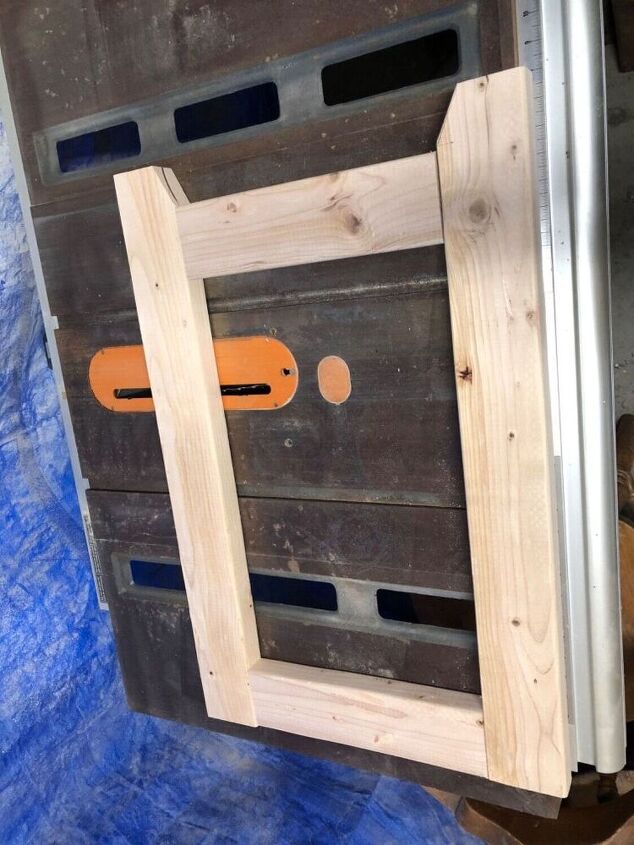
Place one horizontal piece flush with the top of the two vertical legs (between them) and attach with wood glue and screws in the pocket holes. Repeat for the opposite side.
Framed
Place the second horizontal piece at the top of cut taper (as pictured above), using glue and jig screws, secure into place. Repeat for opposite side.
Creating the X
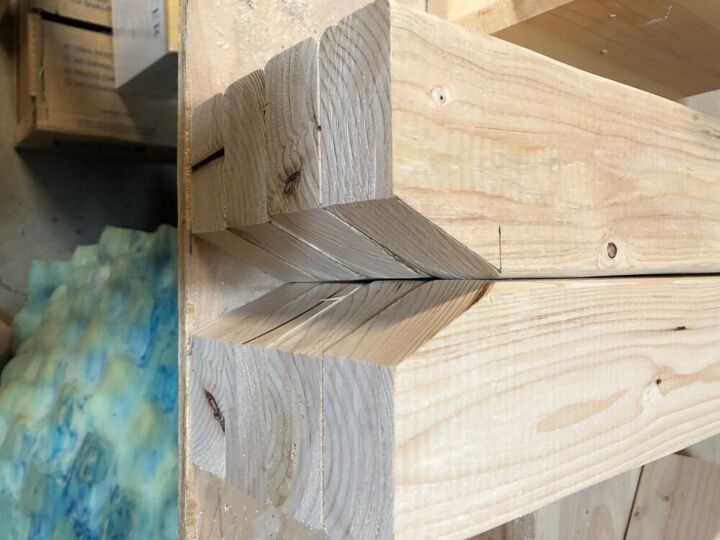
You will use 2x3’s to crate an “X” on one of the legs. The easiest way to do so is illustrated in the picture: lay a 2x3 that is slightly larger than the opening in the leg, from corner to opposing corner. With a pencil, mark on the 2x3 where it crosses under the horizontal pieces of the leg. To create the second part of the “X”, repeat the process, this time also marking the edges where it crosses under the fort 2x3. With your miter saw, adjust the cutting angle to match your marks and cut. On each end of the 2x3’s, still two pocket holes with the Kreg jig using the same measurements as before. Attach the 2x3’s with jig screws and wood glue. Only one of these legs has the “X”.
The fourth leg is constructed the same as the first thre, however the dimensions are different. The vertical pieces are still 30” tall, but the horizontal pieces are shorter measuring 9 1/2”.
Shelf, “L” and supports
This desk forms a lower shelf in the corner where the “L” firms. We’ll begin by building this part. Cut 4 2x4’s to 13 1/4”. Drill pocket holes on the end of each 2x4 piece and between two of the legs, on each side, attach flush with the top of the verticals pieces using wood glue and Jig screws. Attach the next two pieces two inches up from the bottom with wood glue and jig screws. With these attached, you should now have a cube shape. Place an “X” on the back side of this cube using the method described above.
Determine how much space you need for the main part of the desk. We wanted to be able to seat 2 kids comfortably side by side. We measured a working area of 31” each for a total of 62”
Cut three 2x4’s to 62”. Drill 2 pocket holes on each end of your 2x4’s. Attach one 2x4 flush with the top of your remaining large leg and the other end to the side of the cube built earlier. Attach the second 2x4 flush with the top as well, but at the back between the legs. These will support the desk top. Attach the third 2x4 about two inches up from the bottom, between the legs on the backside.
“L” Extension & Desk Top
You should now have the base for the large section. To build the base for the “L” extension, follow the steps for the main section, however only cut two 2x4’s to support the desktop at 31”. By not adding a third 2x4 near the floor on one side, it allows the third seat option to use either side of the desk, maximizing space configuration. Attach the “L” extension to the main part of the desk with jig screws only (no wood glue). This will allow you to easily separate these sections to move the desk in, out or around the room.
For the desk top we used a Spruce/Pine/Fir board project panel. The first piece we cut down for the main desk at 81x20 1/2”, allowing for a slight overhang on one end.
For the “L” extension top, we cut it down to approximately 16 1/2x32 1/4”.
Desk Top Edges
Each desk top piece is wrapped with 1x2” trim, giving the top a thicker look and finished edge. We cut 45 degree angles for the corners. We attached the trim to the desk using a finish nailer and wood glue. We filled the nail holes, any large knot holes in the top and the seams between the trim and desk top with wood filler. Once that was dry, we sanded it smooth with an orbital sander using 220 grit sandpaper.
Sanding
We sanded the entire desk top and any rough spots on the legs and base with 220 grit sandpaper.
Read for Stain
Once the top was sanded and wiped clean, we applied a coat of stain. We used a lint free cloth to apply band wore gloves to protect our skin. After the stain was dry, we applied three coats of polyurethane, sanding with 600 grit sandpaper between coats to smooth it out.
Painting the Base
We painted the base with a white farmhouse color chalk paint. We installed a shelf between the four legs (the cube), measuring the size of the hole and cutting a piece of the spruce/pine/fir board. Wood glue an edge inside So the shelf sits flush and stained the shelf to match the desk top.
Once the poly was completely dry, we attached each desktop piece to its base with wood glue. You could also use the Kreg jig to attach the tops to the base.
New Home
We were able to refinish these chairs we were storing in our garage. They seem to match well and are comfortable for the kids to sit in. The kids are excited to have a school space they can close the fort on for the weekends. I love that it’s functional and fits the needs of our family. This desk would be easy to custom size the length for your home needs. And even take the “L” off if you didn’t need the extra space.
For this project we did not need to buy any tools, glue, wood filler, stain, paint or polyurethane. We often have quite a bit of overstock on items as we refinish and build a lot of furniture and home decor.
As always, check out other projects we refinish, make or decorate around our home over on Instagram @therefininghome And watch how we are adding to our school room.
Enjoyed the project?
Resources for this project:
See all materials
Comments
Join the conversation
-
 R.C. Leach
on Oct 03, 2022
Very nice project, and very well done! The end result is perfect, especially with the blue or turquoise (hard to tell in the photo) seat cushions, and I love that dark stain on the top! This would make a great folding table in my laundry room, but knowing me, I still would dump them on my bed! Beautiful work!
-
-
 Design 59
on Mar 20, 2023
Very cool project! I love those farmhouse table legs
-


















Frequently asked questions
Have a question about this project?
That's so awesome!!! Love it. Where on earth did you find 14 boards for $100???? I just did a project using only 4 pine boards, pretty much the exact same as yours and it was $100 for the 4 boards at Home Depot!! And mine were smaller than yours!