DIY Barn Door Tutorial

by
Noting Grace
(IC: blogger)
11 Materials
$400
4 Hours
Medium
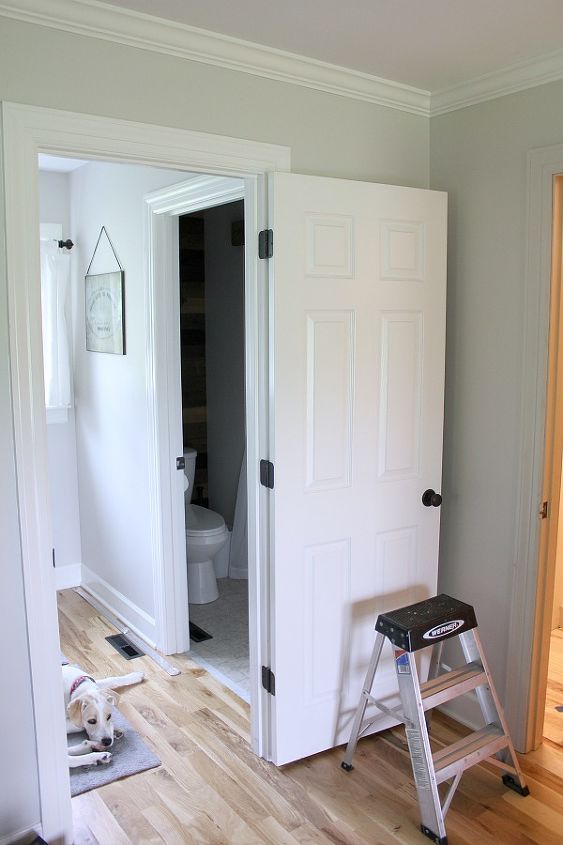
I wanted to make our Master bedroom match the rest of our farmhouse feel in our home and I knew that adding a barn door would be so cool. Here's how easy it is to convert a builder grade door into a sliding barn door.
When we converted an unused 1/2 bath into a second closet in our master bedroom, we were left the same 3 doors all lined up in a row. By switching out the door to our bathroom for a DIY Barn Door, it would break up the monotony. Bonus – it’s a super easy DIY!
Supplies
- 6 – 1 x 6 x 8 boards
- 1 – 1 x 6 x 6 board
- 2 – 1 x 4 x 8 board
- Minwax wood stain in Weathered Oak and Dark Walnut
- Antiquing glaze
- Rockler Rolling Barn Door Hardware Kit
- Door Handle
- Pneumatic nail gun, or screws if you don’t own a nail gun
- Stud finder
- Drill
- Saw
First I distressed the boards. I used nails, planers, a hammer, chain, my anger and frustrations – whatever I could to ding up the boards to make them look old and beat up. There’s no rhyme or reason to it, and you can’t mess it up – just whack away at those boards to add the weathered look.
First, I stained the inside that would face the bathroom with Dark Walnut, and I started the other side that we would see everyday with Minwax Weathered Oak stain, but after the first two coats, it was too light for the look I was hoping for, so I just used a custom mix of the weathered oak stain with a little bit of Dark Walnut and it was a perfect mix.
After it dried, I finished each board with the Antiquing Glaze focusing on all the distressed marks to help those stand out.
The Rolling Barn Door kit came with short brackets to hang the door, but I originally planned on hanging the rolling bar directly on my wall, which meant we needed the long brackets to clear the door frame, so I ordered the longer brackets, which are sold separately.
But then, this happened.
See all those tiny holes? See that ginormous space between those holes?
That’s where the studs are – and notice there aren’t any studs over the door.
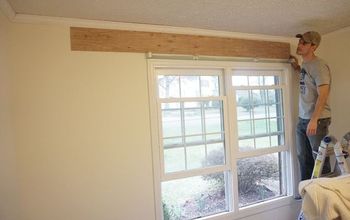
We were concerned that the span between the studs wouldn’t hold the weight of the door. It baffles my mind that there isn’t a stud in the header, and I was so upset that I couldn’t go with my original plan. So, Plan B was quickly concocted and I had to use a board that I was going to use for the closet as a mounting bracket for this door. So I had to go back to the staining table, but opted not to distress this board.
After I stained it to match the door, we attached it to the studs.
Now we felt it was secure enough to hold the weight of the door, so we installed the sliding bar. We removed the door and started assembling the barn door.
The reason why you don’t build the barndoor first is because it needs to be the correct measurement from the sliding bar to the floor. We laid the boards out how we wanted them to look, and then cut the pieces to the correct measurement.
Our door is 33 inches wide and 87 inches tall. Now here’s where another surprise happened. I wanted the boards to be attached with screws, but we realized that the screws we purchased were too long and would poke through the other side. So, my husband had a genius idea to try our pneumatic nail gun.
It worked! And no trip to the hardware store was needed!
No screws, no glue, just pop, pop, pop of the nailgun and it was super secure.
Using the template that came with the barn door kit, we added the roller straps to the door and hung it in place.
It was so simple!
Next we installed the floor hardware – the door stops and guide track. This keeps the door from swinging out.
I have to be honest and say that it hurt my feelings a bit drilling holes into our new Hardwood Floors that we worked so hard on, but it is so necessary to have those in stops and guides in place and once we were finished – I quickly forgot about those tiny screws in my floor!
The last thing we had to install were the door handles. Such a stunning transformation!
I just love my DIY Barn Door and I can’t get over how easy it was converting my old bathroom door into this beauty! And to see the full reveal of our Master Bedroom, click here!
Enjoyed the project?
Resources for this project:
See all materials
Any price and availability information displayed on [relevant Amazon Site(s), as applicable] at the time of purchase will apply to the purchase of this product.
Hometalk may collect a small share of sales from the links on this page.More info

Want more details about this and other DIY projects? Check out my blog post!
Published April 28th, 2017 11:27 AM
Comments
Join the conversation
3 of 62 comments
-
 Linda Lou McCabe
on Nov 28, 2019
I love this idea, was recently looking at barn doors to replace some old closet doors in my hallway and they are pretty expensive, this might be a little more affordable, thanks for the info.
-
 MTzilla
on Apr 01, 2023
Linda, you can use interior doors as the basis for a barn door. They are lighter and you can embellish them with 1x4 or 1x6 mdf boards to give them a custom design. Even strips of cut plywood or pallet boards would work. You can also glue bifolds together and embellish them to use as barn doors. Just remember youll need to add 4"-6" extra width and several inches extra height to cover the opening adequately and reach to the floor from the track.
-
-
-











Frequently asked questions
Have a question about this project?
I went to your site and saw all the lovely things you did to your master! Why didn't you keep the original bed; maybe too colonial? Why didn't you keep the mirror that went with your dresser? It seemed more in scale than the new one. I like how you repurposed the bench and stool and I like the individual closet makeovers; really classy his and hers.
How is it working with the smaller opening?
What measurements did you take to decide what your barn door needed to be?
I am planning on doing this around my wide window, just want to know what measurements I should be going off of. Thanks!