IKEA Malm Dresser Hack: How to Customize Your Furniture

This is the ultimate IKEA Malm dresser hack. I started with this regular IKEA Malm dresser and customized it to my own design. It was easy! Here’s what I did:
Table of contents
Tools and materials
- IKEA Malm chest
- Sandpaper (various grits)
- Measuring tape
- Saw (circular or hand saw)
- 3/4 inch scrap wood
- Wood glue
- Nails and hammer or nail gun
- Plywood
- Edge banding
- Clamps
- Screwdriver
- Small furniture feet
- Primer
- Paint (rich brown burgundy)
- Paintbrush or roller
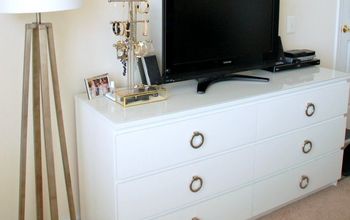
Before
1. Sand the chest
Use sandpaper to sand off the finish of the IKEA Malm chest. Start with a coarse grit and move to a finer grit for a smooth finish.
2. Modify the height
Measure and mark a couple of inches from the bottom of the chest. Use a saw to carefully cut off the marked section to reduce the height of the chest.
3. Prepare the wood trim
Rip down 3/4 inch scrap wood to the desired width for the trim pieces. Measure to ensure they fit the sides and front of the chest. Cut the wood pieces to the appropriate lengths for each side and the front.
4. Attach the wood trim
Apply wood glue to the back of each trim piece. Position the trim on the chest and secure it with nails. Use a hammer or a nail gun for this step. Use clamps to hold the trim pieces in place while the glue dries for a stronger bond.
5. Add the plywood base
Measure the bottom of the chest and cut a piece of plywood to fit. Apply edge banding to the edges of the plywood for a finished look. Secure the plywood base to the chest with screws.
6. Attach the feet
Decide on the placement of the small furniture feet. Use a screwdriver to attach the feet to the bottom of the chest.
7. Prime and paint
Apply a coat of primer to the entire chest, including the new trim and feet. Allow it to dry completely. Paint the chest with your chosen rich brown burgundy color. Use a paintbrush or roller for an even finish. You may need multiple coats for full coverage. Let the paint dry thoroughly between coats.
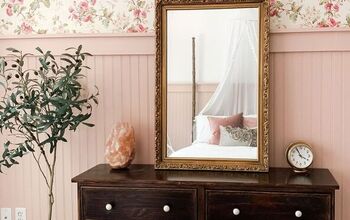
IKEA Malm dresser hack
Now this looks just like the $1,000 designer dresser I wanted, and I can't get over this color. What do you think of these changes? Do you have IKEA Malm dresser hacks to share? Leave a comment below to let us know!
Follow @jennasuedesign on Instagram for more DIY ideas.








Frequently asked questions
Have a question about this project?