


Get A Bleached Effect On Your Furniture Without Taking Out The Bleach

The bleached look is soooo in right now! And yes, you can actually bleach your furniture! But, bleach stinks, and it takes days, literally days, to do. So, what should you do when you want a bleached looked on your dresser, and you want it done within the day??
Read on to find out 😁
*You'll want a deep wood grain piece, such as oak, for this technique
Price is based off the amount of product used
Time estimate does not include dry time

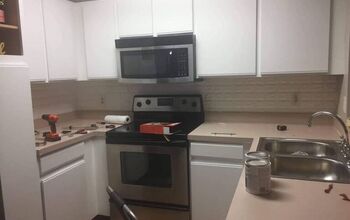
Before
This cute little dresser had so many issues! Pictures don't show all of the flaws 🤷🏻♀️ I'm the first person to save some beautiful wood, but sometimes, it just isn't feasible. So trust me, this piece needed to be painted 😁
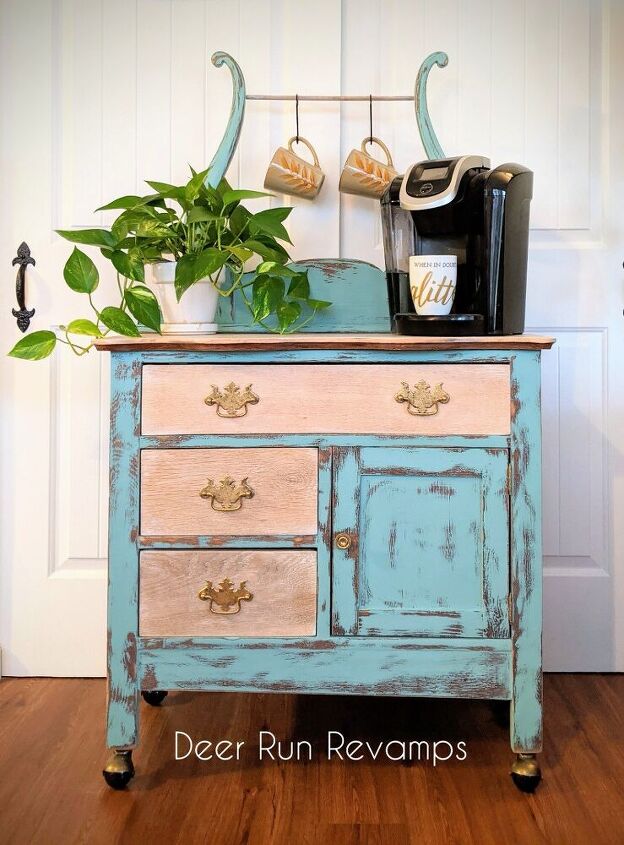
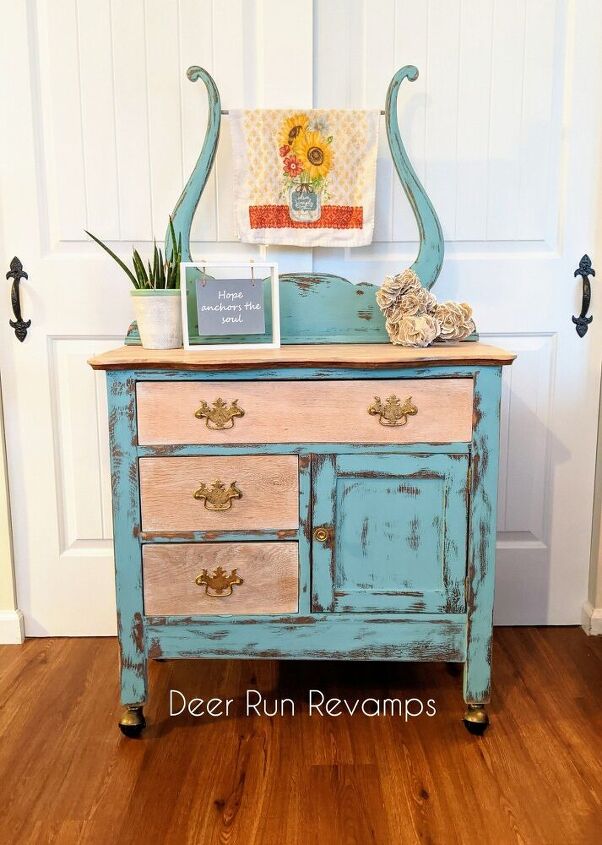
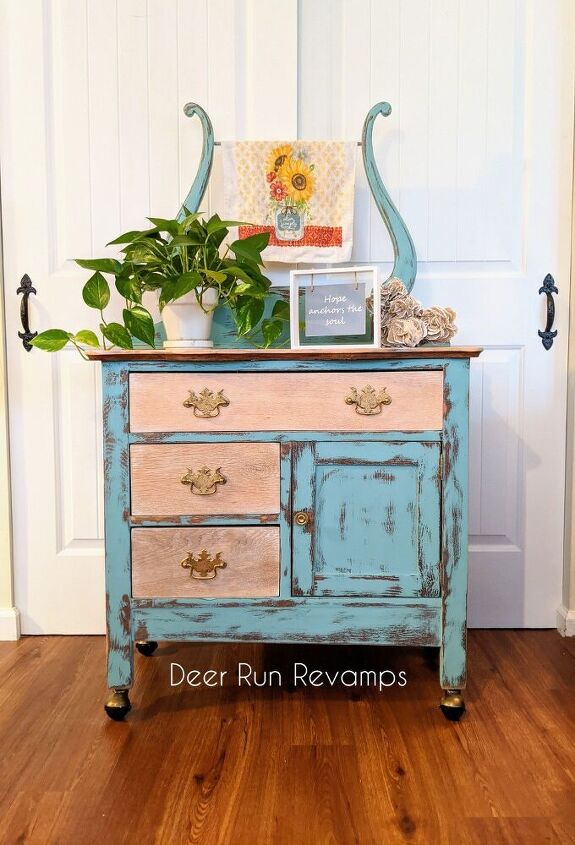
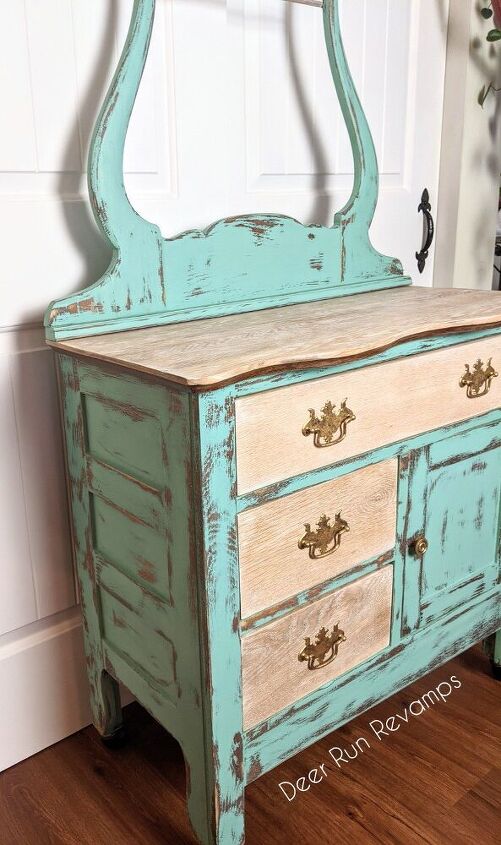
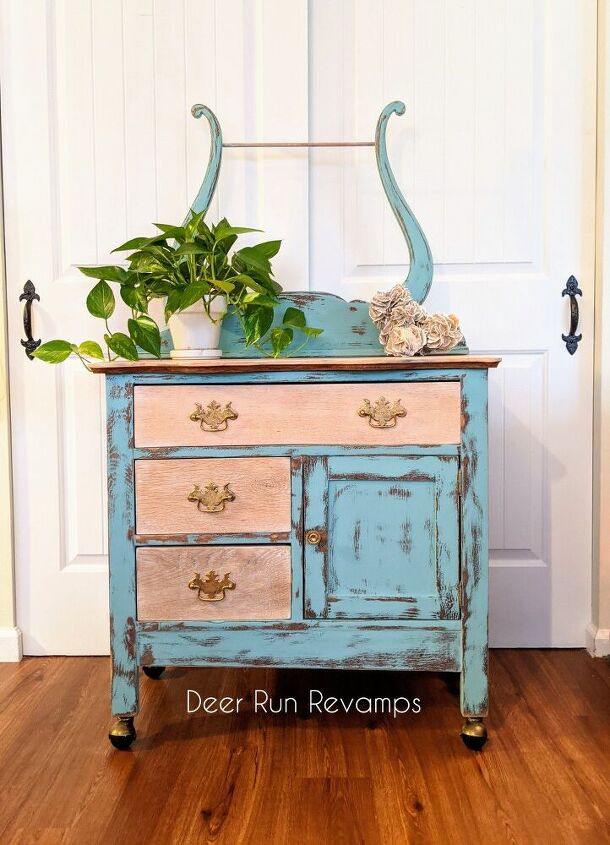
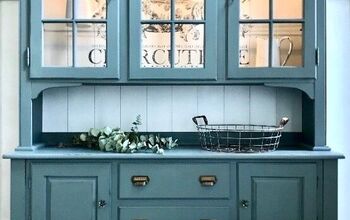
After
I turned her into a rustic coastal beauty 😍
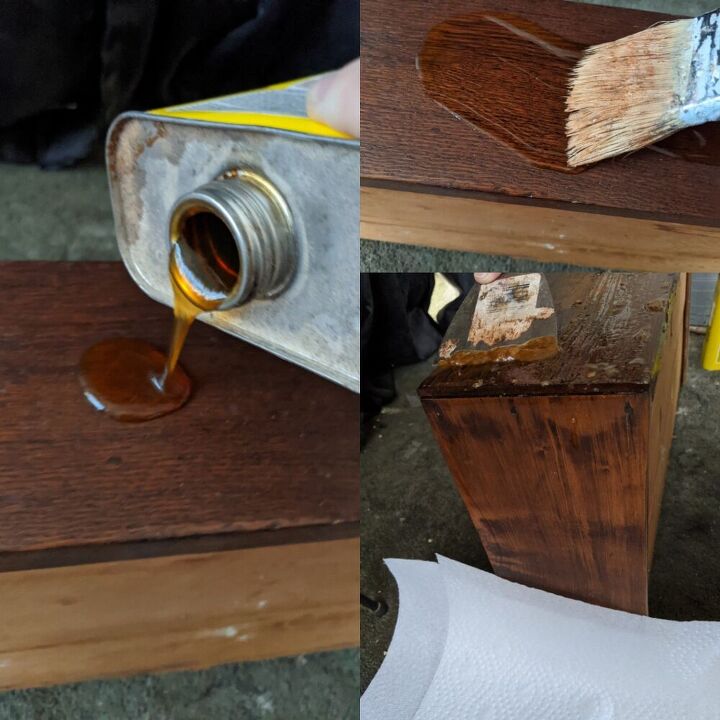
Strip (the furniture 😉😆)
First step is to strip whatever sections you're "bleaching"
I prefer either Jasco brand or the 2 minute stripper off of Amazon, but, I was out of both, so I used Goof Off brand. It wasn't bad, but not my favorite 🤷🏻♀️ Wear heavy-duty gloves, eye protection and a mask, then apply the stripper, preferably outdoors, according to the directions on the can...wait and then scrape 😁 Easy Peasy!
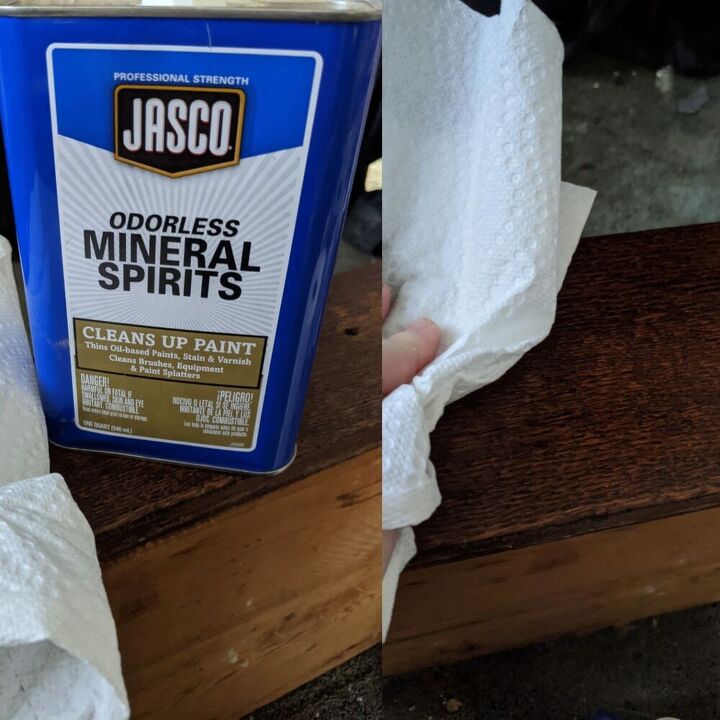
Clean up Residue
Once you've scraped off all of the gunk, use mineral spirits to scrub off any leftover residue.
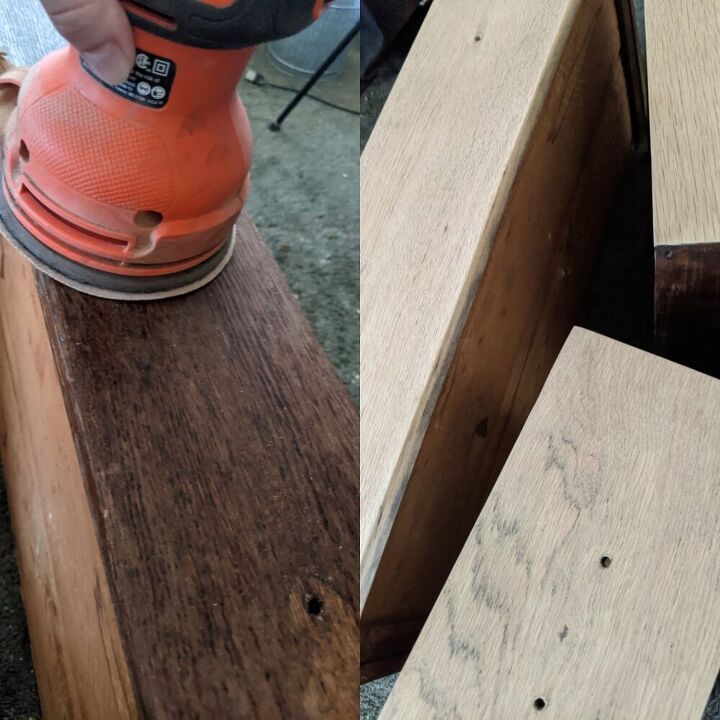
The Fun Part (Not) Sanding
Now, you must check to see if your piece is solid wood or veneer before continuing on with this step. If it is solid wood, you're good, continue on...if it's veneer, you'll need to be extra careful, it is extremely easy to sand through the veneer. If this happens, you'll either have a patch with no wood grain that will stand out like nobody's business, or you'll have to hand paint the wood grain in and try to match the stain color, major pain! You can sometimes catch it before it happens, but watch closely! You'll start to see the wood grain get kind of fuzzy, that means stop sanding in that area! You're close! It's most likely to happen around the edges first. So keep that in mind. And do not sand in one area for too long.
You can tell if a piece is veneer by looking at the edges. You'll see a line where the thin wood veneer has been glued on top of the base. If it's a solid piece, there will be no layers and the grain on the edges will match the grain on the top.
Sanding is my own personal enemy 😆
I just don't like it since it requires patience. You must allow the sander to do the work, do not apply a lot of pressure. Even tho it'll get the job done quicker, fight the urge! It'll leave swirl marks behind if you do.
Starting with 120 grit sandpaper, sand off the stain. We want to get down to bare wood.
Move up to 150 grit to remove any remaining stain and begin to smooth it out
Now 180 grit to completely smooth it all out
Now 220 grit
Finally we can finish off with 320 to really make this wood feel oh so soft!
Sandinf by hand, you can also quickly go over the edges and corners to round it off ever so slightly. Usually when sanding down to bare wood, corners and edges get sharp. I like to dull them a tad
*Future project tip
If you're staining, always stop at 220 grit! Going above closes the wood grain and will cause the stain to soak in unevenly 😁
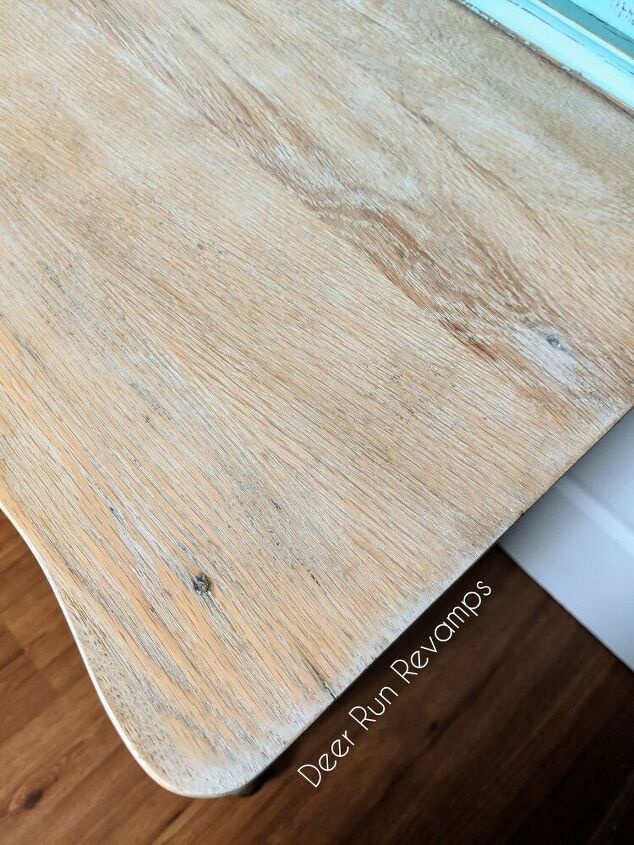
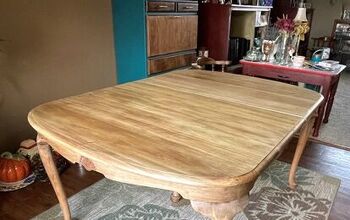
Bleach Effect
Time to move onto my bleaching method
There are many ways to do this. You can use actual household bleach and allow it to sit in the wood for hours/days. You can whitewash. You can dry brush. Or, you can do what I do, a mixture of white washing, dry brushing and painting 😁
My first step here is to water down my furniture paint. I'm using "Dazzle Me" from Frenchic's Al Fresco range. It has the built in topcoat and is so durable, it can even be used outdoors!
I do 40/60 water/paint for this project.
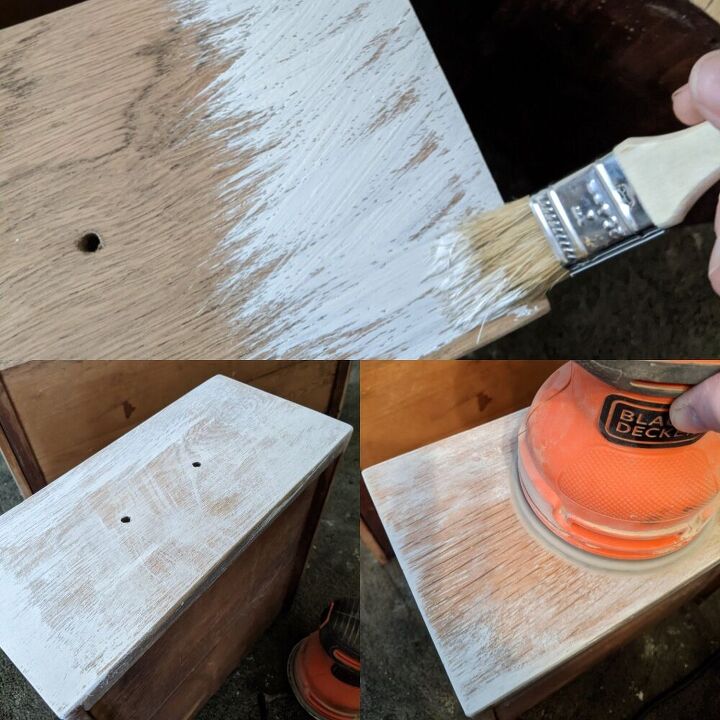
Grab a chip brush, and paint in the watered down paint. I apply it heavily around the edges, and dry brush as I get towards the middle.
Once it's dry, sand it off.
I did this process twice
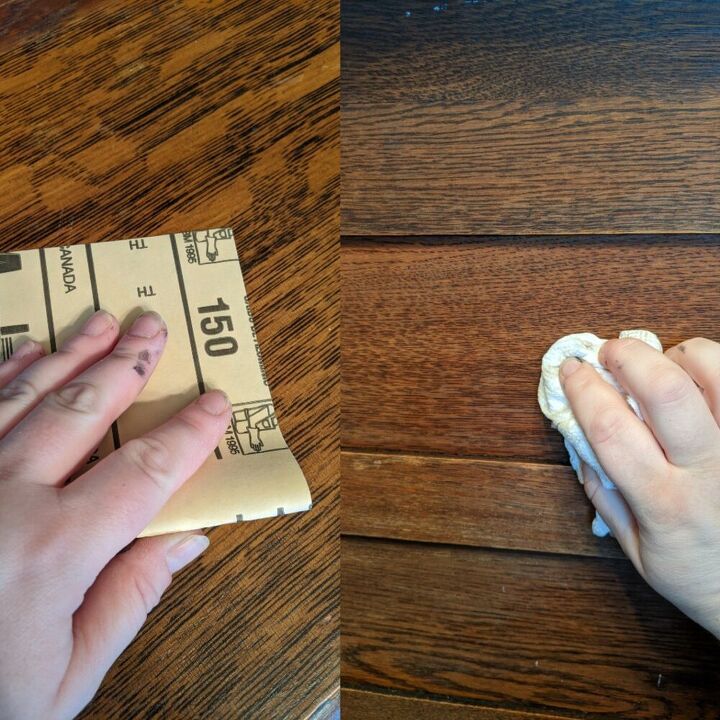
For the third coat, I did a thin white wash layer. I misted the wood with water, quickly applied a thin layer of the watered down paint, then took a damp rag and wipe the paint away. This really soaked it into the grain.
Once it was dry, I hand sanded with 320 grit sandpaper to smooth it out
Prep For Paint
Before painting, prep is a must. No matter which furniture paint you use. Even if they claim no prep needed.
Clean your piece well. I use Sugar Soap from Frenchic. It's a non toxic cleaner that gets rid of dirt, grime, mold, even nicotine stains!
Then do a quick scuff sand using 220 grit sandpaper. This is a crucial step! It "keys" the surface, giving the paint something to really grip onto, ensuring a perfect finish that will last generations ♥️
Finally, wipe down with plain water
Paint
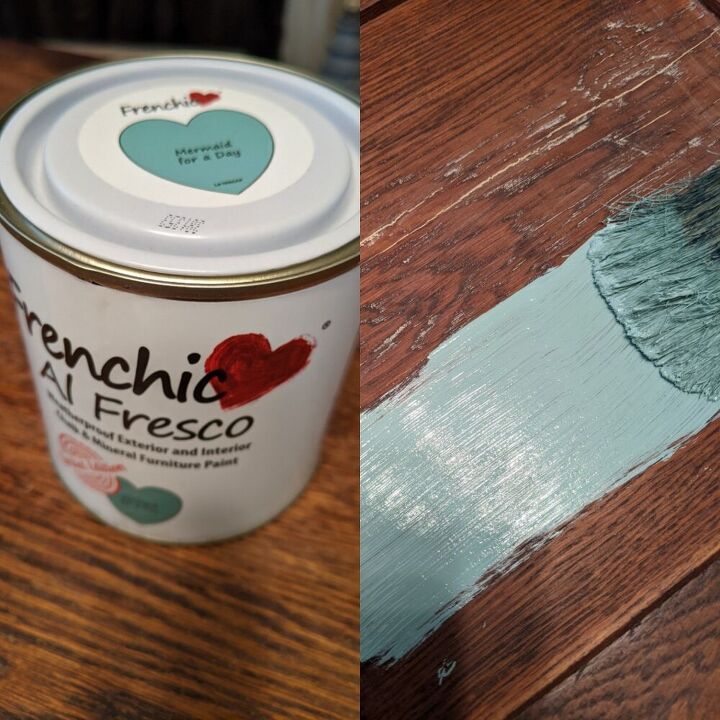
I used "Mermaid For A Day", again from Frenchic's Al Fresco Range. This is a limited edition color, so it won't be around forever 😢
This color darkens a bit as it dries
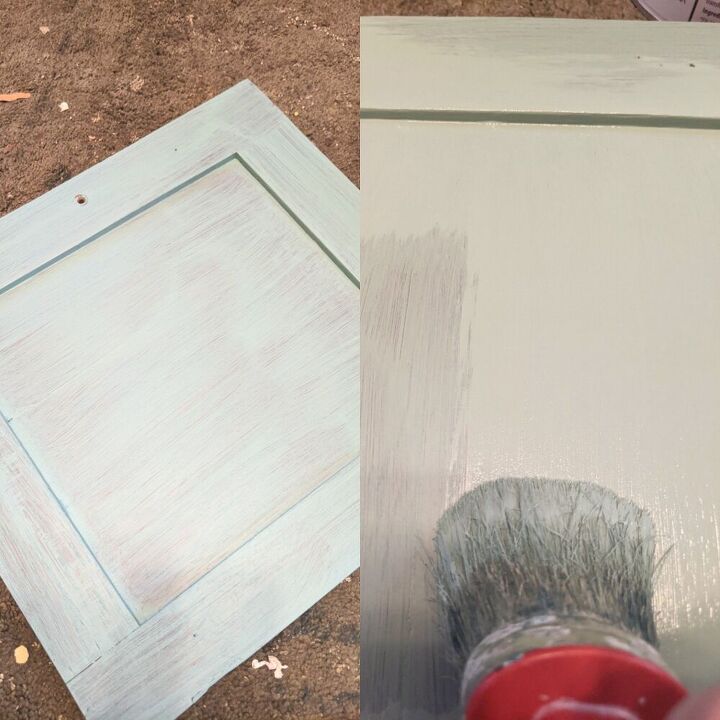
Frenchic paints also have AMAZING coverage! Most colors only require 2 coats. And no primer is ever needed! Even white over Mahogany..I've done it!
You can see the one coat coverage on the left, then applying the 2nd coat (right) completely covers any missed spots 😁
I like to mist the piece and my brush as I paint. This helps reduce brushmarks and leaves a perfect "airbrushed" look behind.
Also make sure that you use a high quality brush! It really does make a difference
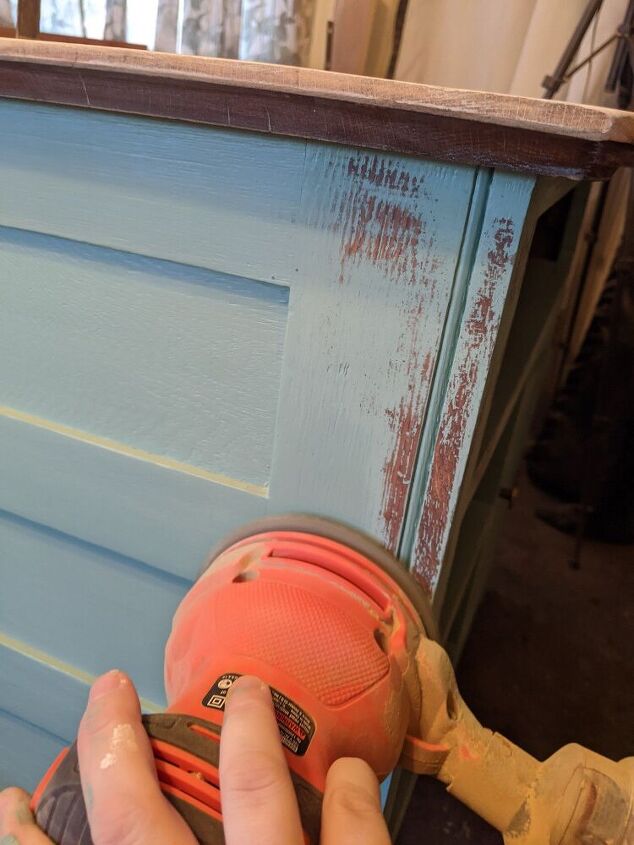
Sand Again
Once the paint has dried to the touch, it's time to distress 😁
Al Fresco range paints, being super durable, can be difficult to distress. The longer it cures, the harder it'll be to sand 😉
I adore chippy, distressed pieces when it's done correctly.
You really want to focus on edges, corners, raised details, areas that typically would get work naturally.
For my piece, I wanted to give the chippy effect as well, like the piece had been sitting outside a beach front home and the salty air and mist has beautified it over many years ♥️
So, I sanded all over, like the paint has chipped
To get into tight corners, use 180 grit sandpaper and sand it by hand, then smooth it out with 220 grit
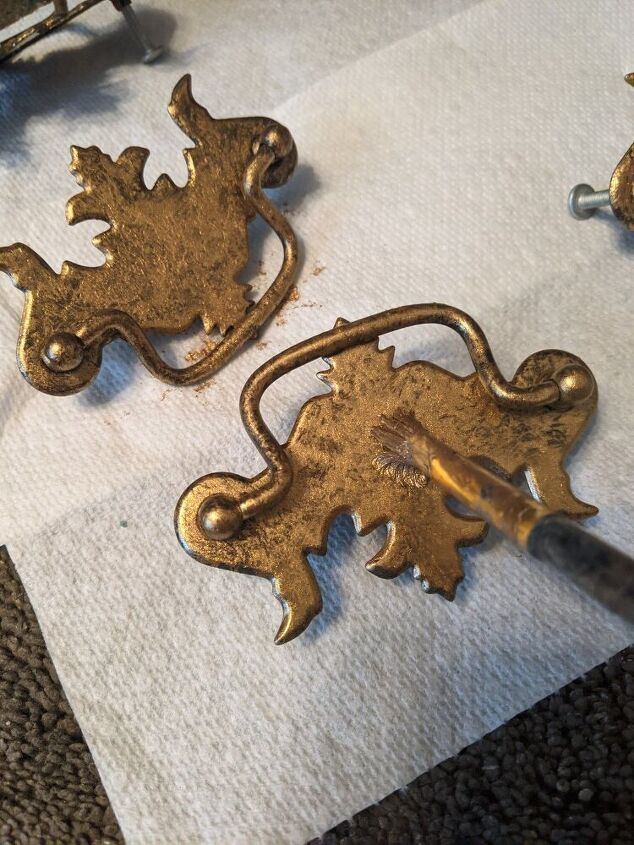
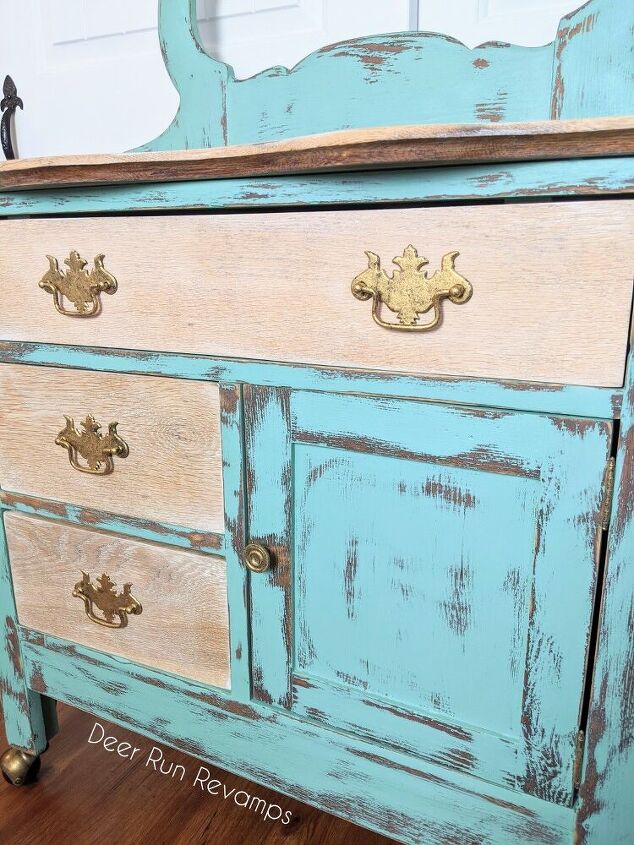
Hardware
My go to for hardware is Frenchic's Frensheen.
It's a highly pigmented metallic powder that you can mix with wax, paint, or, like I've done here, any waterbased topcoat to create a glaze. I like my glaze to be a bit thicker than normal so that I can easily create some texture.
A little bit goes a long way. Using a small 2 ounce container, add a tablespoon of Gorgeous Gold Frensheen, then start with a tablespoon of your favorite waterbased sealer (I use Frenchic's Finishing Coat) and mix well. If it's too thin, add a pinch more Frensheen, too thick, had a drop more sealer.
You can also mix the different colors of Frensheen to create your own custom color. I like to add a pinch of silver to my gold, this creates a champagne color 😍
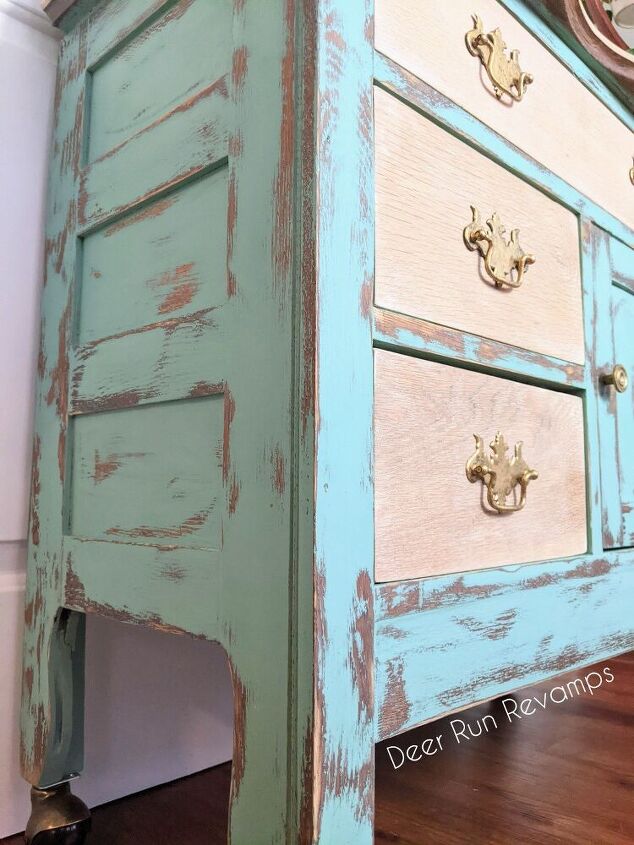
Dip a fluffy detail brush into the gold glaze and dab it onto the hardware, almost like you're stenciling. This causes texture and an aged effect. I purposely didn't cover the entire pull. I let some of the darker brass shine through to add to the aged look
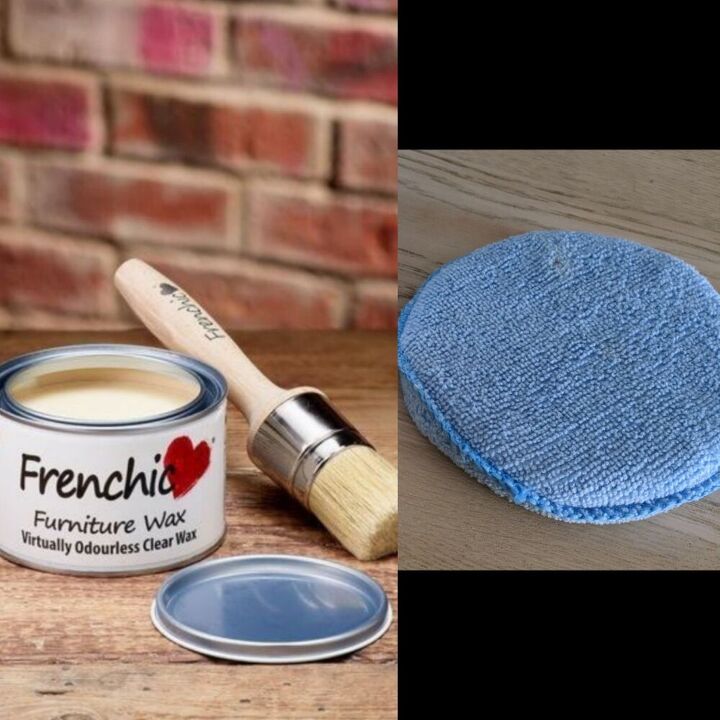
Wax
This step is not necessary if using Frenchic's Lazy or Al Fresco Range paints since they have the built in sealer. But, I wanted the color to be just a touch darker, and sealer does just that 😁
So, I waxed the turquoise painted parts of my rustic coastal beauty 😍 I did not wax the "bleached" areas
I LOVE these car wax sponges from Amazon. They are perfect for wax or any liquid sealer.
Frenchic wax is the creamiest wax you will ever come across. It so easy to use, and literally goes on like room temperature butter spreading over a piece of warm bread that just came out of the toaster 😉
The best part, it doesn't have to be buffed! It leaves the perfect slight sheen without buffing, but, if you want shine, buff away 😁
Again, a little bit goes a long way, so apply just a dollop of wax to your sponge, then in circular motions, apply the wax to the piece. Your last swipe should be all one direction to even out the wax
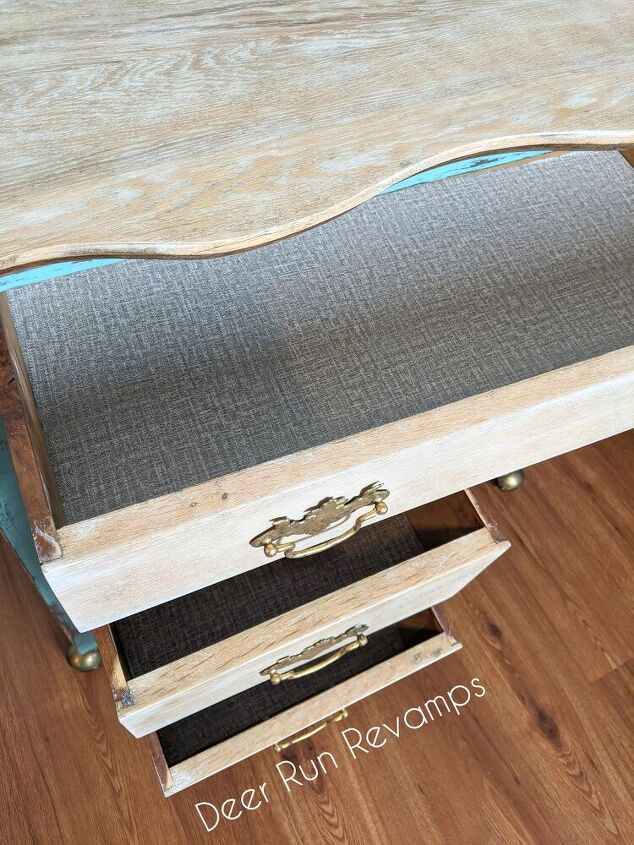
It's all in the details! You can add contact paper to the drawers for a finishing touch! Or even do a fun design on the drawer sides for a peek-a-boo effect 😍
Now sit back and enjoy all of your hard work ♥️♥️
This coastal cutie is available!
We are located in NJ but do ship nationwide 😁🥰😁
You can find this piece, all of the Frenchic products, and soooo much more in our Etsy shop
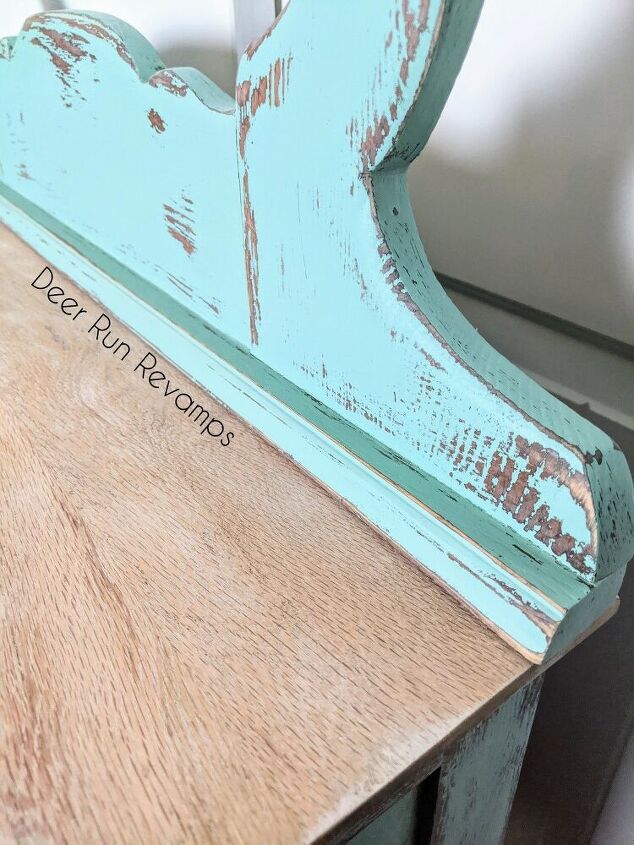
I love how there's a bit more paint in the edges 🥰
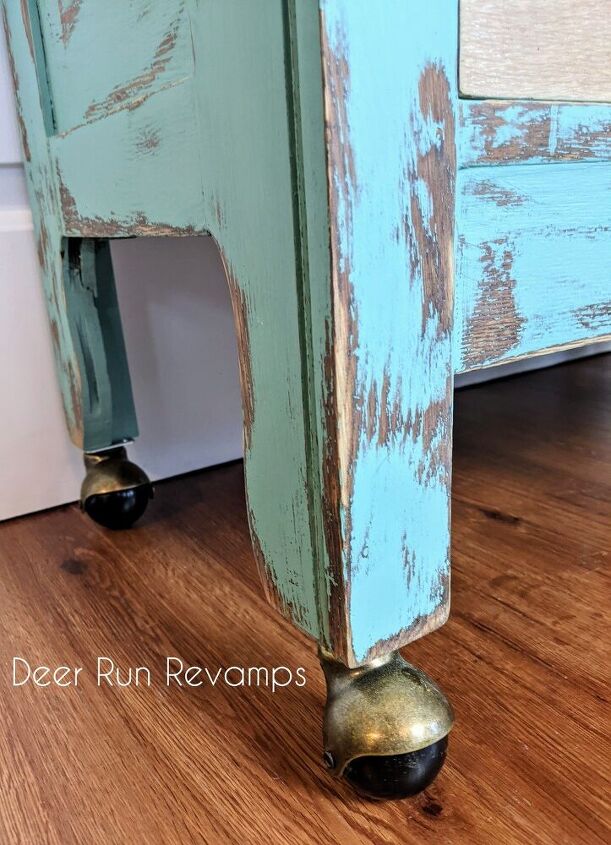
We also added these super cool casters from Amazon to raise the piece up an inch or so
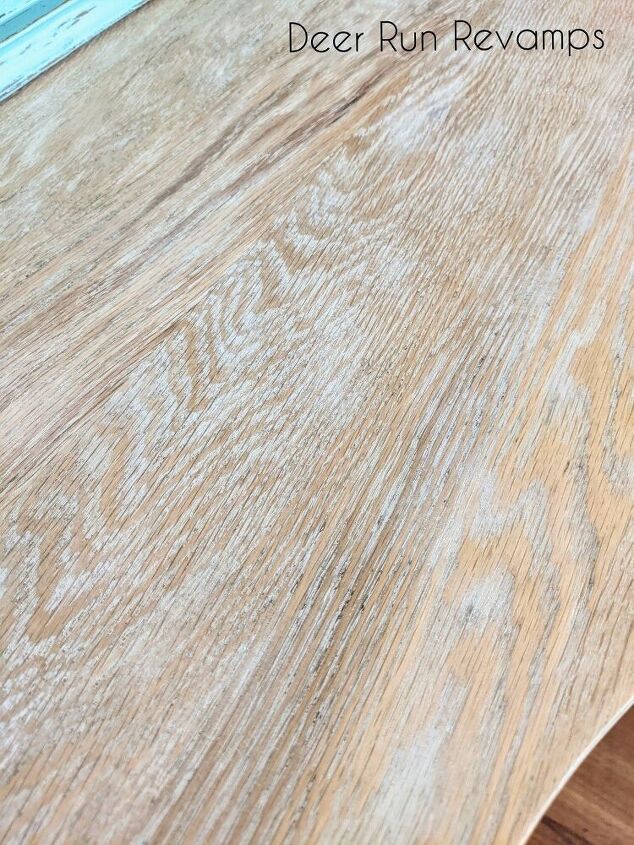
In this close up, you can really see how the paint soaks into the wood grain
You can find even more unique furniture pieces and inspiration on our Facebook page
We truly hope this tutorial has inspired you to create something beautiful ♥️
Resources for this project:
See all materials


Comments
Join the conversation
-
The amount of stripping/sanding. Has me wondering how that valuable antique was beyond saving? The value had been depreciated. I'm wondering what was needed to cover up with paint?
-
Your explanation was well worded & a nice reply to yet another complaint from someone that has not realized that anything that is done to a piece of furniture to help it find a second chance of purpose & be enjoyed is worthwhile & doesn't need to be justified! I love furniture & especially wood furniture! I have to admit that I have never painted a piece of furniture that I hadn't already purchased painted! Some pieces are actually even more attractive when painted especially how well it is executed! I have stripped an antique hat chest years ago that I had purchase at a garage sale & I & my father just knew there would be some lovely oak underneath! The paint job was nothing fancy & it had several coats of different colors through its life that it was being appreciated & taken care of! I still own that lovely piece of furniture & I would never paint it! This piece that DEER RUN REVAMP has featured here was lovely enough to catch my eye! And I have seen other pieces that they have brought back to life! So haters please look somewhere else to find fault! This piece now wearing an amazing new outfit of MERMAID FOR A DAY is gorgeous! It now is ready for its next chapter! Kudos to the beautiful transformation that shows off its great bones & I like the idea that it got its own 2 pairs of "roller skates" !! LOL! Thanks for sharing your how to achieve a similar effect!! 🥰👍️👏😍


Frequently asked questions
Have a question about this project?
I love this look, I have an Antique dresser that I want to paint but I’m unable to remove the hardware. What are your suggestions for painting the hardware?